Blind Bearing Puller: How It Works & Top Picks
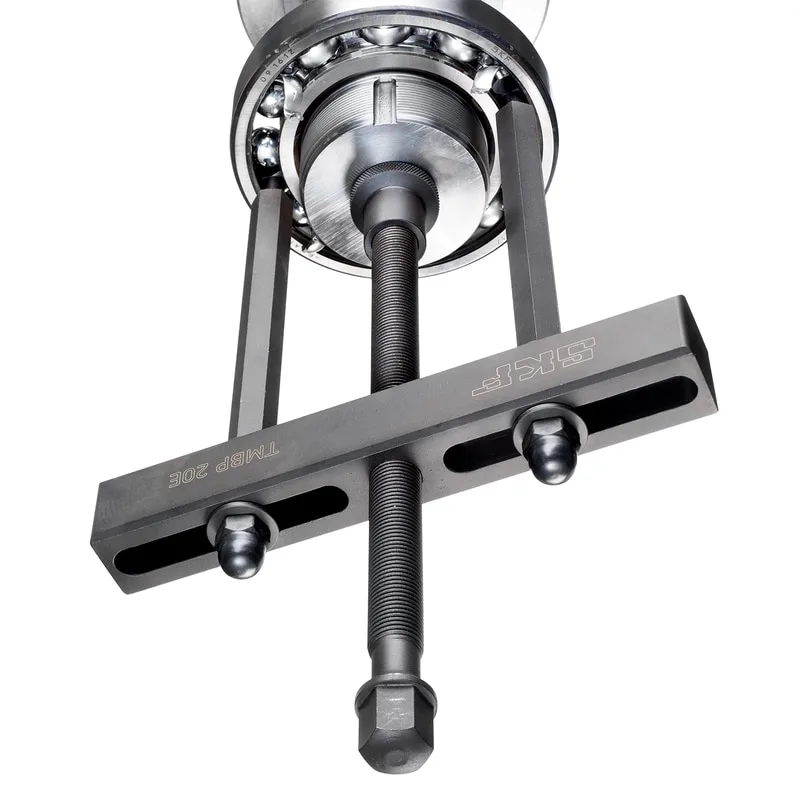
If you’re stuck with a bearing pressed on a shaft and no access from the back, a blind bearing puller is the tool that fixes it. It lets you pull the bearing straight off from the side that’s visible, without tearing the assembly apart. That matters when the job is tight, crowded, or expensive to disassemble.
As of 2026, this is still the standard fix for one-sided bearing removal in motors, pumps, conveyors, and similar equipment. The right setup usually starts with shaft size, bearing outer diameter, and whether you have room to reach under the outer race. Manufacturer specs typically call for a working load limit, and those ratings set the ceiling for how much force the tool can safely deliver.
That’s where the decision starts.
Quick Answer
A blind bearing puller removes a bearing from one side when the back of the shaft is blocked. You clamp it around the exposed shaft side and pull straight outward. It’s best when the bearing outer ring is accessible.
Use the right jaws and collar for the bearing size.
What a Blind Bearing Puller Is (And Why It Matters)
A blind bearing puller is a mechanical tool used when you can only access a bearing from one side of the shaft. It grips the outer ring, centers the pull on the shaft axis, and draws the bearing off without needing a second-sided press or rear access.
That’s why it’s common in maintenance shops and field work. If the housing is crowded, the shaft is buried, or the component is too costly to disassemble, this is often the fastest way out. In our research, that’s the pattern that keeps coming up.
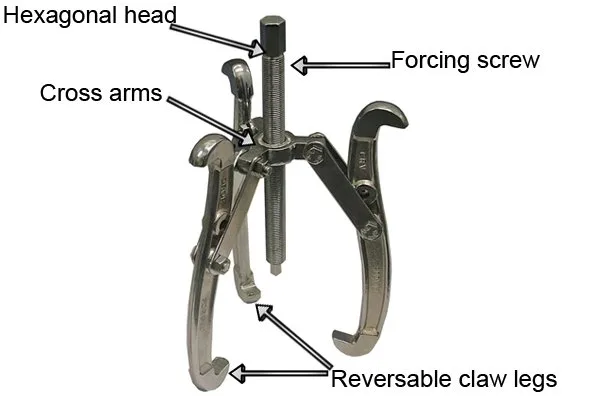
A good puller needs three parts working together: a body, a center jack screw, and jaws that can reach behind the bearing’s outer ring. The body stays on the shaft shoulder. The jaws bite the outer race.
The screw pulls the bearing away in a straight line.
This matters because forcing from the wrong place damages parts. If the load lands on the inner ring, you risk scoring the shaft or distorting the bearing. A blind puller is designed to avoid that when it’s set up correctly.
What it looks like
- A main body that mounts around the shaft shoulder
- Two or three jaws that hook under the bearing OD
- A center jack screw that creates the pulling force
- Optional gearing or a hydraulic jack for heavier loads
Choosing the Right Puller: Decision Variables
The answer changes based on four variables: bearing outer diameter, shaft diameter, access angle, and load size. Get those right and the job is straightforward. Get one wrong and the pull becomes messy fast.
Start with the bearing OD. The jaws have to reach under it, and they have to clear the shoulder without scraping the housing. If the bearing is small, a two-arm model can work.
If the OD is larger, three arms usually deliver more even force. This is one of the most common sizing questions, so if you’re not sure how to measure, this guide will help: the right measurement order.
What to check first
- Bearing outer diameter
- Shaft diameter
- Shoulder height and clearances
- Whether the outer race is fully exposed
- Whether you need straight-line pull or angled access
If you have a tight shoulder and a small clearance gap, a lower-profile body helps. If the bearing is frozen on the shaft, the jaws must still grip the outer ring without slipping. For that reason, jaw depth is just as important as reach.
That’s a big part of reach versus spread selection.
Decision shortcuts
- Small OD and tight space: compact two-arm or three-arm blind puller
- Larger OD or heavy interference fit: gear-type or hydraulic puller
- One-sided access only: blind puller
- Accessible from both sides: through puller or press may be simpler
If the bearing is sealed, rusted, or heavily corroded, don’t underestimate the force needed. Manufacturer specs show the maximum load, but in real work, the limit is often a frozen fit, not the tool rating itself.
Blind Puller vs. Through Puller vs. Other Methods
If you can get behind the bearing, a through puller is often the easiest tool to use. If you can’t, a blind puller is the right call. That’s the core split.
A through puller pulls from the opposite side of the shaft. It’s simpler when the component is open-ended. A blind puller works from the visible side only.
That makes it better for packed equipment, motors, pumps, and shafts with limited rear access. For a quick way to choose between approaches, see the external versus internal puller logic.
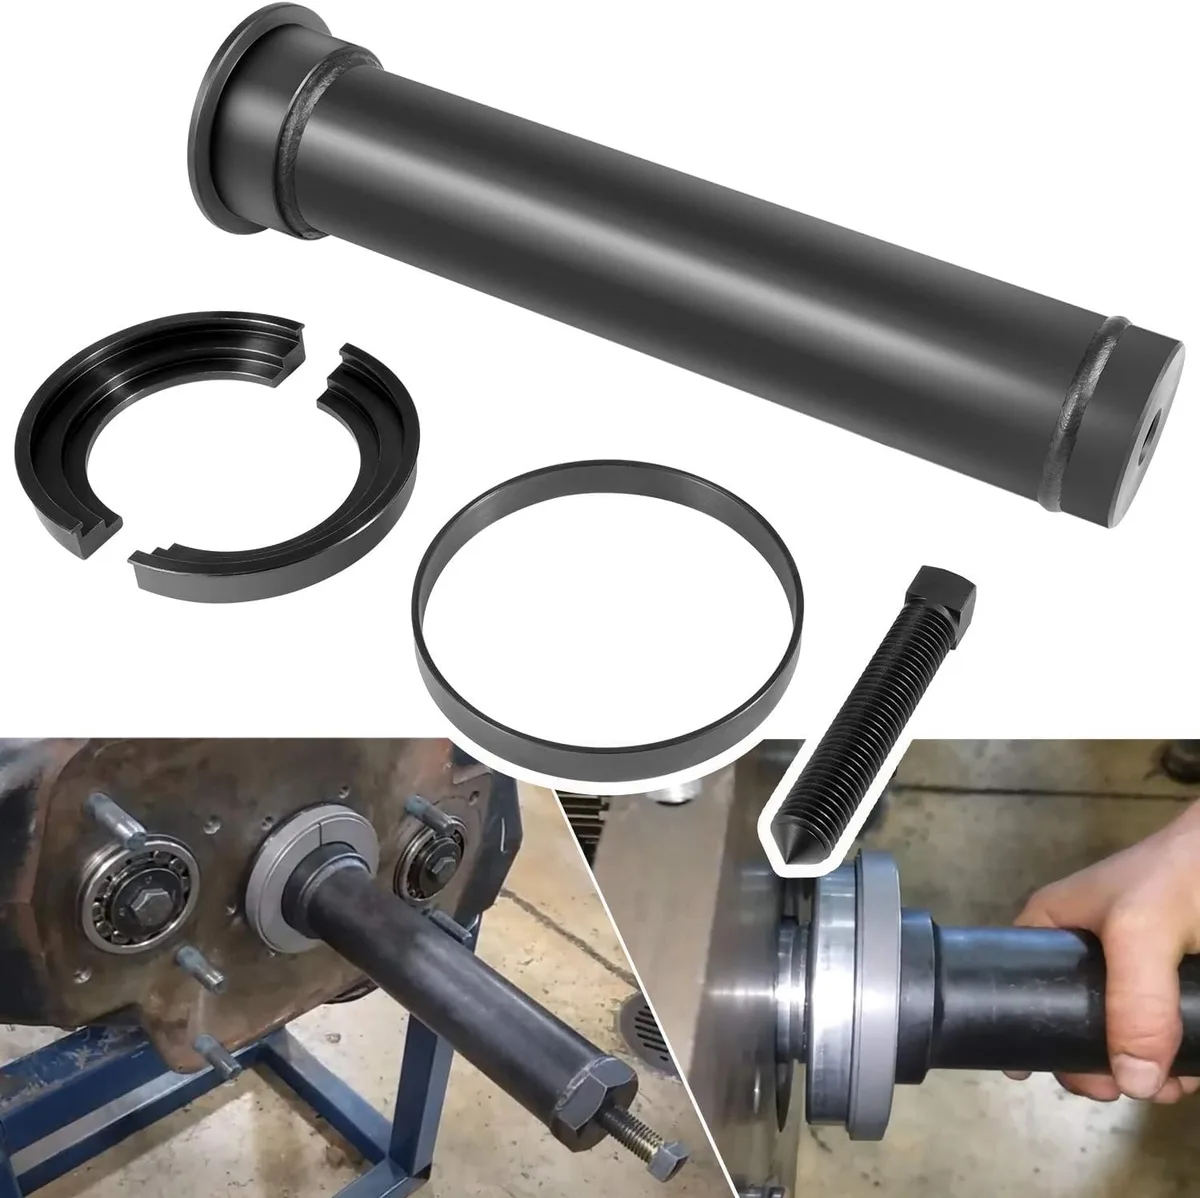
When to use a blind puller
- The backside is blocked
- The housing has to stay assembled
- You want the least disassembly possible
- You need a quick extraction in the field
When not to use it
- The bearing is only pressed on the inner ring and you can safely pull from behind
- You have no room to seat the jaws under the outer ring
- The part is small and fragile enough that a controlled press is safer
Other removal methods
- Drift pins: risky, easy to damage the race
- Hammering: noisy, imprecise, high impact damage risk
- Induction heating: useful for stuck bearings, but requires heat access and control
- Puller plus heat: common when the fit is very tight
If the bearing is badly seized, heat can help. But you still need a tool to pull it out cleanly once it loosens. A puller and a heat gun or induction heater are often paired in real repair work.
How to Install and Use a Blind Bearing Puller
The whole job comes down to alignment. You want the jaws under the outer ring, the collar centered on the shaft shoulder, and the screw pulling in a straight line. If those three are right, the bearing usually comes off cleanly.
First, clamp the shaft or secure the workpiece. A loose part will move under load and the pull can go sideways. Then fit the shaft collar against the shoulder.
The collar has to be tight enough that the pull doesn’t twist or slip.
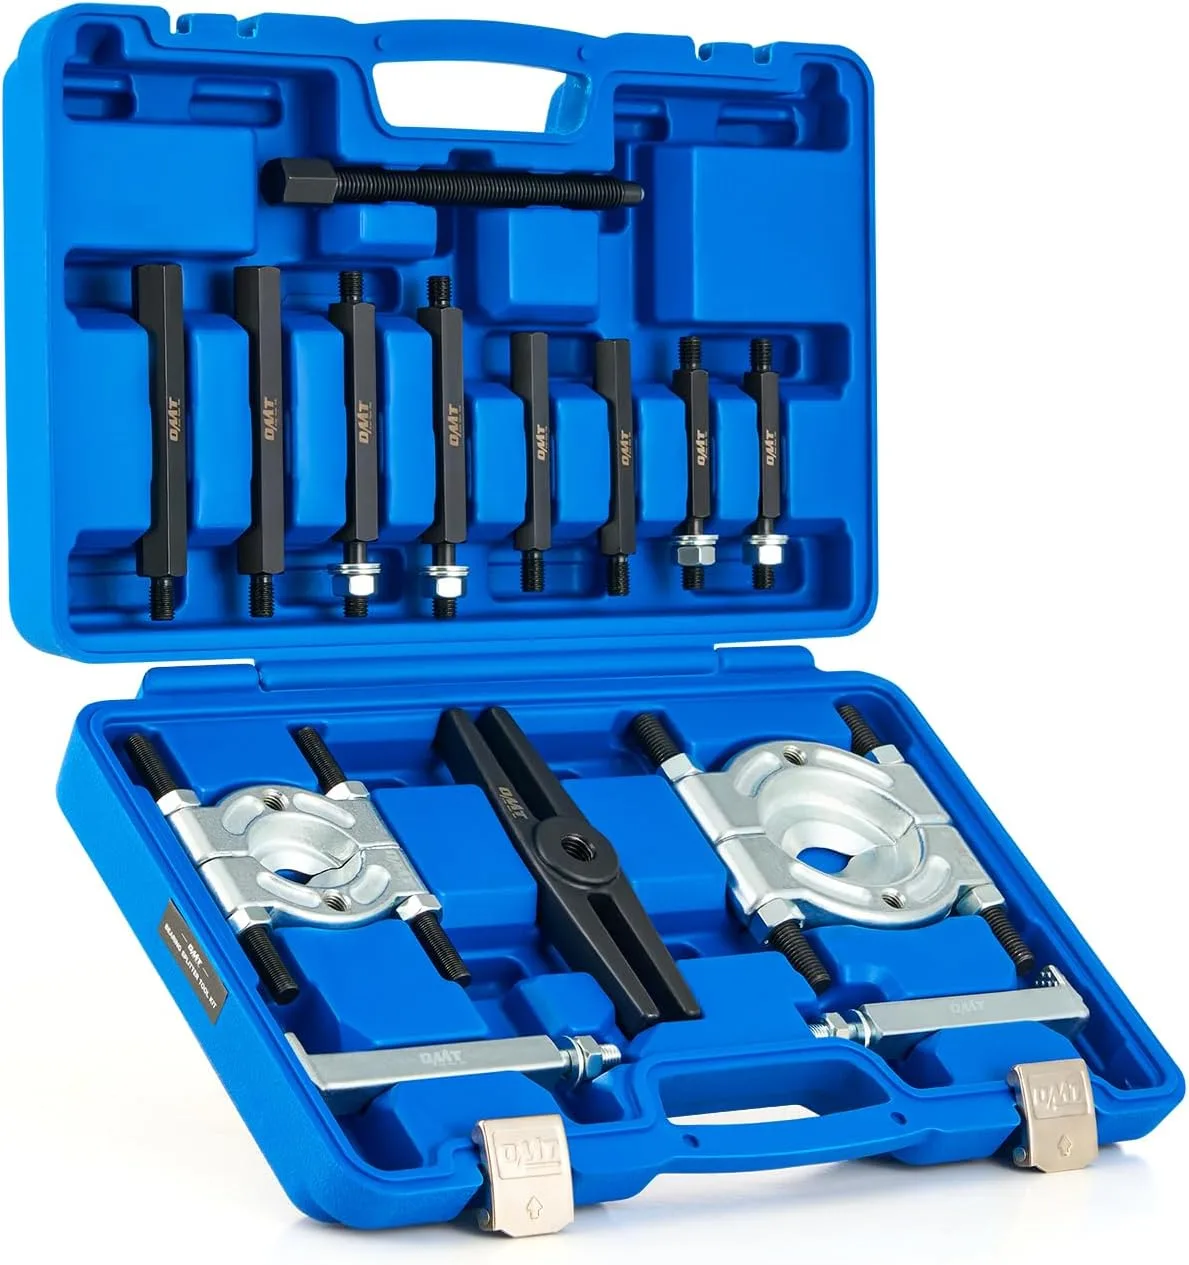
Next, seat the jaws behind the outer ring. Make sure they’re under the full OD and not rubbing the bearing race edge. Then back the center screw in until the jaws contact the bearing evenly.
When you turn it, the jaws should close together and grab the outer ring at once.
Step-by-step
- Confirm the outer ring is accessible.
- Fit the collar to the shaft shoulder.
- Seat the jaws under the bearing OD.
- Center the puller body.
- Start the jack screw slowly.
- Watch for even contact and straight-line pull.
- Remove the bearing before the body or jaws loosen.
- Inspect the shaft and bearing seat after removal.
If the pull binds, stop. A bind usually means the jaws aren’t centered, the collar is loose, or you’re trying to pull from the wrong ring. In practice, that’s where most failed pulls happen.
If the bearing is still stuck after a clean pull, it’s usually the fit that’s the problem, not the tool. Check the shoulder for burrs, corrosion, or a seized collar. That’s the time to switch to a different method or add heat.
Common Mistakes That Damage the Shaft or Bearing
The most common mistake is pulling from the wrong race. If the bearing is pressed onto the inner ring, but you’re using a blind puller on the outer ring, you can destroy the bearing, score the shaft, or make the job worse.
That’s why you have to confirm the fit first. If the inner ring is what’s stuck to the shaft, an internal puller or a different setup may be needed. If the outer ring is what’s stuck in the housing, a blind puller may not even be the right tool.
This is why the sizing and fit check matters so much: see a full bearing puller size chart before you start.
Mistakes to avoid
- Using a too-small puller for the bearing OD
- Letting the jaws slip off the race
- Starting the screw with uneven contact
- Forcing a loose collar under load
- Twisting the body during the pull
- Using the tool as a pry bar
- Ignoring rusted or corroded shoulder surfaces
- Pulling without clamping the workpiece
If you can’t see clear access to the outer ring, don’t guess. Measure first, then choose. A wrong pull can ruin the shaft surface and create a much bigger repair than the original bearing removal.
For a quick reference on what kind of puller fits most shaft jobs, a generic buyer’s guide can be helpful: choosing the right tool.
Buying Guide: Specs, Pricing, and What to Look For
Pricing varies based on mechanism and material. Entry-level two-arm blind pullers typically range from $20 to $50. Gear-driven and three-arm models usually cost between $50 and $150.
Heavy-duty or hydraulic systems can exceed $300. These price bands reflect durable steel construction and reliable gearing as of 2026.
The material matters for longevity. Look for chrome vanadium steel on the body and jaws. Softer carbon steel bends under load.
Forged steel handles impact better. Check the jaw thickness. Thin jaws creep or crack under heavy interference fits.
Thicker jaws grip firmer but have less reach. Balance depth and strength based on your typical bearing size.
Spec checklist
- Rated load limit: Match to expected friction
- Jaw count: Two for small, three for large
- Gearing: High ratio reduces hand torque
- Collar fit: Must snap tightly onto the shaft
- Finish: Zinc or phosphate prevents rust
If you buy cheap, you risk stripping gears. If you buy industrial, you pay for capacity. Most shops find the middle ground works best.
See our guide on puller types to match the build style to your job site.
Safety Checks and Long-Term Tool Care
Safety starts with personal protection. Wear safety glasses. Jaws can snap back if they slip.
Wear gloves to protect against sharp edges. Clamp the workpiece. Never rely on hand pressure to hold the shaft steady.
A shifting shaft creates a lateral force that damages the tool and the part.
For powered equipment in shops or plants, follow proper lockout/tagout procedures from OSHA’s industrial safety guidance. Removing energy sources before bearing work prevents injuries during extraction.
Inspect the tool before every use. Look for cracked jaws, stripped gears, or a bent center screw. Damaged parts fail suddenly.
Store the puller dry. Moisture corrodes the gears. A stuck screw is useless when you need it fast.
Clean grease off the body. Grease traps dirt, which then grinds the metal.
Maintenance routine
- Lubricate gear teeth with light oil
- Tighten any loose mounting bolts
- Replace worn jaws immediately
- Keep the center screw free of debris
Proper care extends the tool’s life. A well-maintained puller lasts for years. A neglected one breaks at the worst time.
For more on keeping your workshop tools in top shape, check out our specialty tools guide.
Please enter product(-s) ASIN(-s)!Frequently Asked Questions
What is the main difference between a blind and a through puller?
A blind puller works from one side only. It is used when the back of the shaft is blocked. A through puller works from both sides.
It is simpler when you have full access. Use the blind style for packed assemblies and one-sided jobs.
Can a blind puller remove a bearing from the inner ring?
No, not effectively. Blind pullers grip the outer ring. If the inner ring is stuck, you need a different tool.
An internal puller or a press is better for inner ring removal. Pulling the outer ring when the inner is stuck will just damage the bearing.
How much force does a manual puller generate?
Most gear-driven manual pullers generate between 500 and 5,000 pounds of force. This depends on the gear ratio and jaw strength. Heavier interference fits may require a hydraulic puller.
Always check the rated load limit on the tool body.
Should I heat the bearing before using a puller?
Yes, if it is stuck. Heat expands the housing or shaft. This reduces the grip on the bearing.
Use an induction heater or heat gun. Let it cool slightly before pulling. This makes the pull much easier and safer.
How do I know if my jaws are deep enough?
Jaws must reach fully under the outer ring. If they only catch the edge, they will slip. Measure the jaw depth against the bearing OD.
If the depth is too short, get a different tool. Never force a shallow grip onto a deep bearing.
[…] a detailed look at blind bearing pullers and how they differ, understanding jaw configuration matters more than brand […]