Automotive Bearing Puller: Complete Guide to Types and Sizes
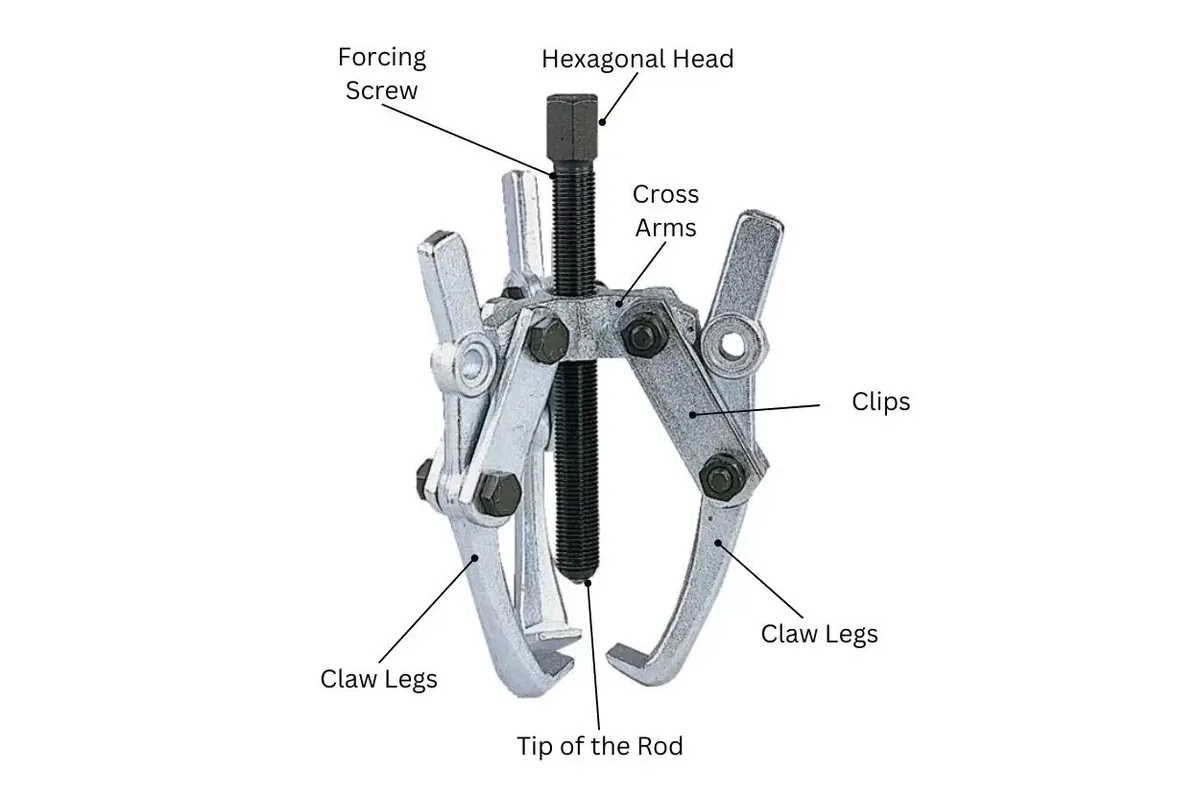
An automotive bearing puller is a specialized tool designed to extract interference-fit bearings from shafts, housings, and axles without damaging the mating surfaces. The right tool prevents raceway destruction and axle scoring.
Choosing the wrong method can ruin a $50 part and turn a quick fix into a $500 rebuild. As of 2026, manufacturer specs confirm that proper jaw alignment remains the single biggest factor in success. We break down the variables so you can pick the right approach.
Quick Answer
An automotive bearing puller removes tight bearings. It uses mechanical or hydraulic force. You attach jaws to the inner race.
You pull axially until the bearing releases. This saves the housing and shaft.
Why Puller Choice Matters More Than the Bearing Itself
The type of bearing dictates the puller you need. A radial ball bearing requires different geometry than a tapered roller set. Using the wrong jaw configuration creates slippage.
This slippage causes immediate damage to the bore.
Consider the vehicle. A truck wheel hub needs high tonnage. A motorcycle engine shaft needs precision.
The access space limits your options. You must match the tool to the physical constraints.
If you are unsure where to start, understand the main puller families first. This helps you narrow down your choice. The right fit saves time and money.
How Bearing Pullers Work and the Variables That Decide Your Path
Pullers generate axial force. They pull the bearing straight off the shaft. The three main forces are mechanical, hydraulic, and inertia.
Each has distinct advantages for different jobs.
Mechanical pullers use a screw. You turn the handle to create pressure. This is simple and cheap.
Hydraulic pullers use fluid pressure. They generate much higher force with less effort. Slide hammers use inertia.
They strike the bearing with a dead blow.
The decision depends on three factors:
- Bearing Size: Large bearings need high force. Small bearings need precision.
- Housing Condition: Rust requires more force. Clean parts need less.
- Access: Tight spaces limit jaw reach. Open areas allow larger bases.
For a detailed look at these mechanics, review the tool selection chart. It maps force requirements to tool types. This helps you match the job to the gear.
Choosing the Right Puller for Your Specific Job
Hydraulic vs. Mechanical vs. Slide Hammer
Image source: Bing (Web (fair-use with source credit))
Hydraulic pullers win for heavy-duty work. They handle seized bearings easily. Mechanical pullers suit general automotive tasks.
Slide hammers are for tight spaces where a puller won’t fit.
| Feature | Hydraulic | Mechanical | Slide Hammer |
|---|---|---|---|
| Force | Very High | Medium | High |
| Control | Excellent | Good | Poor |
| Cost | High | Low | Low |
| Best For | Trucks, Seized | Passenger Cars | Tight Corners |
Hydraulic units cost more but save time. Mechanical units are durable and affordable. Slide hammers are a backup tool.
Use them when access is restricted.
If you work on commercial vehicles, invest in pro-grade hydraulic tools. They handle the higher stress. This prevents tool failure under load.
2-Jaw vs. 3-Jaw: When to Use Each
Two-jaw pullers are compact. They fit in tight engine bays. Three-jaw pullers provide better balance.
They distribute force evenly around the bearing.
Use 2-jaw for:
- Snap ring removal.
- Pilot bearings.
- Narrow axles.
Use 3-jaw for:
- Wheel hub bearings.
- Tapered roller sets.
- General shaft extraction.
The number of jaws matters for symmetry. An even pull prevents twisting. Twisting can crack the housing.
Always match the jaw count to the bearing shape.
For more on jaw configurations, explore the full selection guide. It explains how jaw geometry affects force application. This knowledge prevents component damage.
Step-by-Step: Pulling a Bearing Without Destroying the Housing
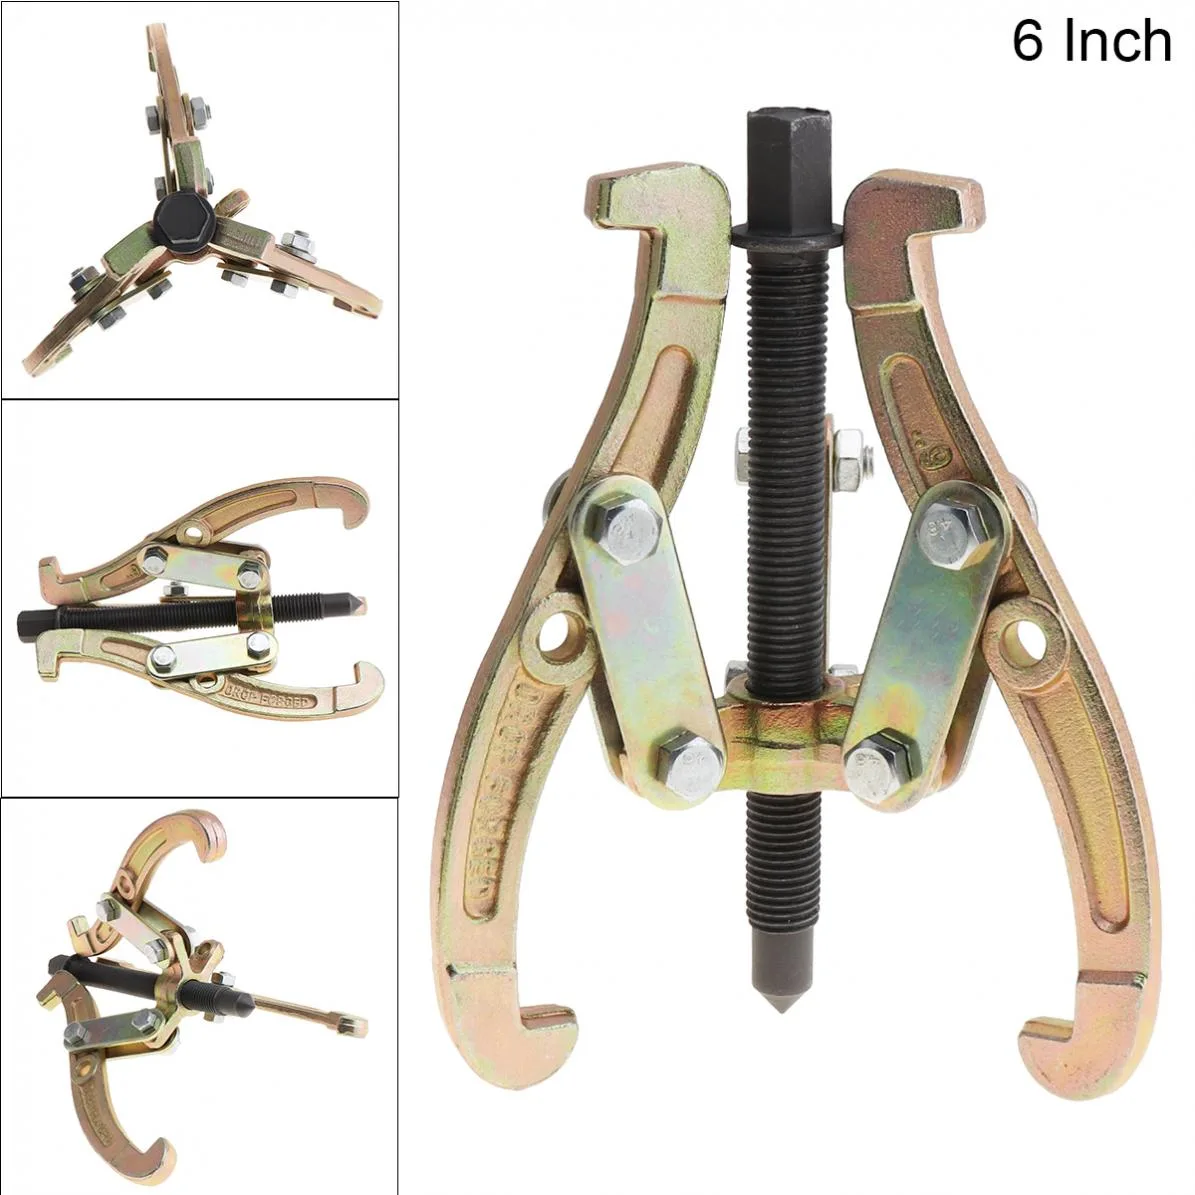
Image source: Bing (Web (fair-use with source credit))
Preparation is 50% of the job. A sloppy start leads to a failed pull. Follow these steps for safety and success.
- Clean the Area: Remove grease and dirt. You need a clear view. Check for rust.
- Identify the Race: Jaws must grab the inner ring. Never pull on the outer ring.
- Attach the Base: The plate must sit flat. Use bolts or magnets for stability.
- Align the Center: The puller axis must match the bearing axis. Any angle causes shear.
- Engage the Jaws: Secure the jaws firmly. Check for slippage.
- Apply Force: Turn the screw slowly. Watch for movement. Stop if it sticks.
If the bearing doesn’t move, stop. Do not force it. Re-check alignment.
Apply penetrating oil and wait.
For a visual guide on alignment, watch the instructional walkthrough. It shows common errors in real-time. This prevents accidental damage.
Mistakes That Turn a $50 Job Into a $500 Rebuild
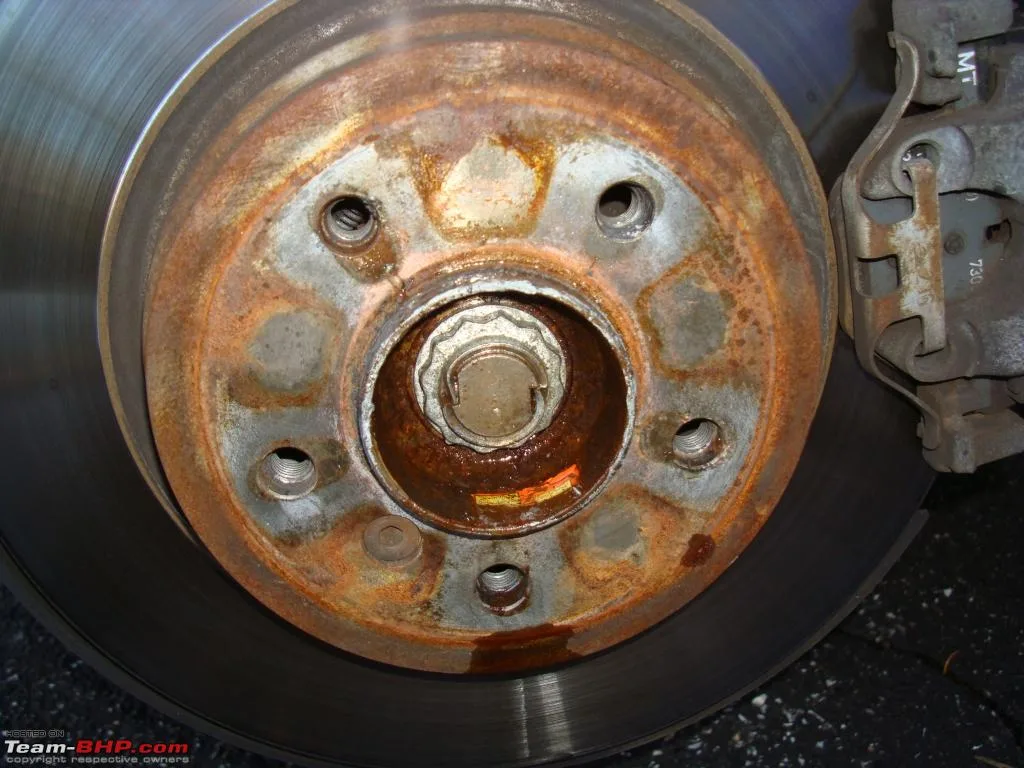
Image source: Bing (Web (fair-use with source credit))
Most failures happen before the pull starts. Ignoring these errors costs you. Here are the top risks.
- Prying Instead of Pulling: Prying tools lever against the race. They gouge the surface. Always use axial force.
- Misaligned Jaws: Even a slight angle twists the shaft. This bends the axle. It ruins the mounting surface.
- Ignoring Rust: Corrosion locks the bearing in place. Forcing it without oil fails. Use a penetrating agent first.
- Wrong Tool Size: Small jaws on large bearings slip. Slipping damages the ring. Match the tool size to the part.
These mistakes lead to expensive repairs. A damaged bore often requires machining. This adds hours to the job.
It increases the total cost significantly.
To avoid these pitfalls, study common repair failures. The guide highlights where technicians go wrong. Learning from others saves your parts.
Costs, Specs, and What’s Actually Worth Buying
Pricing varies widely by force and quality. Entry-level mechanical sets cost $50 to $100. Professional hydraulic units range from $300 to $1,000.
Key specs to check:
- Max Force: Rated in tons. Choose 50% above your heaviest job.
- Jaw Reach: The distance the jaws can open.
- Base Plate Size: Larger plates provide stability.
- Material: Forged steel outlasts cast iron.
Do not buy the cheapest option. Poor welds fail under pressure. A broken tool in a tight space is useless.
Buy from reputable brands.
Check the latest pricing trends for current market rates. Prices fluctuate with material costs. This helps you budget correctly.
You want value, not just the lowest sticker price.
Frequently Asked Questions
How often should I replace a worn bearing puller?
Check your tool after every heavy job. Look for stripped threads on the screw. Inspect the jaw teeth for wear.
If the screw spins without creating tension, the internal threads are damaged. Replace the unit immediately. A broken tool mid-pull causes more damage than a stuck bearing.
Can I use a bearing puller on a rusty shaft?
Yes, but do not force it. Rust locks the bearing to the shaft. Use a penetrating oil first.
Let it soak for at least ten minutes. Apply gentle heat to expand the housing. If it still will not move, stop.
Drilling or hammering will ruin the shaft.
What is the difference between a 3-jaw and 4-jaw puller?
Three-jaw pullers handle most automotive bearings. They fit in tighter spaces. Four-jaw pullers provide more stability.
They are better for very large, heavy-duty components. For most cars and trucks, a 3-jaw set is sufficient. Only choose 4-jaw for massive industrial bearings.
Is a slide hammer better than a hydraulic press?
It depends on your access. A slide hammer works in tight spots. It uses inertia to tap the bearing loose.
A hydraulic press offers controlled, steady force. Presses are safer for critical parts. Use a slide hammer for rusted, small bearings.
Use a press for large, sensitive housings.
Do I need to lubricate the puller jaws?
Yes, always apply light grease to the threads. This reduces friction on the screw. It helps the jaws grip better.
It also prevents corrosion on the tool. A well-maintained puller lasts longer. Never run the tool dry during heavy loads.
Your Decision Guide: Which Puller Fits Your Situation
Match the tool to the job. Do not guess. Use this quick guide to find your best fit.
- Home Mechanic: Buy a mechanical 3-jaw set. It costs under $100. It handles 90% of car repairs. It is durable and easy to store.
- Professional Shop: Invest in a 30-ton hydraulic unit. You face seized bearings daily. The speed saves labor hours. It pays for itself quickly.
- Tight Spaces: Keep a slide hammer in your drawer. It reaches where large pullers cannot. Use it for pilot bearings and small shafts.
- Heavy Duty: Use a hydraulic press. You need maximum control. It prevents damage to expensive housings. It is the safest option for critical components.
If you are still unsure, review the final selection guide. It breaks down specific scenarios. This ensures you pick the right gear.
The right tool makes the job easy. The wrong tool creates new problems. Start with the basics.
Upgrade only when you need more force.
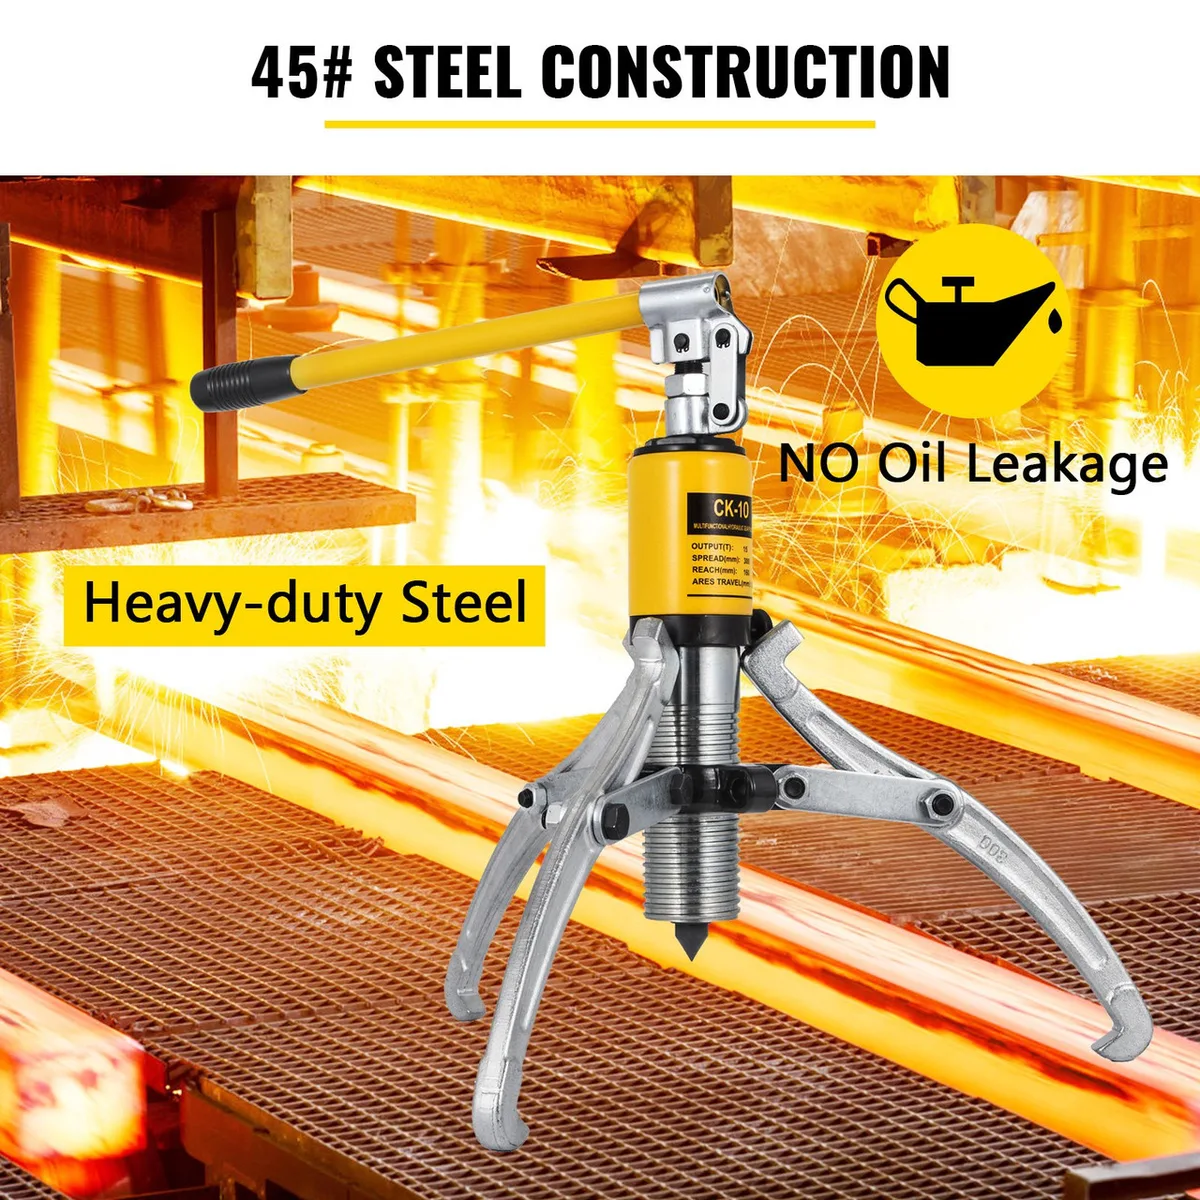
Image source: Bing (Web (fair-use with source credit))
Maintenance and Long-Term Care for Your Puller
Treat your puller like a precision instrument. Clean it after every use. A shop rag removes old grease and dirt.
This prevents grit from digging into the screw threads. Use a cloth dampened with brake cleaner for stubborn residue. Dry the tool immediately.
Moisture causes rust on the steel jaws and base plate.
Store your equipment properly. Keep the puller in a dry cabinet or toolbox. Hang it on a pegboard if you have the space.
Avoid leaving it on a concrete floor overnight. Floor moisture accelerates corrosion on the base plate. If you use hydraulic units, check the fluid levels monthly.
Low pressure indicates leaks or worn seals.
Lubricate the moving parts regularly. Apply a thin coat of white lithium grease to the screw threads. This keeps the handle spinning smooth.
It also protects the metal from rust. Check the jaw hinges annually. A stiff hinge means you will lose control during a pull.
| Maintenance Task | Frequency | Tool Needed |
|---|---|---|
| Wipe down surfaces | After every use | Shop rag |
| Clean screw threads | Monthly | Brake cleaner, cloth |
| Lubricate screw | Monthly | Lithium grease |
| Check hydraulic fluid | Quarterly | Dipstick |
| Inspect jaw teeth | Quarterly | Visual inspection |
Proper care extends the life of your tool. It prevents mid-job failures. A sharp jaw grips better.
A smooth screw pulls faster. Neglected tools become liabilities.
For detailed upkeep routines, find maintenance tips here. It covers specific care for different tool types. This helps you protect your investment.
Final Verdict on Choosing and Using Automotive Pullers
There is no single best puller. The right tool depends on your specific job. Match the force to the bearing.
Match the size to the space.
- For most drivers: A 3-jaw mechanical set is enough. It is cheap and effective.
- For heavy trucks: Get a hydraulic unit. You need the extra power.
- For tight spaces: Keep a slide hammer handy. It reaches where others fail.
Always pull on the inner race. Never pry. Never force.
If it is stuck, use oil and patience. A damaged bore costs more than a new bearing.
Start with the basics. Learn the steps. Respect the forces.
Your tools will serve you well.
For a final check on your choices, see the complete buyer's guide. It confirms you have picked the right gear. Now get to work.
Do it right the first time.