Not Sure Which Puller You Need? We’ve Got Answers
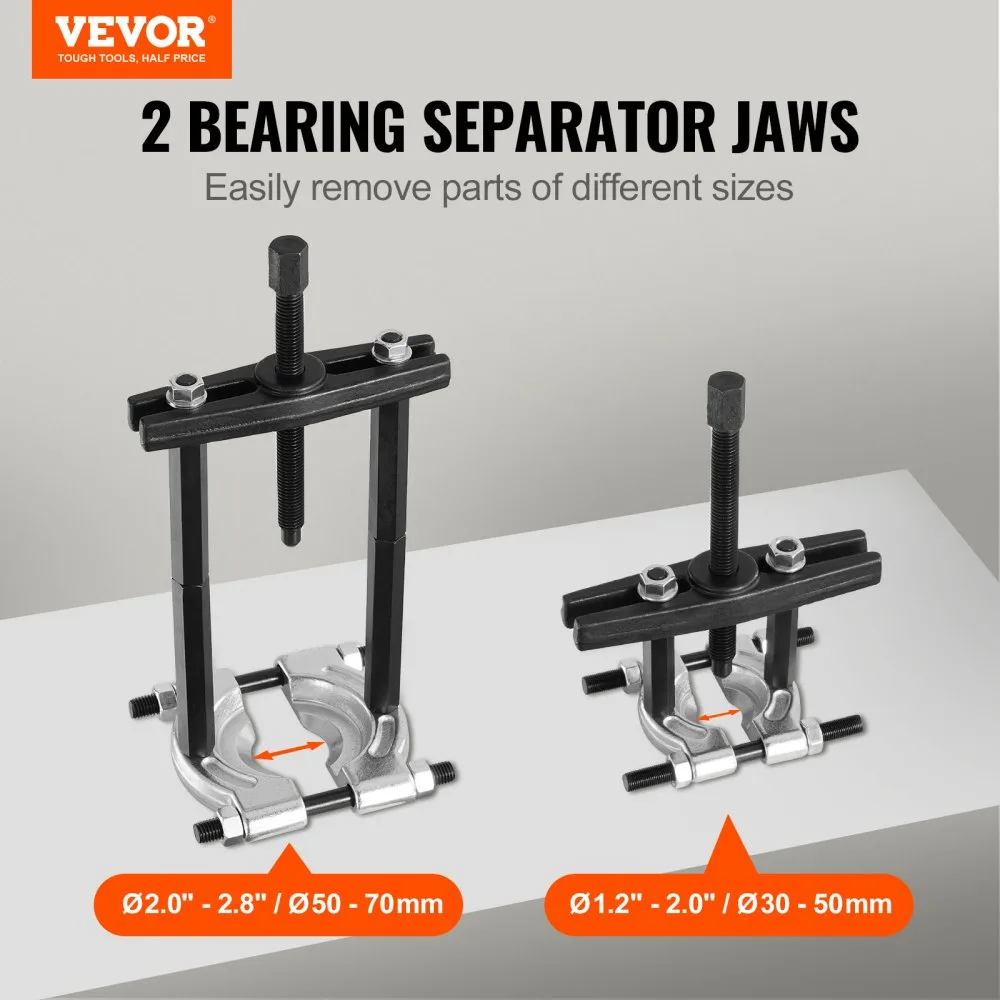
You've got a stuck bearing or a stubborn bushing. Your usual wrenches are useless. So you ask yourself: which puller do i need?
The answer depends on three things: what you're pulling, how much room you have, and whether this is a one-off job or part of your regular toolkit.
Most DIYers and mechanics can solve common extraction problems with a basic two- or three-jaw puller. But when you're working in tight spaces or dealing with heavy-duty equipment, you'll need specialized designs. Let's walk through the decision steps so you end up with the right tool and avoid damaging parts in the process.
What You're Dealing With (And Why It's Tricky)
First, let's define the problem clearly. A bearing puller is a tool that grips the inner race of a bearing, gear, or pulley and applies steady force to slide it off the shaft. Most people assume any puller will work.
That assumption leads to stripped jaws, bent shafts, and wasted time.
The real issue is matching the tool to the specific geometry of the job. Are you pulling a sealed ball bearing out of a motorcycle swingarm? Or removing a large cylindrical roller from a conveyor drive?
The space around the part changes everything.
Manufacturer specifications indicate that most general-purpose pullers handle light to medium duty within their rated capacity. However, pushing a puller beyond its limit or using it on an incompatible part is where things go wrong. Per OSHA guidelines on hand-tool safety, always select a tool rated above the expected load and ensure proper engagement before applying force.
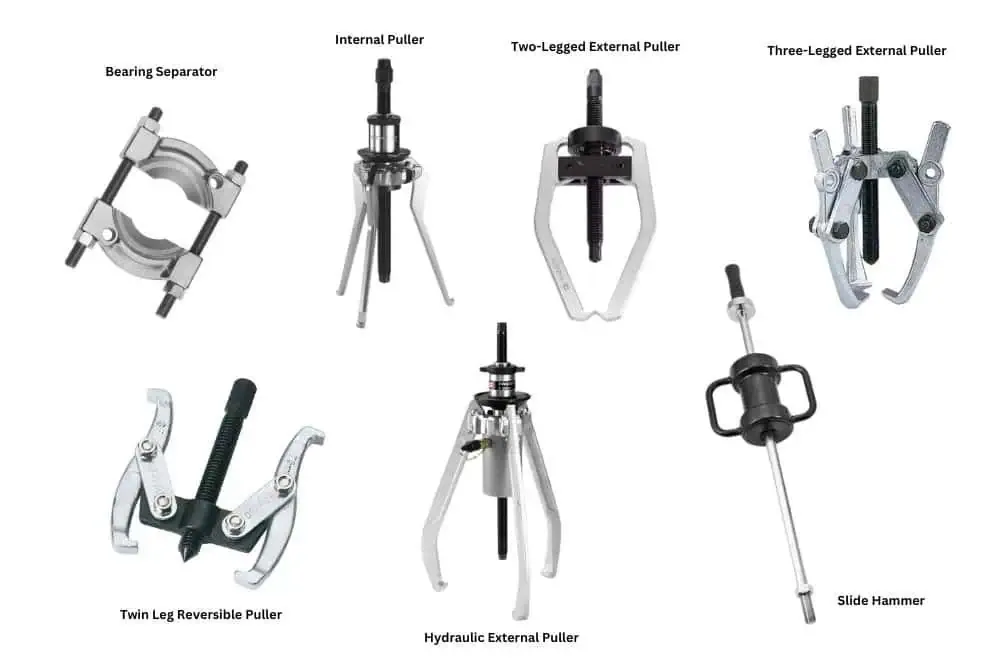
Before we get into the decision framework, check out [a detailed breakdown of different puller designs] to understand how jaw configuration affects grip and stability. This knowledge will make the next steps much clearer.
Quick Answer
Which puller do I need? A 2-jaw puller for open-sided, accessible bearings. A 3-jaw puller for most general tasks with limited clearance. An internal puller for rings inside a housing.
A slide hammer for deep, stubborn extractions with direct impact. Match the tool to the part shape and available working space first, then verify the puller's tonnage rating meets your job's demands.
The Decision Framework: Three Questions That Tell You Everything
Think of this as a simple flowchart. If you can answer these three questions, the rest becomes straightforward. We'll run through them one by one.
1. What Are You Actually Removing?
Your first question is about the part itself. Is it a bearing with a visible outer race? A gear sitting flush against a shoulder?
A press-fit sleeve with no clear gripping point?
- Bearing with exposed inner race: Use an external puller that hooks under the race.
- Gear or pulley with a keyway: Ensure the puller jaws can clear the shaft and key without interference.
- Internal ring or race inside a housing: Switch to an internal expansion puller that grips from the inside out.
- Stubborn, stuck, or rusted component: Consider adding a slide hammer or applying penetrating oil before pulling.
Identifying the exact geometry saves you from buying the wrong tool and starting over. Most mistakes happen because someone grabs a standard 3-jaw puller when the situation actually calls for a specialized internal kit.
2. How Much Room Do You Have to Work?
Clearance is the second big filter. Some pullers require significant back-of-part space to open their jaws. If you're working inside a compact engine block or a narrow frame, you might not have enough room for standard long-arm tools.
Measure the distance from the part to any surrounding structure. Then check the puller's jaw spread and arm length. A compact 2-jaw puller often fits where a bulkier 3-jaw design won't.
For extremely confined areas, a mini bearing puller set or an internal extraction kit may be your only option.
As of 2026, many manufacturers offer adjustable jaw systems that collapse down to smaller profiles without sacrificing reach. This flexibility can turn an impossible job into a manageable one.
3. What's Your Budget and Frequency of Use?
Finally, think about how often you'll need this tool. A professional mechanic who pulls bearings weekly should invest in a high-quality kit with multiple attachments. A casual DIYer who tackles one project a year can start with a single mid-range puller.
Budget kits often include basic jaws and screws but lack durable materials or precise threading. Mid-tier options from reputable brands offer better steel hardness and smoother operation. Premium kits may add hydraulic actuators or specialty heads for industrial applications.
Deciding based on usage frequency prevents overspending on tools you'll barely use, while also avoiding cheap replacements that fail mid-job.
Choosing Your Puller Type: Breaking Down the Options
Now that we've filtered the problem, let's look at the main puller categories. Each type has a sweet spot. Knowing that sweet spot will guide your final pick.
2-Jaw Pullers: When to Pick Them
A 2-jaw puller features two opposing arms with hooks that engage the part. They're simpler, lighter, and often require less clearance than their 3-jaw cousins. Use a 2-jaw puller when:
- One side of the assembly is completely open and accessible.
- You need a slim profile to slip between close-fitting components.
- The part being pulled has a smooth, uniform edge for the jaws to grip securely.
Their simplicity makes them less prone to jamming, but they can apply uneven force if not centered perfectly. Always double-check jaw alignment before tightening the screw.
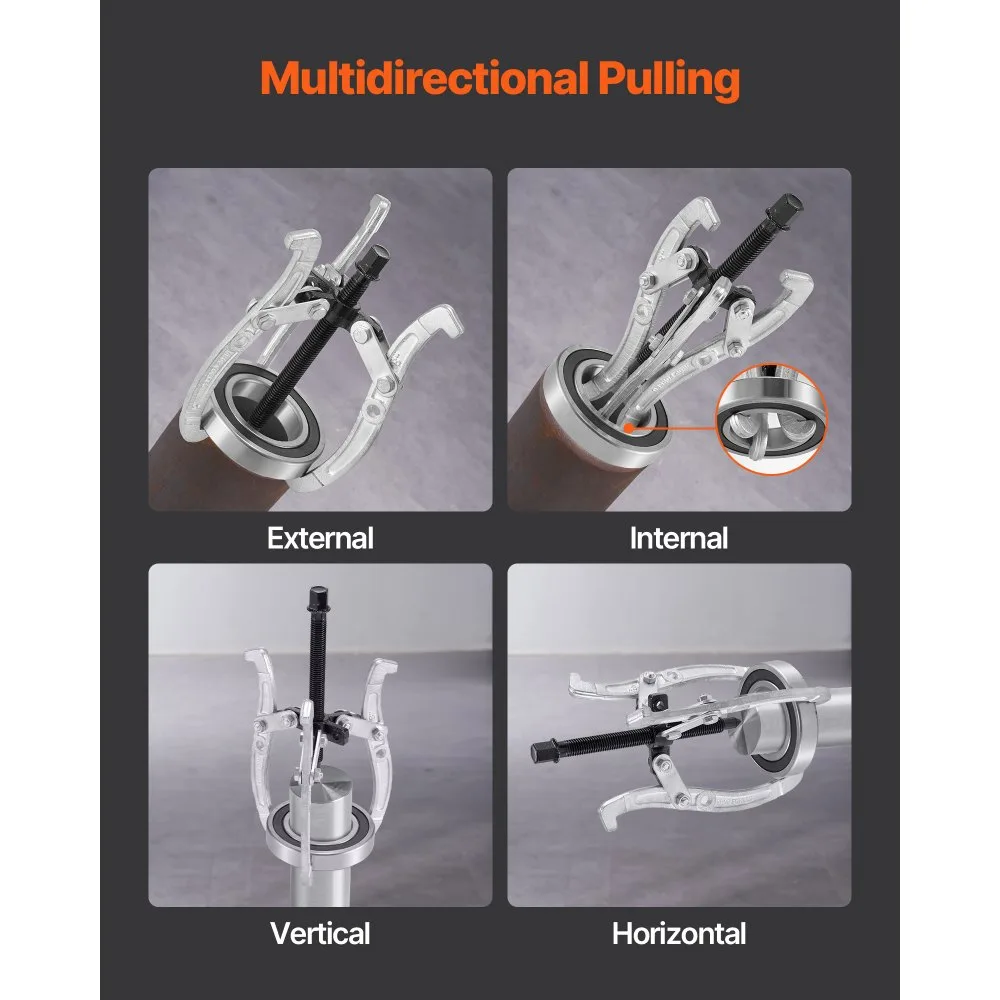
For a deeper dive into how these configurations differ, see our guide on [choosing the right puller design for various mechanical applications]. Understanding the mechanics behind each style helps you avoid force mismatches.
3-Jaw Pullers: The Versatile Default
The 3-jaw puller is the workhorse of most workshops. Its symmetrical design distributes pulling force evenly around the part's circumference. This balance reduces the risk of tilting or binding during extraction.
Opt for a 3-jaw puller when:
- You're removing standard bearings, gears, or pulleys with even edges.
- Clear space is limited but still sufficient for three shorter arms.
- You want a tool that handles 80% of everyday jobs without switching kits.
Most starter kits include a 3-jaw puller alongside interchangeable jaws and extension screws. This versatility makes it the safest first purchase for anyone building a basic tool collection.
Internal Pullers: For Hidden Bearings and Rings
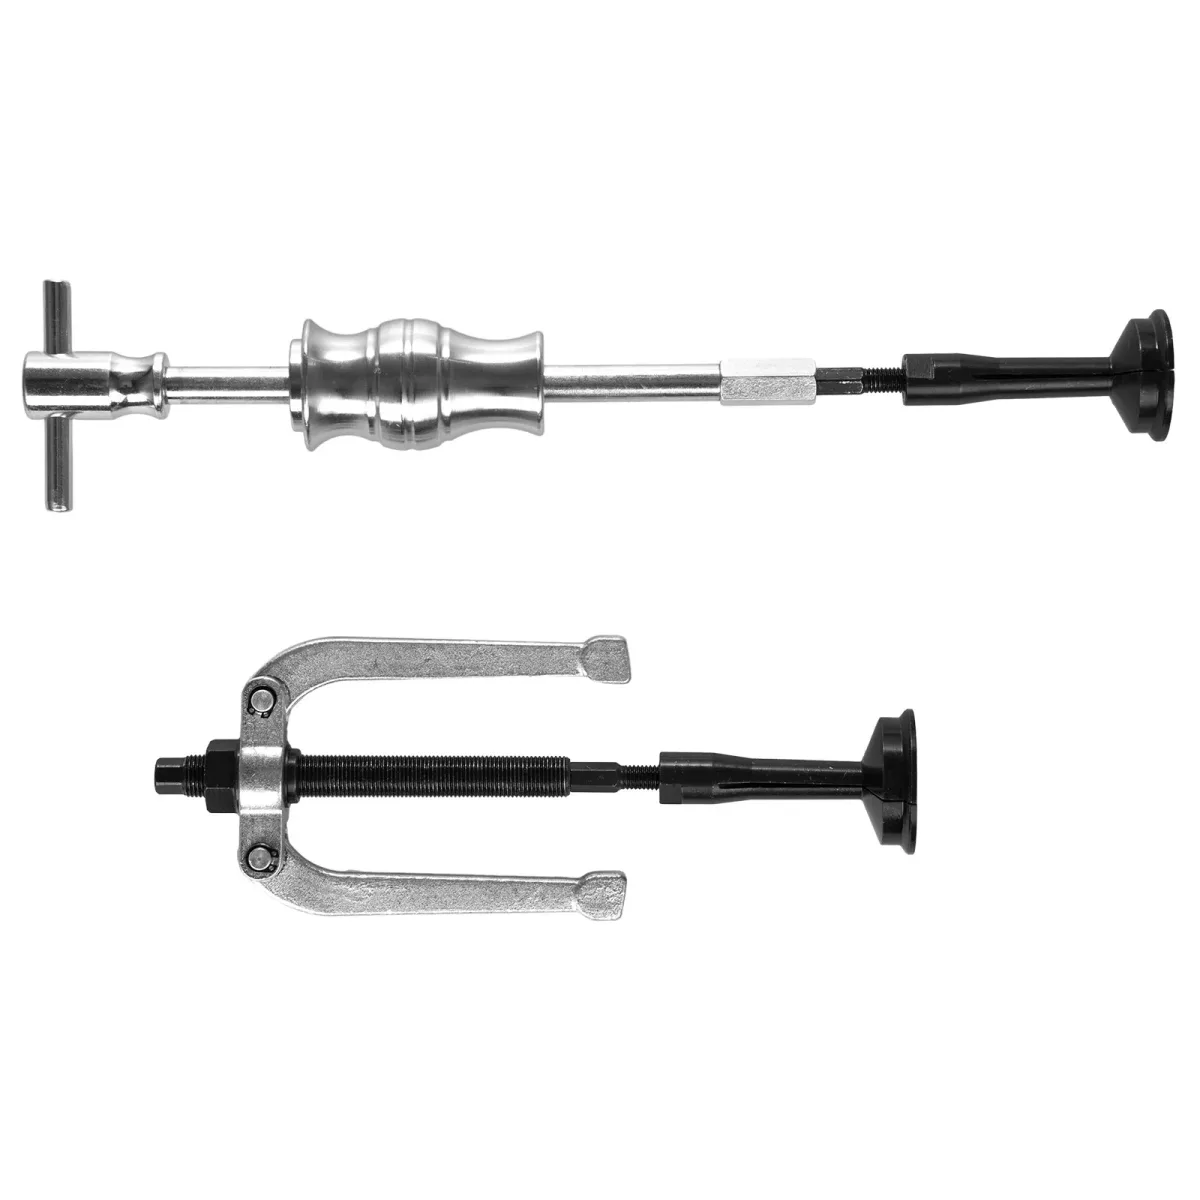
Sometimes the part you need to remove sits inside a housing or has no exposed outer edge. In these cases, an internal bearing puller expands from the center outward. It grips the inner race or ring directly and pushes against the housing's shoulder.
Use an internal puller when:
- The bearing is trapped inside a stationary casing with no visible outer rim.
- You need to extract a snap ring or retaining ring from a groove.
- Standard external jaws cannot reach the gripping surface.
Internal pullers come in various styles, including expansion cups and split-collar designs. Choosing the right one depends on the exact diameter and depth of the hidden component.
Slide Hammers: Impact Power for Stuck Parts
When corrosion, rust, or tight tolerances prevent a clean pull, a slide hammer adds kinetic energy to break the part free. You mount the puller legs to a sliding weight, then strike the handle repeatedly. The impact shocks dislodge the component.
Reach for a slide hammer when:
- The part is seized solid and conventional steady force won't move it.
- You need to extract a bearing deeply seated inside a tapered housing.
- Standard pullers are slipping or stripping the inner race due to excessive friction.
While effective, slide hammers require careful control to avoid damaging the shaft or surrounding structure. Always wear safety glasses and apply blows in short, measured bursts rather than continuous hammering.
Hydraulic vs. Mechanical: Raw Force vs. Precision Control
Hydraulic pullers replace manual screw tension with fluid pressure. They deliver massive, consistent force ideal for heavy machinery and large industrial bearings. Mechanical pullers rely on threaded screws operated by hand or with a ratchet.
Choose hydraulic if you regularly extract multi-ton components or need hands-free operation during long pulls. Opt for mechanical if you value portability, lower cost, and direct tactile feedback. Many professionals keep both types in their inventory for different scales of work.
How to Use Your Puller Correctly (Step-by-Step)
Selecting the right tool is only half the battle. Proper technique ensures you extract the part safely and preserve the shaft for reassembly. Follow this workflow for every job.
Measuring and Selecting the Right Tool
Start by measuring the shaft diameter, the bore of the bearing, and the available clearance behind the part. Use these numbers to verify that your chosen puller's jaw reach and throat depth exceed the required dimensions. Leave at least a quarter-inch of extra clearance on all sides to allow for smooth operation.
Setting Up for a Clean Pull
Proper setup prevents slippage and damage. Center the puller's body on the shaft so the jaws grip symmetrically. Tighten the jaws just enough to hold firm without deforming the inner race.
Apply a quality penetrating oil to the shaft and bearing interface if corrosion is suspected. Allow the oil to soak for at least fifteen minutes before proceeding.
Applying Force Without Causing Damage
Begin turning the central screw steadily. Apply consistent pressure and pause frequently to check alignment. If the part begins to tilt, stop immediately and recenter the jaws.
Never force a binding pull; instead, backtrack slightly, inspect the contact points, and try again. Excessive speed or torque can gall the shaft or crack brittle components.
Troubleshooting a Stuck Extraction
If the part refuses to budge after several minutes of steady pulling, reassess. Check whether the jaws are properly engaged under the race. Look for hidden set screws, tabs, or clips that may still be securing the component.
In some cases, gently tapping the shaft face with a soft mallet can break the initial seal and allow movement.
If corrosion remains severe, consider heat application near the outer race to expand the housing slightly. Never apply direct flame to a bearing unless you're certain the seals and lubricants won't degrade or ignite. Follow manufacturer guidelines for safe thermal extraction methods.
Safety Warnings and Long-Term Care
Tool safety protects both you and your investment. Handling bearing pullers incorrectly can lead to pinched fingers, flying metal shards, or crushed components. Adhering to basic precautions minimizes risk significantly.
Mandatory Precautions Before You Start
Always wear ANSI-approved safety glasses and sturdy gloves. Secure loose clothing and tie back long hair. Ensure the workpiece is firmly supported on a stable surface before applying any pulling force.
Never stand directly behind a loaded slide hammer or hydraulic system in case of sudden release.
Inspect your puller before each use. Check that jaws move freely, threads engage smoothly, and there are no cracks or excessive wear on contact points. Replace damaged components immediately rather than attempting risky repairs.
Cleaning, Storage, and Kit Maintenance
After each job, wipe down all parts with a clean cloth to remove grease, dirt, and moisture. Apply a light coat of machine oil to exposed steel surfaces to prevent rust formation. Store your puller in a dry, organized case or drawer where jaws won't knock against hard objects.
Periodically test the screw mechanism for smooth operation. If threading becomes gritty or stiff, disassemble and clean the threads with a brass brush and appropriate solvent. Reassemble and lubricate lightly before returning the tool to service.
Proper maintenance extends tool life dramatically and ensures reliable performance when you face your next stubborn extraction job.
Mistakes to Avoid / Common Errors
Even experienced mechanics fall into these traps. Learning from others' errors saves you time, money, and damaged components.
Misidentifying Internal vs. External Applications
The most frequent mistake is using an external puller on a part that requires internal extraction, or vice versa. Attempting to grip an inner race with standard external jaws often results in slipping and rounded edges. Always confirm whether the bearing sits inside a housing or exposes its outer surface before selecting your tool.
Over-Tightening Jaws on Soft Components
Aluminum housings and brass bushings deform easily under excessive jaw pressure. If you crank the screw too aggressively, you'll distort the mating surfaces and create new problems. Apply firm but measured tension, and stop as soon as the jaws make solid contact.
Ignoring Shaft Protection During Removal
Leaving the puller's center screw directly against the shaft end can mar or compress delicate threads. Use a thread protector cap or a soft metal punch between the screw and shaft face. This simple step preserves the shaft for reassembly and prevents costly repairs.
Forcing a Binding Pull
When resistance spikes and the part won't budge, don't yank harder. Force rarely wins against corrosion; it only breaks tools or damages parts. Back off, reassess alignment, apply more penetrating fluid, or switch to a slide hammer technique instead.
Skipping Regular Tool Inspection
Worn jaw tips, stripped threads, and cracked arms compromise safety and performance. Check your puller after every few uses. Replace any component showing signs of fatigue rather than risking failure during a critical extraction.
Costs / Pricing / Data / Specs
Puller pricing varies widely based on quality, brand, and included attachments. Understanding what you're paying for helps you avoid both overspending and cheap failures.
| Category | Typical Price Range | Best For | Key Features |
|---|---|---|---|
| Budget Kits | $20–$50 | Occasional DIY projects | Basic steel construction, limited attachments |
| Mid-Range Sets | $50–$150 | Regular home mechanics | Hardened chrome vanadium jaws, multiple sizes |
| Professional Kits | $150–$400+ | Daily shop use | Precision threading, heavy-duty ratings, specialty heads |
| Hydraulic Systems | $300–$800+ | Industrial applications | Powered extraction, high tonnage capacity |
Most starter kits include a 3-jaw puller body, two or three jaw styles, extension screws, and a basic carrying case. Higher-tier options add internal expansion heads, hydraulic actuators, and specialized adapters for industrial components.
As of 2026, aggregate reviews indicate that mid-range sets from reputable brands like OTC and Mitchell deliver the best value for serious hobbyists. Budget options often suffer from soft metals and imprecise threading, which leads to slippage and part damage.
When evaluating specs, prioritize tonnage ratings above jaw count. A well-built 2-jaw puller rated for 5 tons outperforms a flimsy 10-piece kit rated for only 2 tons. Always select a tool whose maximum capacity exceeds your expected pulling force by at least twenty percent.
Frequently Asked Questions
Can I use a bearing puller on bushings and gears too?
Yes. Most bearing pullers work equally well on press-fit bushings, splined gears, and pulleys. The key is ensuring the jaws grip a smooth, even surface without damaging surrounding components.
Adapt your jaw selection and pulling angle to match each specific part geometry.
What's the difference between metric and SAE pullers?
Metric pullers use millimeter-threaded screws and jaw spacing, while SAE versions rely on imperial measurements. Both function identically, but mixing systems can cause cross-threading and poor engagement. Choose the system that matches your existing toolkit and the fasteners on your components.
How do I know if my shaft or housing is damaged after removal?
Inspect the shaft for scoring, galling, or compression marks where the bearing seat contacted the inner race. Check the housing bore for deformation, scratches, or enlarged diameters. Any visible damage may require machining, sleeving, or replacement before reassembly.
Is it ever okay to improvise with bolts and nuts instead of a proper puller?
Improvised methods sometimes work for non-critical jobs, but they risk stripping threads, cracking housings, or injuring yourself. A proper bearing puller applies controlled, centered force that improvised solutions simply cannot match. Reserve improvisation for emergencies only, and switch to the right tool when possible.
Where should I buy my first puller kit as a DIYer?
Reputable sources include authorized tool distributors, industrial supply houses, and major hardware retailers. Avoid no-name products from unknown sellers, as quality control varies significantly. Stick to established brands that offer warranties and published load specifications for reliable performance.