Essential Automotive Specialty Tools Every Mechanic Needs
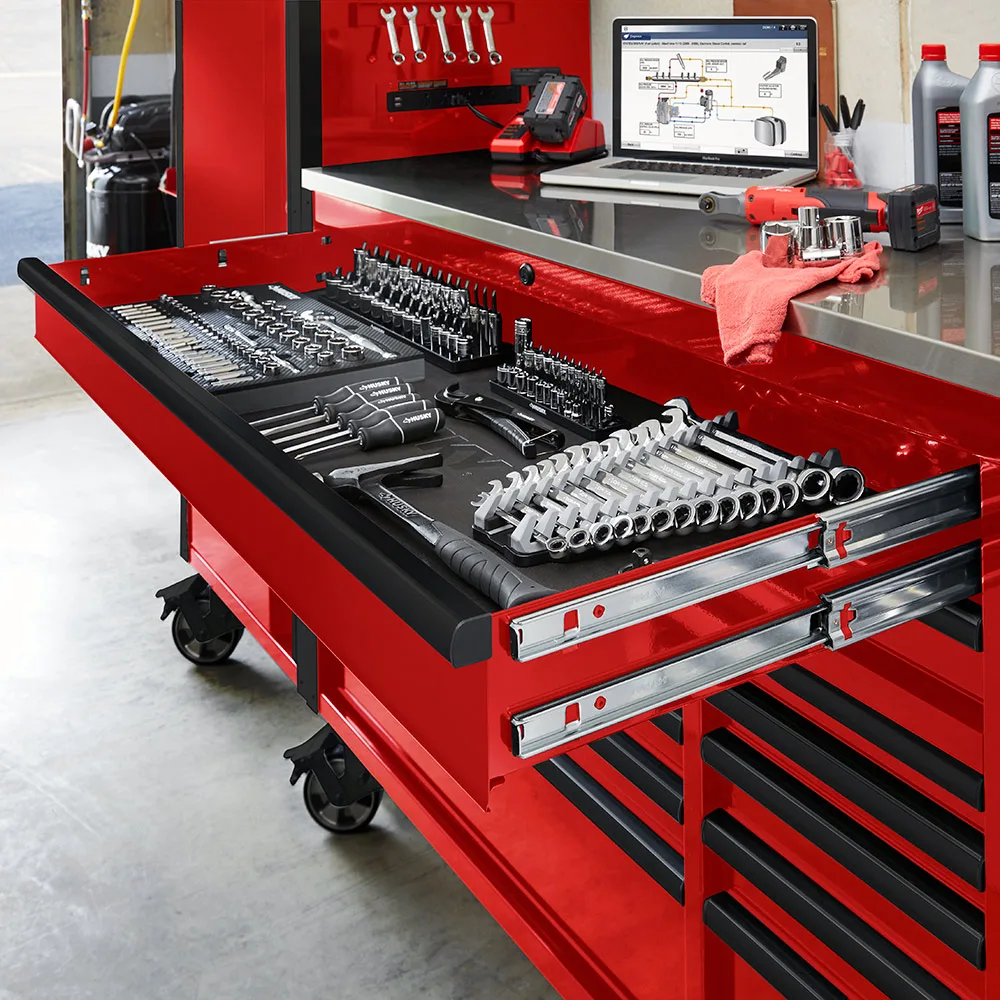
Specialty automotive tools exist for jobs that generic wrenches simply can't handle. If you've ever stared at a stubborn wheel bearing or a seized harmonic balancer, you already know why standard sockets fall short. These purpose-built implements solve specific mechanical challenges with precision engagement that protects both the fastener and the component around it.
Understanding what each tool looks like and how it contacts your part is what separates successful repairs from stripped threads and cracked housings. Let's walk through the visual cues, critical features, and smart buying strategies you need before your next project.
Image source: Web (Bing) / gocarlife.com (Web image (fair-use with source credit))
Quick Answer
Automotive specialty tools are purpose-built implements designed for specific repair tasks that standard sockets and wrenches cannot handle. Common examples include valve spring compressors, piston ring compressors, caliper windback tools, harmonic balancer pullers, bearing puller sets, and CV axle nut sockets. Each tool is shaped to engage a particular fastener or component safely and efficiently.
Selecting the correct tool prevents stripped threads, damaged parts, and costly mistakes during engine rebuilds, brake work, suspension service, and transmission repairs.
| Tool Type | Primary Use |
|---|---|
| Valve spring compressor | Compress valve springs for seal or retainer replacement |
| Piston ring compressor | Compress piston rings for cylinder insertion |
| Caliper windback tool | Retract caliper pistons for pad service |
| Harmonic balancer puller | Remove crankshaft pulleys without damaging threads |
| Bearing puller set | Extract internal and external bearings cleanly |
| CV axle nut socket | Grip and loosen 12-point CV axle fasteners |
Why Visual Identity Matters When Choosing Specialty Automotive Tools
You cannot buy the right specialty tool by reading a name alone. A valve spring compressor, a harmonic balancer puller, and a bearing puller set might sound similar on paper but look completely different in your hands. Each tool has a distinct physical profile that determines whether it will engage your fastener securely or slip under load.
Take the CV axle nut socket as an example. It comes in multiple head profiles. Some feature a 12-point internal drive, while others use a splined design.
If you grab the wrong pattern, you will round off the nut before you even apply torque. The same principle applies to piston ring compressors. Band-style models wrap around the cylinder, while collar-style versions slide over the piston head.
Using the wrong type will crush your rings or score the cylinder wall.
Visual identification helps you confirm fitment before purchase. Check manufacturer diagrams or product photos carefully. Look for key contact points, jaw configurations, and drive sizes.
You should always verify that the tool matches your vehicle's make, model, and year before ordering. This step alone prevents the most common returns and frustrating late-night shop trips.
When you understand what each tool looks like and how it interfaces with your engine components, you build a solid foundation for smarter purchasing decisions. Puller Types Explained: Choosing the Right One for the Job covers how different puller designs serve distinct removal tasks, which reinforces the importance of matching tool appearance to application.
Key Specialty Tools: What They Look Like and How to Spot the Right One
Identifying the correct specialty tool requires knowing what to look for visually and mechanically. Let's examine six essential tools and their distinguishing features so you can spot the right option every time.
Valve Spring Compressor
These tools come in three main styles. Bench-type compressors sit on a workbench and use a vertical screw to push the spring retainer down. Fork-style compressors grip the spring keepers directly and are ideal for head-off work.
Inline compressors attach to the spark plug hole and compress from below. Look for a sturdy base plate, a threaded ram, and replaceable adapters for different spring sizes.
Piston Ring Compressor
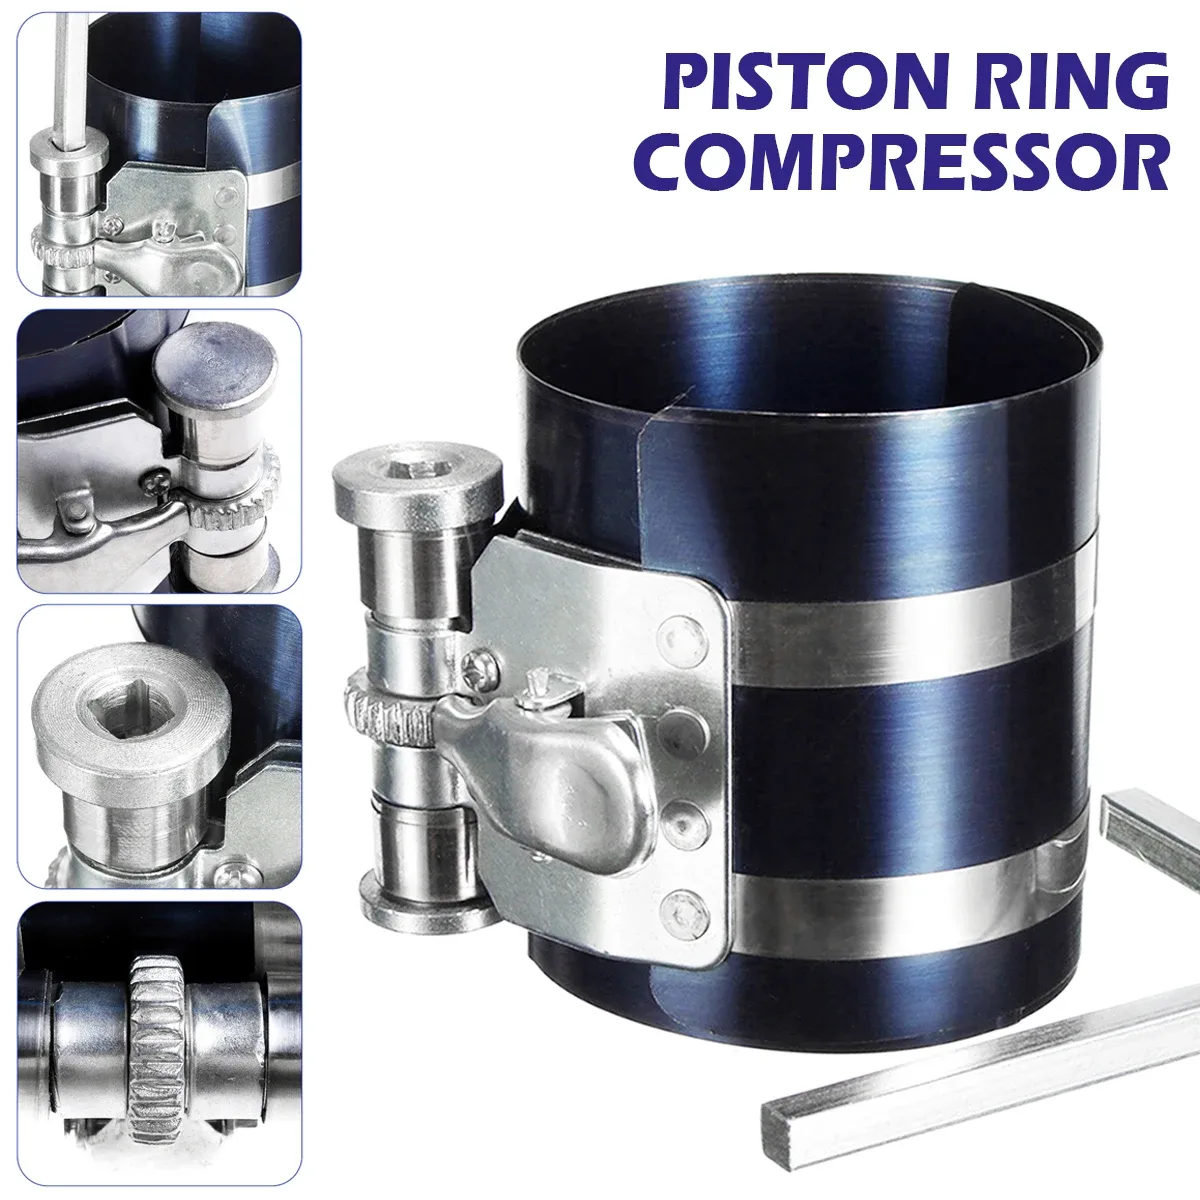
Image source: Web (Bing) / aliexpress.com (Web image (fair-use with source credit))
Band-style ring compressors use a flexible steel band with tightening bolts. You slide the band around the installed piston and tighten until the rings compress flush. Collar-style compressors are rigid cylinders that push down on the ring lands.
Check for smooth inner walls without burrs and adjustable tension bolts that hold consistent pressure during cylinder installation.
Caliper Windback Tool
This tool fits into the caliper bleed port or presses against the piston face. It rotates the piston back into the bore while expelling fluid. Look for a square-drive adapter that matches common ratchet sizes.
The tip should be flat or slightly contoured depending on whether your caliper uses a rotary or threaded piston design.
Harmonic Balancer Puller
Also called a crank puller, this device uses a central bolt that threads into the crank snout. Two or three arms grip the balancer hub from behind. Choose a 2-jaw model for light-duty removal and a 3-jaw version for seized or heavy pulleys.
Verify that the center bolt matches your engine's crank thread size before buying.
Bearing Puller Set
These kits include internal and external jaws, spreader rings, and sliding hammers. Internal bearers grip the race from inside the housing, while external pullers seize the outer diameter. Look for hardened steel jaws with sharp gripping teeth and a smooth-threaded center screw rated for at least 5000 pounds of pull force.
For deeper guidance on choosing the right configuration, review Automotive Pullers: The Complete Buyer's Guide.
CV Axle Nut Socket
These deep, 12-point sockets engage the oversized center nut on front-wheel-drive axles. They feature a magnetic or ball-detent retention system to keep the socket attached while you install it. Check the drive size and wall thickness.
Thicker walls resist rounding under high torque loads during removal.
Common Visual Mistakes: Stripped Sockets, Wrong Jaws, and Bad Fitments
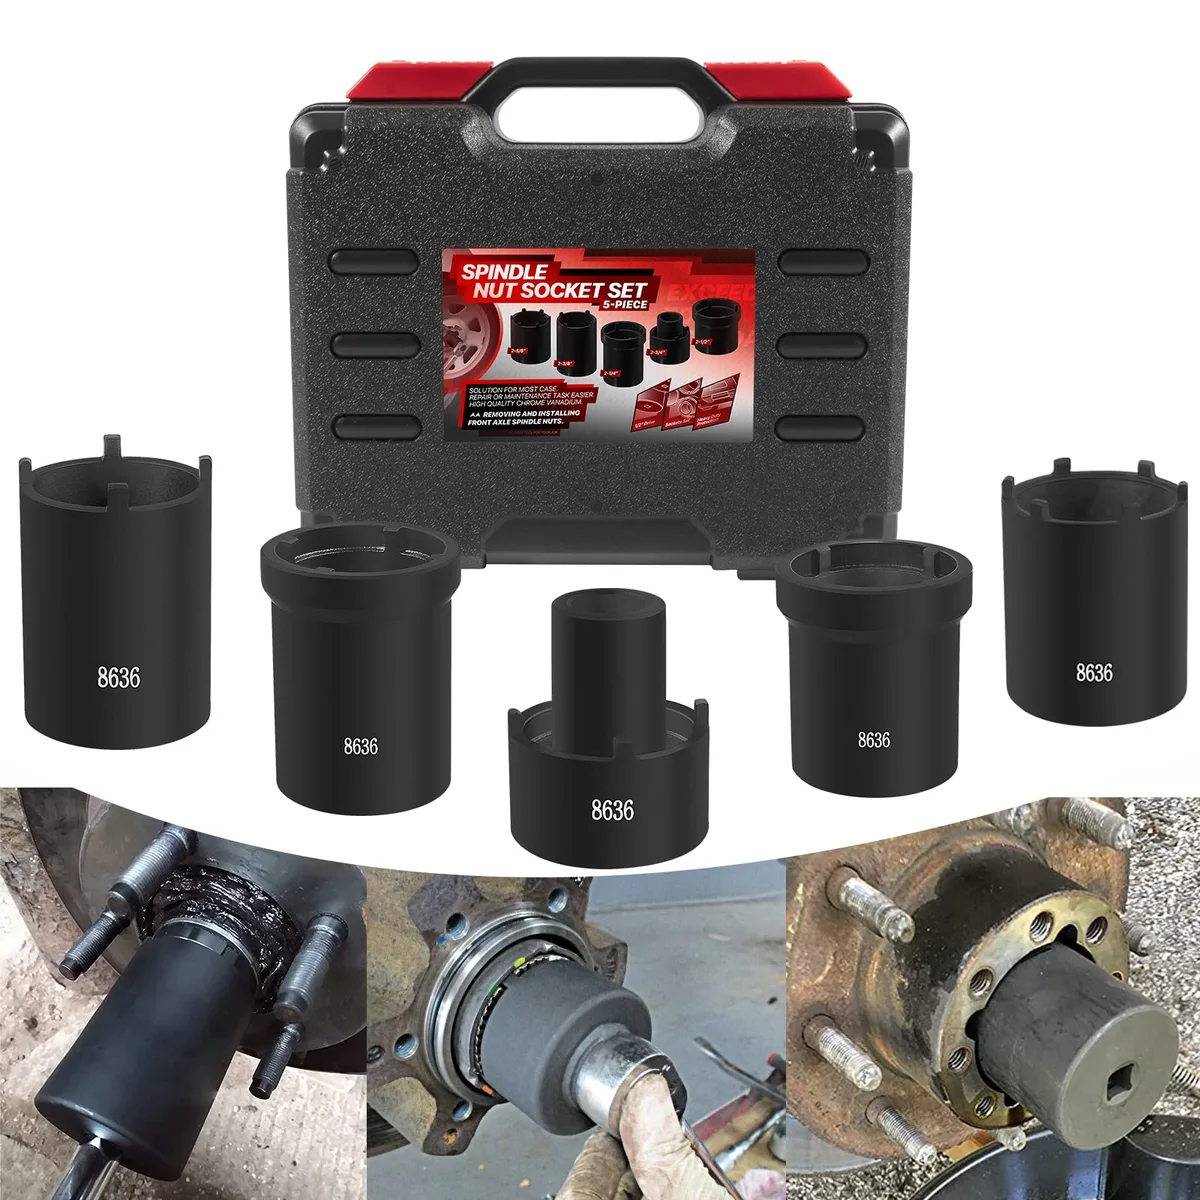
Image source: Web (Bing) / snapklik.com (Web image (fair-use with source credit))
Even experienced mechanics fall into visual traps when selecting specialty tools. These mistakes cost time, money, and sometimes entire components. Let's walk through the most frequent errors so you can avoid them.
Stripped Sockets from Poor Engagement
A socket that does not fully seat on a fastener will round edges under load. This happens when you use a 6-point socket on a 12-point bolt or when the socket diameter is slightly too large. Always match the point count and confirm the socket slides onto the fastener with minimal lateral play before applying force.
Wrong Jaw Configuration on Pullers
Bearing puller jaws come in straight, curved, and hooked styles. Using a straight jaw on an internal race will slip off under pressure. Curved jaws lock into the recess between the race and housing.
Hooked jaws grip the outer edge of external bearings. Check the jaw shape against your application before tightening the central screw.
Incorrect Drive Size Adapters
Many specialty tools require adapter pins or square drives. Forcing a 3/8-inch adapter into a 1/2-inch drive breaks the interface. Inspect the drive hole size and compare it to your ratchet square before installation.
A quick measuring tape check saves frustration later.
Ignoring Material Markings
Cheap tools often omit hardness ratings or material stamps. If a socket lacks any marking, assume it is soft chrome-plated steel rather than hardened chrome vanadium. Soft tools deform under torque and can shatter unexpectedly.
Only trust marked tools from reputable manufacturers.
Mismatched Thread Sizes
Puller center screws and spindle threads vary widely. Using a metric screw on an imperial housing cross-threads instantly. Verify thread pitch and diameter using a thread gauge or by comparing against a known good fastener.
When in doubt, consult Automotive Pullers: The Complete Buyer's Guide for detailed sizing references.
Visual inspection of every tool before purchase and use eliminates most avoidable failures. A few seconds of close examination pays for itself many times over during actual repair work.
Critical Features to Inspect: Materials, Coatings, and Design Details
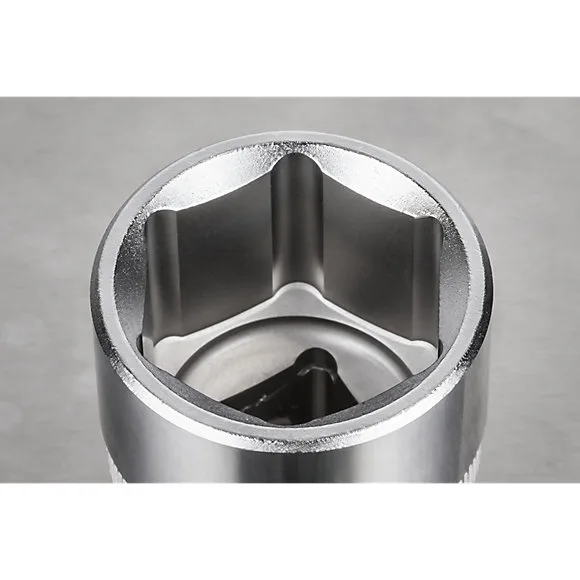
Image source: Bing (Web (fair-use with source credit))
The longevity and safety of any specialty tool depend on three factors: material grade, surface coating, and engineering design. You can spot quality at a glance if you know where to look.
Material Grade and Hardness
Premium specialty tools use chrome vanadium steel, designated Cr-V or 6150 alloy. This material holds a deeper heat treatment than standard carbon steel. Look for etched markings indicating HRC 48 to 60 hardness.
Tools stamped only with "chrome" or "vanadium" without a percentage are likely lower-grade imports. A magnet test also helps. High-quality steel responds weakly to magnets, while cheap soft steel sticks strongly.
Surface Coating Options
Chrome plating provides corrosion resistance and easy cleaning. Black oxide finishes reduce glare and resist rust better in humid environments. Some tools feature a nickel-chrome combo for extra durability in harsh shop conditions.
Avoid uncoated black steel unless you plan to oil it immediately after each use.
Jaw and Contact Point Design
Puller jaws should have sharpened, replaceable teeth that dig into metal races without slipping. Socket interiors must show uniform point engagement with no uneven gaps. Ball joint separators need tapered wedges that spread evenly under pressure.
Examine contact surfaces under bright light for casting flaws or rough machining marks.
Drive Interface Quality
The square drive hole should be precisely machined with chamfered edges. A poorly finished drive creates vibration and accelerates wear on your ratchet. Check for runout by spinning the tool on a flat surface.
Any wobble indicates misalignment that will cause binding under load.
Ergonomic and Safety Features
Deep sockets often include magnetic inserts or rubber balls to retain hardware. Weight distribution matters for hand-held compressors and separators. Tools with balanced centers reduce fatigue during extended use.
Look for knurled grip zones on adjustment knobs and smooth-acting locking mechanisms on band-style ring compressors.
Manufacturer specifications from OSHA-aligned hand tool safety standards emphasize proper material selection and inspection protocols to prevent workplace injuries. Following those guidelines ensures your tools remain safe and reliable throughout their service life.
Cost, Buying Options, and Smart Tool Kit Strategies
Specialty automotive tools span a wide price range depending on brand, material, and intended use frequency. Understanding the market helps you invest wisely instead of overspending or buying cheap replacements twice.
Pricing Tiers Explained
Entry-level specialty tools cost between $15 and $50 per item. These are often imported brands with basic chrome plating and softer steel cores. Professional-grade tools from brands like Snap-on, Matco, and Kent-Moore range from $50 to $200 each, with lifetime warranties as standard.
Competition and OEM-reproduction tools can exceed $200 for single items like harmonic balancer pullers or precision valve spring compressors.
Individual Purchase vs. Complete Sets
Buying a single specialty tool makes sense for one-time repairs. A complete kit saves money over time if you perform multiple engine or suspension jobs regularly. Bearing puller sets and socket kits often include more value than purchasing components separately.
Evaluate your projected usage before committing to a bundle.
Where to Buy Specialty Tools
Authorized dealer networks offer the widest selection and warranty support. Online retailers provide competitive pricing but require careful verification of seller authenticity. Factory outlets and refurbished tool programs deliver professional quality at reduced costs when certification is included.
Always purchase from verified distributors to avoid counterfeit products that fail under torque.
Building a Practical Toolkit on a Budget
Start with the five most frequently needed specialty tools: a caliper windback set, a basic bearing puller kit, a piston ring compressor, a harmonic balancer puller, and a valve spring compressor. Expand gradually as your projects demand more specialized items. Store each tool in labeled containers to prevent loss and maintain readiness.
| Tool Category | Entry-Level Range | Pro-Grade Range | Best For |
|---|---|---|---|
| Valve spring compressor | $30–$60 | $80–$180 | Engine rebuilds |
| Piston ring compressor | $20–$45 | $50–$120 | Block service |
| Caliper windback tool | $15–$35 | $40–$90 | Brake jobs |
| Harmonic balancer puller | $40–$80 | $100–$200 | Crank removal |
| Bearing puller set | $35–$70 | $90–$180 | Suspension work |
Smart buyers research specifications before purchasing and prioritize durability over initial cost savings. A $150 professional harmonic balancer puller typically lasts decades, while a $40 bargain may fracture after three uses on seized components. Factor in warranty coverage, return policies, and availability of replacement parts like jaws and screws when making your decision.
Safety Protocols and Long-Term Tool Maintenance
Using specialty tools safely requires following basic precautions that prevent injury and equipment damage. Always wear safety glasses when applying force to stubborn fasteners or bearings. Steel fragments can break free under high tension and cause serious eye damage.
Inspect every tool before use. Look for cracks, rounded edges, or stripped threads that could fail unexpectedly. If a bearing puller jaw shows wear or a socket has mushroomed edges, replace it immediately.
Continuing to use damaged tools increases the risk of component failure mid-job.
Follow proper torque application techniques. Apply steady, controlled force rather than sudden impacts on brittle components. When using a harmonic balancer puller, tighten the center screw gradually while checking alignment frequently.
An off-center pull can fracture the balancer hub or bend the crank snout threads.
Store tools in a dry, organized environment. After each use, wipe down metal surfaces with a clean cloth and apply a light coat of machine oil to prevent rust formation. Keep band-style ring compressors loosened to relieve spring tension during storage.
This preserves the metal's temper and extends tool life significantly.
When to Seek Professional Help
Certain repairs exceed the scope of DIY specialty tool use. Seized bearings that resist standard pullers, damaged transmission housings, or complex timing system work often require professional-grade hydraulic equipment. If you encounter resistance that standard techniques cannot overcome, consult OSHA hand tool safety guidelines for workplace protection standards and consider seeking assistance from a certified technician.
Proper maintenance transforms a $200 specialty tool into a decades-long investment. Clean, inspect, and store your implements correctly after every project, and they will serve you reliably through countless repairs ahead.
Frequently Asked Questions
Can I use general mechanic tools instead of specialty automotive tools?
General tools can sometimes substitute for specialty implements in emergency situations, but they carry significant risk. A standard socket may slip off a CV axle nut and round off the fastener. Improvised bearing removal often damages surrounding components beyond repair.
Specialty tools engage parts precisely and distribute force evenly, protecting expensive engine and suspension components from avoidable harm during service procedures.
How do I know which piston ring compressor fits my engine?
Measure your piston diameter and ring compression height before purchasing a compressor. Band-style compressors fit most applications up to 4.5-inch bores, while collar-style units suit specific racing or heavy-duty engines. Check manufacturer specifications against your engine displacement and block diameter.
Verify that the band width matches your ring pack configuration for proper compression during cylinder installation.
What is the difference between 6-point and 12-point specialty sockets?
Six-point sockets engage flat surfaces on fasteners and resist rounding under high torque loads. Twelve-point sockets offer dual engagement angles for quicker positioning in tight spaces but provide less surface contact. For specialty applications like CV axle nuts and harmonic balancers, six-point designs are preferred because they grip harder, more irregular fastener shapes securely without slipping during removal.
How often should I replace worn specialty automotive tools?
Replace tools showing visible wear, cracking, or loss of structural integrity immediately. Socket walls thinner than 0.060 inches, bearing puller jaws with rounded gripping teeth, or compressed spring bands that no longer tension properly all indicate end-of-life conditions. With proper maintenance, quality chrome vanadium tools can last decades of regular shop use before requiring replacement.
Are refurbished specialty tools worth purchasing?
Refurbished tools from authorized dealers offer professional-grade quality at reduced prices when certification is included. These items undergo inspection, replacement of worn parts, and reconditioning to meet original specifications. Avoid uncertified used tools from online marketplaces where material grade and heat treatment history remain unknown.
Authorized refurbishment programs typically include limited warranties that protect your investment.
What storage solutions work best for oddly shaped specialty tools?
Custom foam inserts in portable cases keep each specialty tool separated and protected from damage. Label containers clearly with tool names and intended applications for quick identification during busy repair sessions. Magnetic strips mounted on workshop walls organize smaller items like bearing puller jaws and socket adapters while keeping them visible and accessible during active projects.