Best Pullers for Car Repair: Essential Tools You Need
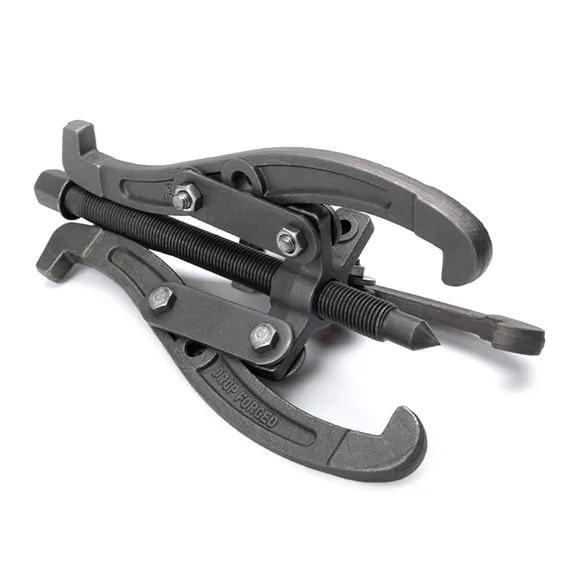
You're staring at a rusted hub or a seized bearing and the hammer feels like the fastest solution. That impulse is exactly why so many DIY repairs turn into expensive replacements. The right set of pullers for car repair saves time and protects the integrity of expensive components like crankshafts and transmission cases.
Mechanics rely on controlled mechanical advantage because impact methods often cause more damage than the problem itself. Once you understand how each tool applies force differently, you'll know exactly which one belongs in your hand for any given job.
Quick Answer
Pullers for car repair are simple machines designed to remove stubborn parts without impact damage. The three most common types are the gear puller, slide hammer, and hydraulic puller. A two-jaw or three-jaw gear puller handles most gears, pulleys, and loose-fit bearings.
A slide hammer excels at pulling bearings deep inside a hub or casing. Always match the tool's tonnage rating to the force required by the specific component.
Why You Can't Just Hammer It Out
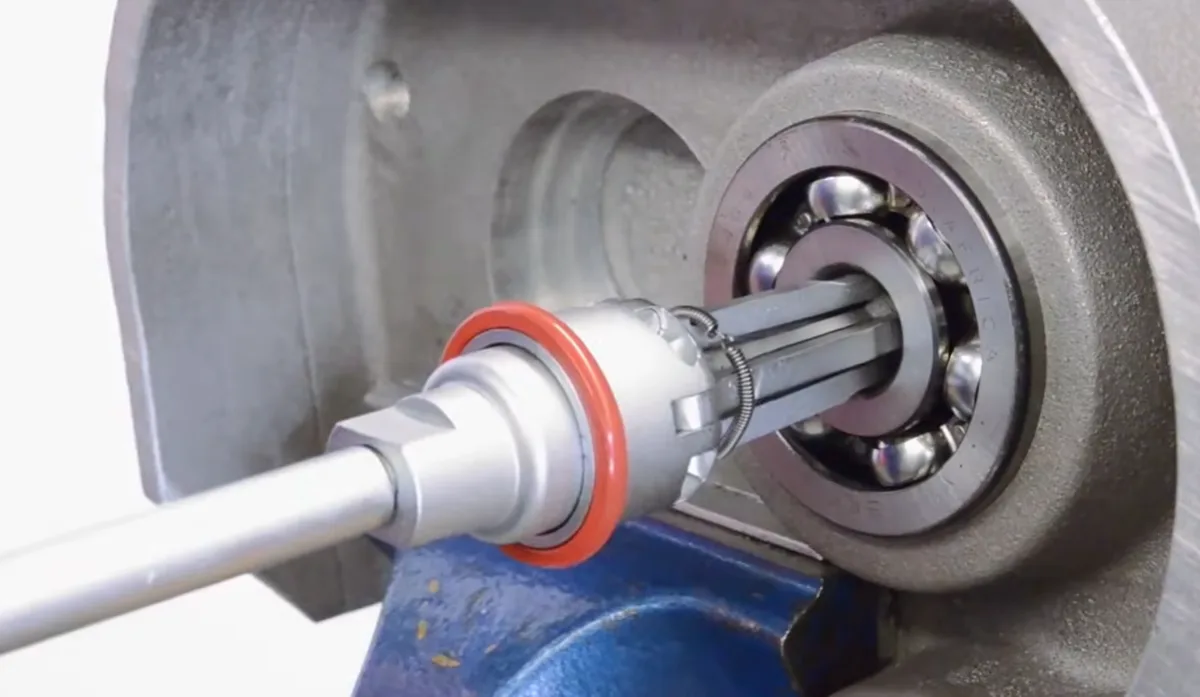
The urge to smash a stuck part loose is universal. Everyone has held a hammer and thought a few sharp blows would solve the problem. However, the physics of an interference fit mean that blunt force rarely solves anything.
Impact shatters the metal bonds holding the bearing in place, but it also destroys the shaft and housing in the process.
Manufacturer specifications, often aligned with SAE standards, consistently warn against using hammers on precision engine components. An over-torqued strike can crack a cast aluminum housing instantly. A bruised shaft journal will ruin a new seal the moment you install it.
This is why learning to properly remove a wheel bearing requires patience and the right equipment.
Common damage from impact methods includes:
- Cracked transmission or differential housings
- Distorted shaft diameters leading to vibration
- Shattered outer races sending metal shards everywhere
- Damaged threads on critical fasteners
Using the correct puller types for your specific task prevents these catastrophic failures. Mechanical pullers apply steady, even pressure that expands the outer race evenly. This controlled release keeps the mating surfaces smooth and ready for reassembly.
It is a small shift in mindset that separates a successful repair from a trip to the scrap yard.
The 5 Main Types of Pullers and What They Actually Do
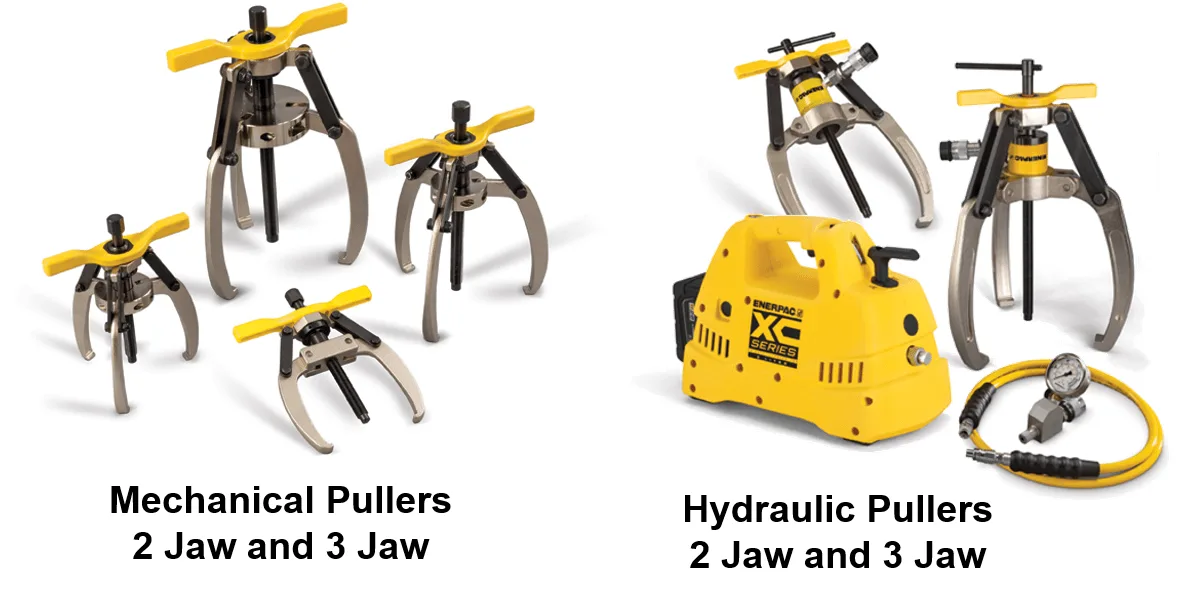
Not every stuck part requires the same approach. Understanding the fundamental design differences helps you select the tool that will actually work. The market offers several distinct categories, each engineered for a specific type of removal challenge.
Two-Jaw Pullers
These are the simplest tools in the box. They feature two adjustable arms that grip behind the part while a central screw pushes against the shaft. They work best for pulleys, flywheels, and loose-fit bearings where you have clear access to the back side.
Three-Jaw Pullers
The three-jaw model provides superior balance and stability. The third leg centers the load automatically, preventing the tool from tilting under heavy strain. This makes it ideal for heavier gears, sprockets, and tight-fit bearings.
Most enthusiasts should start with a high-quality automotive puller kit containing both two and three-jaw configurations.
Gear Pullers
Often called split jaw pullers, these use hinged hooks that wrap around the part rather than gripping the back edge. They are excellent for situations where you cannot reach behind the component. This design allows you to pull from the face of the part safely.
Slide Hammers
Slide hammers use inertia rather than static leverage. You slide a weighted handle back and forth along a bar to create rapid, sharp tugs. This technique breaks the corrosion bond on deeply seated bearings.
They are indispensable for removing bearings from the center of a hub assembly.
Hydraulic Pullers
These high-end tools use fluid power to generate immense, controllable force. They are typically used in professional shops for massive differential gears or heavily rusted industrial components. They eliminate the physical effort required by manual screw models entirely.
How to Pick the Right Puller for Your Specific Job
Choosing the correct tool comes down to three specific variables: the part geometry, the available clearance, and the expected resistance. If you try to force a slide hammer into a tight engine bay, you will fail. If you use a tiny gear puller on a massive flywheel, you will bend the arms.
Start by identifying the component you need to extract. Is it a pulley on the front of an engine? Is it a bearing pressed into a hub?
Is it an internal seal inside a casing?
Next, assess your clearance. Look at the space surrounding the part. You need room for the puller arms to swing and attach securely.
If the surrounding brackets are close, you must choose a compact tool. A standard three-jaw puller might not fit where a specialized internal puller or a thin-profile slide hammer would work perfectly.
Finally, match the capacity to the job. Never guess the force required. Look at the manufacturer's recommended torque or the known interference fit.
Select a puller rated for at least double that force. Running a tool to its maximum limit is dangerous and often ineffective. Proper selection ensures the tool does the work, not your sweat.
Step-by-Step: Setting Up and Using a Puller Safely
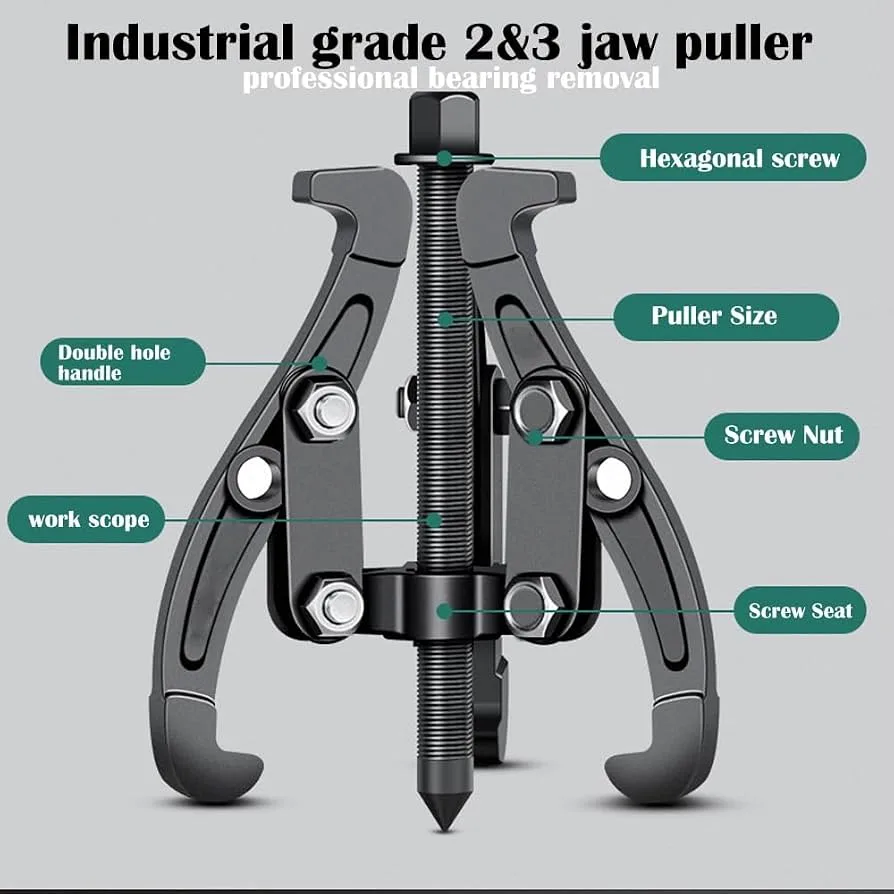
Proper setup is the difference between a smooth removal and a damaged part. Follow this workflow to ensure safety and effectiveness every time you use a puller.
Preparation and Inspection
Clean the area around the part you intend to pull. Remove dirt and grease that could prevent the jaws from seating correctly. Inspect the puller arms for cracks or bends.
Check that the center screw moves freely and the threads are not stripped. Lubricate the screw threads and the jaw contact points with a light machine oil.
Positioning the Jaws
Attach the jaws to the part securely. Ensure they are seated as far back under the component as possible. For two-jaw pullers, adjust the arms so they are roughly parallel to each other.
This prevents the tool from twisting under load. Make sure the central screw is perfectly aligned with the center of the shaft or axle.
Applying Force
Tighten the center screw steadily. Apply even pressure and pause frequently to check alignment. If the tool starts to lean, stop immediately.
Loosen it, realign, and try again. For extremely stubborn parts, apply a quality penetrating oil and wait fifteen minutes before applying more force. Do not use a cheater bar on the wrench.
Excessive torque will strip the threads or snap the screw.
Troubleshooting Stuck Parts
If the part refuses to move, do not panic. Sometimes the bearing has rotated with the shaft. Try tapping the shoulder of the shaft gently with a soft-faced mallet to free it.
If that fails, apply heat to the outer race of the bearing using a propane torch. The heat expands the outer race, breaking the friction hold. Always wear safety glasses when applying heat or striking components.
Common Mistakes That Ruin Bearings and Shafts
Even experienced mechanics make errors when rushing a job. These common mistakes lead to ruined components and wasted money. Avoiding these pitfalls will save you hours of frustration.
Misalignment is Fatal
The most common error is pulling at an angle. If the center screw is not coaxial with the shaft, the puller will bind. This puts uneven stress on the jaws and the bearing.
It often results in a bent puller arm or a scored shaft surface. Always verify alignment from multiple angles before applying full pressure.
Jumping Capacity Grades
Using an undersized puller is a recipe for broken tools. When the capacity is exceeded, the metal yields permanently. You might bend a jaw or strip the screw thread mid-operation.
This leaves you stranded with a stuck part and a broken tool. Always choose a tool rated significantly higher than the estimated resistance.
Ignoring Clearance Issues
Forcing a large puller into a cramped space often leads to accidental damage. You might scratch a painted surface, dent a nearby bracket, or strip a bolt head by slipping the wrench. Take the time to measure your workspace accurately before selecting your tool.
Improper Jaw Contact
Gripping the face of a gear or pulley instead of the back edge can crush the part. Soft metal components like aluminum flywheels or plastic timing covers will deform under jaw pressure. Always grip the strongest, hardest part of the assembly, usually the metal hub or the back flange.
What Quality Pullers Cost and Where to Invest
Pricing varies widely depending on material quality and intended duty cycle. Entry-level consumer tools can be tempting, but they often lack the heat treatment and thread hardness needed for serious automotive work. Investing in quality matters most when you tackle demanding jobs regularly.
Budget Options Under $30
Basic two-jaw pullers and small three-jaw kits fall into this range. These are adequate for light pulley removals and occasional DIY tasks. However, the steel is often softer and more prone to bending under heavy loads.
Thread quality may be inconsistent, leading to stripped screws during critical moments.
Mid-Range Professional Kits ($50 to $150)
This sweet spot offers chrome vanadium steel construction and reliable threading. Reputable brands dominate this tier with comprehensive accessory sets. You get interchangeable jaws, protective shoes, and multiple shank sizes.
This range handles most household and garage repair scenarios effectively.
Heavy-Duty Hydraulic Systems ($200 to $600+)
Hydraulic pullers multiply force effortlessly and reduce physical strain significantly. These systems are essential for massive flywheels, industrial bearings, or severely corroded components. Professional shops rely on them for daily heavy-duty extraction work.
The initial investment pays dividends in saved labor time and reduced part damage.
| Price Tier | Typical Range | Best Use Case | Expected Longevity |
|---|---|---|---|
| Entry-Level | $12 to $30 | Light pulley tasks | 1 to 3 years occasionally |
| Mid-Range | $50 to $150 | Regular home mechanics | 5 to 10+ years properly maintained |
| Professional | $200 to $600 | Frequent shop use | 10 to 20+ years with care |
| Industrial | $500+ | Daily heavy extraction | Decades with replacement parts |
When to Buy Individual Tools Versus Kits
Kits provide versatility and convenience at a slightly higher overall cost. They include multiple jaw configurations and accessories you might need eventually. Individual premium tools offer superior build quality for specific applications.
If you know you will only ever pull slide hammers or specific bearing separators, buying singles makes financial sense. Most hobbyists benefit most from a solid mid-range kit as their foundation.
Frequently Asked Questions
Can I Use a Pipe Wrench as a Bearing Puller?
You should never attempt this. Pipe wrenches are designed for gripping smooth pipes, not extracting pressed components. The aggressive teeth will maul the bearing surface and likely slip violently.
This creates significant safety hazards and guarantees part damage. Always use a purpose-built puller for any extraction task.
How Do I Remove an Internal Seal Without Damage?
Internal seals require specialized pullers with hooked jaws that engage from the inside. Standard external pullers cannot reach these components. You need an internal bearing puller with expandable hooks or a dedicated seal pick set.
Insert the tool behind the seal lip, expand the hooks gently, and apply steady outward pressure. Never pry from the seal face itself.
What Is the Difference Between a Gear Puller and a Bearing Puller?
Gear pullers typically refer to three-jaw designs with parallel arms suited for external components like sprockets and pulleys. Bearing pullers is a broader category including internal extractors, slide hammers, and specialty jaw configurations. Many tools overlap functionality.
A quality three-jaw puller removes both gears and many bearing types effectively.
Should I Heat a Seized Bearing Before Pulling It?
Yes, controlled heat application is a standard and effective technique. Heating the outer race causes thermal expansion, breaking the friction interference fit. Apply heat evenly around the bearing outer circumference using a propane torch.
Avoid heating the inner shaft directly, as this can alter its metallurgy. Let the part cool before attempting further removal.
Is It Safe to Use a Cheater Bar for Extra Leverage?
No, this practice risks catastrophic tool failure. Extension bars exceed the engineered torque limits of the center screw. Stripped threads or sheared screws create dangerous projectiles and leave you stranded.
Instead, switch to a larger capacity puller or apply penetrating oil with patience. Proper tool selection always beats improvised force multipliers.