A Complete Guide to Removing Bearings with a Puller: 3 Easy Steps
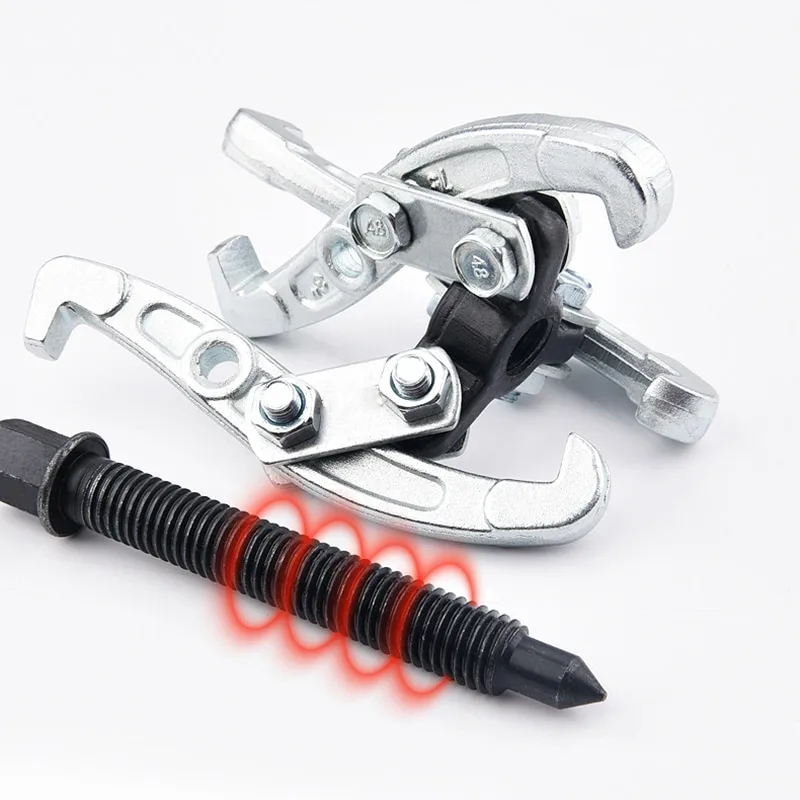
Image source: Bing (Web (fair-use with source credit))
How to Remove a Wheel Bearing With a Puller
There is nothing worse than stripping threads or cracking a hub while you are trying to replace a worn wheel bearing. Learning how to remove a wheel bearing with a puller correctly saves you hours of frustration and hundreds of dollars in damaged parts. Most failed attempts happen because people rush through preparation or use the wrong tool for the job.
Manufacturer specifications indicate that proper axle nut torque ranges from 150 to 250 lb-ft depending on the vehicle, but getting the bearing out safely requires more than just strength and the right puller. You need a solid understanding of your tool choices and the steps involved before you ever lift the vehicle. Let us walk through everything you need to know to do this right.
Why This Procedure Demands Precision and Respect
You might think pulling out a wheel bearing is straightforward, but it is one of those tasks where cutting corners leads to expensive mistakes. The hub assembly holds your wheel in place while you drive. Get this wrong and you are looking at a safety hazard that could leave you stranded on the highway.
The bearing sits in a tight press-fit inside the hub. That means the inner race is compressed onto the shaft with thousands of pounds of force holding it in place. Trying to force it out the wrong way can crack the hub, strip threads, or damage the bearing seating surface.
Learn more about the complete removal procedure here. Understanding the full process from start to finish gives you a clearer picture of why each step matters.
OSHA guidelines for automotive repair emphasize proper tool selection and safe work practices to prevent injury. Their recommendations around secure vehicle support and hand protection apply directly to bearing removal work. Taking shortcuts here does not pay off.
The right approach takes patience and the right tools. But when you get it done properly, you save money by avoiding hub damage and you keep your vehicle safe. That is worth the extra time upfront.
Selecting the Right Puller and Supporting Tools
Choosing the right puller makes the difference between a smooth extraction and a damaged hub. Your options depend on the type of bearing and the space you have to work with in the wheel well.
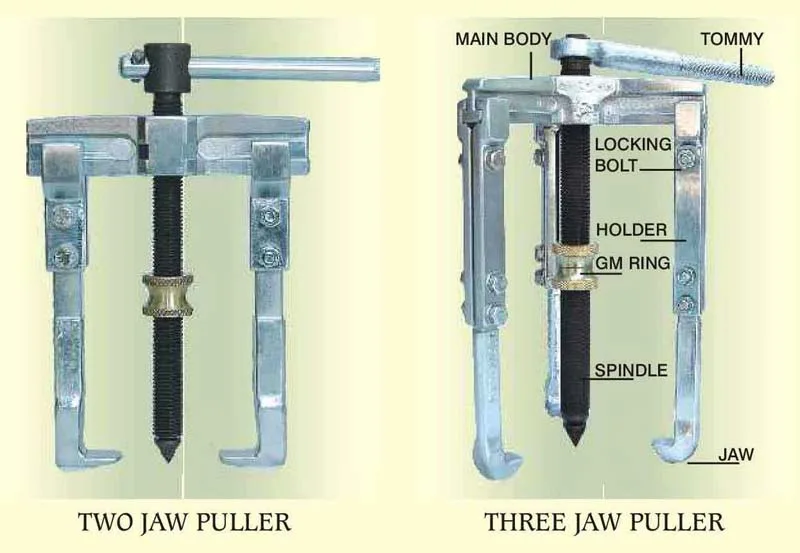
Two-jaw pullers work well for most standard applications. They grip the outer edge of the bearing or hub and apply even force. Three-jaw pullers give you better balance on larger or heavier assemblies. They distribute pulling force across three contact points, which reduces the chance of tilting the bearing as it comes free.
When choosing a puller, check our guide on finding the right tool for the job before you buy. It helps you match the tool to your specific needs.
| Puller Type | Best For | Capacity Range |
|---|---|---|
| Two-jaw mechanical | Light to medium duty | 1 to 5 tons |
| Three-jaw mechanical | Heavy hubs and bearings | 3 to 10 tons |
| Slide hammer | Deep-set or seized bearings | 1 to 3 tons |
Slide hammer pullers are worth considering for stubborn or corroded bearings. They deliver a sharp impact force that breaks corrosion bonds without hammering the bearing itself. However, they require more skill to control and can cause damage if you miss your mark.
You also need supporting tools and accessories. Make sure you have a quality torque wrench, socket set, wrench set, jack stands rated for your vehicle weight, and penetrating oil for corroded parts. A bearing separator tool can also help lift bearings clear of their seats.
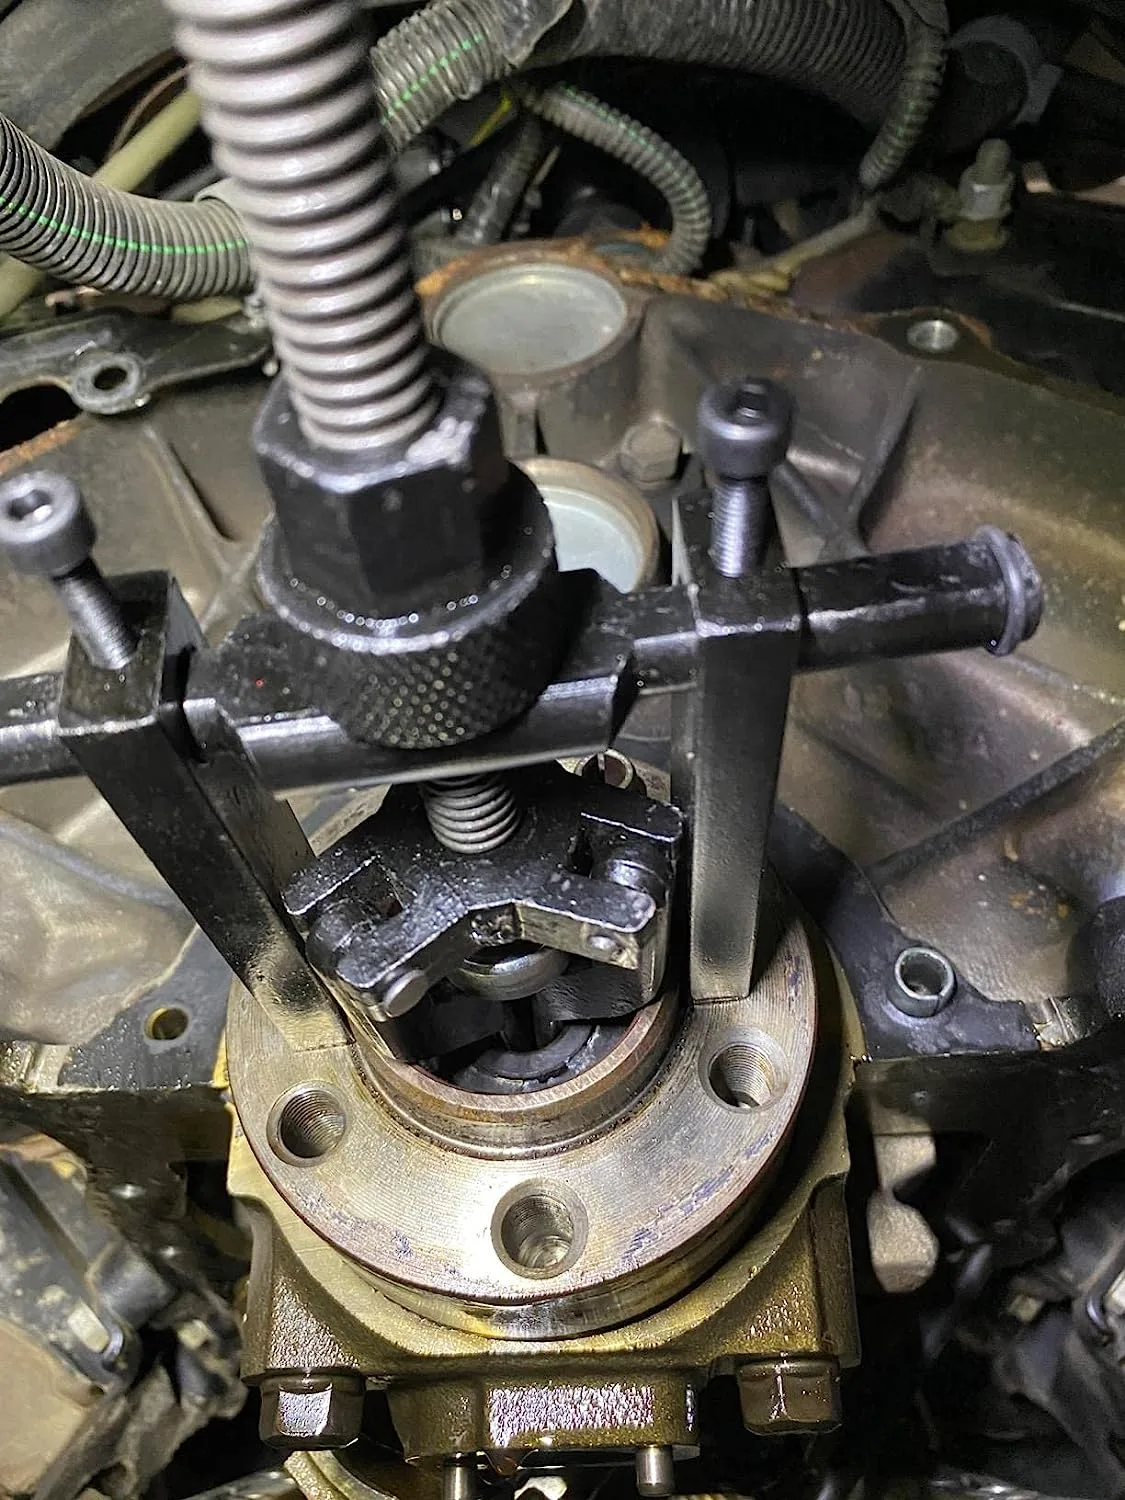
The puller you select should exceed the estimated force needed for your application. If your vehicle has a heavy truck or SUV hub, a 5-ton puller minimum keeps you in safe territory. Do not cheap out on the puller itself.
A $30 puller that strips threads mid-job costs more than a quality tool that gets the job done clean.
The Step-by-Step Process: Removing Your Wheel Bearing Safely
Follow these steps in order and you will remove the bearing without damage. Each step builds on the last, so do not skip ahead or rush.
Lifting and Securing the Vehicle Properly
Park on a level surface and engage the parking brake. Loosen the lug nuts slightly while the wheel is still on the ground. Then raise the vehicle with a floor jack and secure it on jack stands rated for your vehicle weight.
Never work under a vehicle supported only by a jack.
Remove the lug nuts and take off the wheel. Set it aside somewhere safe so it does not roll around the workspace.
Disassembling Brakes and Suspension Components
Remove the brake caliper and hang it safely out of the way. Do not let it dangle by the brake line. Take off the brake rotor or drum to expose the hub assembly.
Depending on your vehicle, you may need to remove the tie-rod end or control arm bolt to free the knuckle. Use penetrating oil on any seized bolts and let it sit for 10 minutes before attempting removal.
Removing the Axle Nut and Cotter Pin
The axle nut holds the hub assembly on the steering knuckle. It is often staked in place, so you may need to punch out the stake first. Use a socket and breaker bar to loosen the nut.
Some vehicles require the wheel to be on the ground while loosening the axle nut to prevent the hub from spinning.
Remove the cotter pin and extract the axle nut. Set both aside in a safe place where they will not get lost.
Extracting the Hub Assembly from the Knuckle
With the suspension components loose, you can now separate the hub from the knuckle. This may require tapping the back of the knuckle with a rubber mallet. Avoid striking the hub directly, as this can damage the bearing or seal.
Once free, set the hub assembly on a clean work surface with the bearing facing up.
Positioning the Puller Correctly
This is the critical step. Place the puller body over the hub so the center screw contacts the axle thread or a suitable pulling surface. Position the jaws under the bearing lip or outer race, never against the inner race or the hub face.
Adjust the jaws so they are evenly engaged and the puller body is centered. Tighten the center screw just enough to take up slack. Do not force it yet.
Applying Steady Pressure Without Force Strikes
Turn the center screw steadily and apply even pressure. The bearing should begin to move slowly. If it resists, stop and check your jaw placement.
Never hammer on the puller screw or try to shock the bearing loose.
Apply penetrating oil to the bearing interface if corrosion is present. Give it time to work before applying more force.
Inspecting the Hub After Bearing Removal
Once the bearing is free, inspect the hub surface thoroughly. Look for scoring, burrs, or corrosion that could affect the new bearing installation. Clean the surface with a fine abrasive pad if needed.
Any debris left on the hub will cause premature failure of the replacement bearing.
Dangerous Mistakes That Cost Time, Money, and Safety
Most wheel bearing removal failures come from the same handful of mistakes. Avoid these and you will save yourself serious headaches.
Never Strike the Bearing Directly With a Hammer
Hammering a bearing is one of the most common mistakes DIYers make. The impact deforms the bearing race, cracks the hub material, and ruins the precision fit that new bearings require.
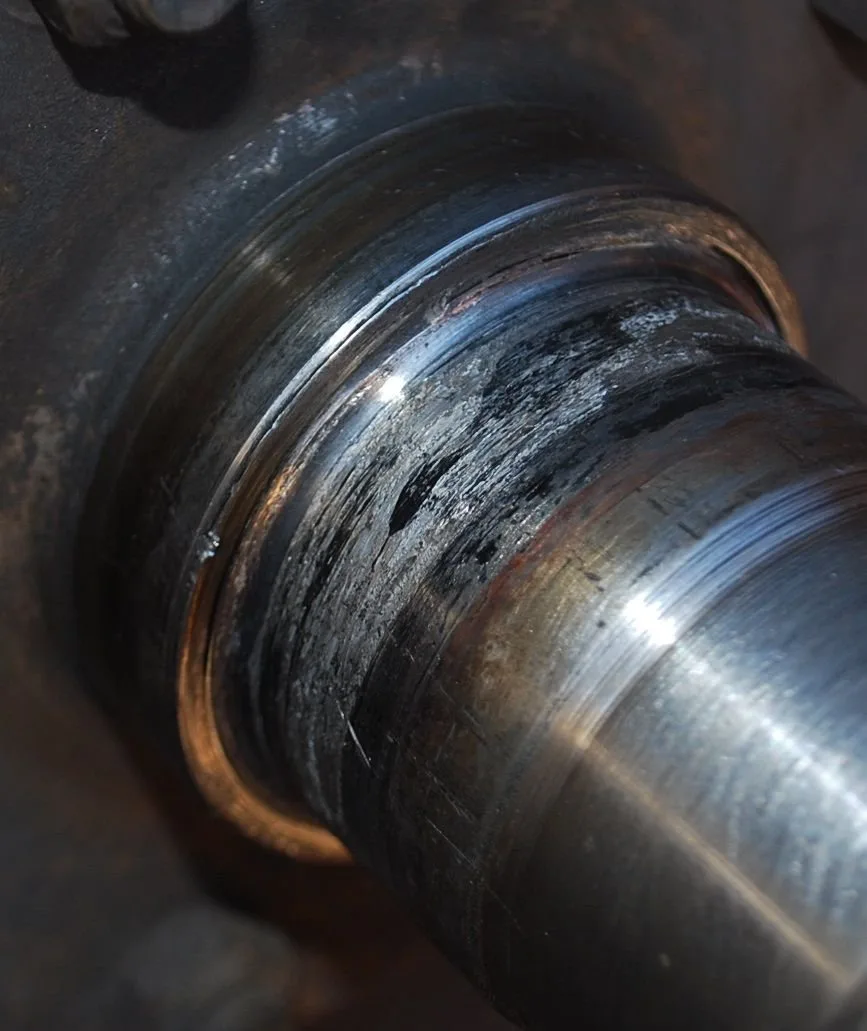
Even gentle taps with a steel hammer can damage the soft steel of a bearing race. The image above shows what happens when a hammer strike damages the bearing race surface. That kind of damage compromises the seal and leads to premature failure of your new bearing.
If a bearing seems stuck, apply penetrating oil and let it soak. Use a proper puller with steady pressure instead of brute force. You will thank yourself later when the new bearing seats cleanly and lasts.
Avoiding Jaw Placement Errors That Break Bearings
Placing puller jaws on the wrong part of the bearing causes immediate damage. Never pull on the inner race, the seal, or the hub face itself. The jaws must grip the outer lip or race where force transfers safely through the bearing structure.
Jaw placement errors can crack the bearing cage, deform the race, or split the outer ring. A $20 bearing becomes a $200 hub replacement when you damage it during removal.
Preventing Stripped Threads and Damaged Hubs
Stripped puller threads are a real risk when you overtighten or misalign the tool. Always start the center screw straight and apply gradual pressure. If you feel binding, back off and reposition.
Do not force a misaligned screw.
Damaged hub threads from improper axle nut removal can also cause problems. Use the correct socket size and avoid rounding the nut. If the nut is seized, apply penetrating oil and let it work.
Do not use an impact wrench blindly, as it can damage the axle threads.
The Dangers of Incorrect Torque Procedures
Axle nut torque is critical to wheel safety. Under-torquing allows the hub to move and can lead to bearing failure or wheel separation. Over-torquing stretches the nut and axle threads, reducing clamping force and risking failure.
Always follow the manufacturer specification for your vehicle. Use a calibrated torque wrench and double-check your work. The torque spec for most passenger vehicles falls between 150 and 250 lb-ft.
Check your wheel bearing and hub removal guide for vehicle-specific details.
When Professional Assistance Is the Smart Move
Some situations call for professional help, and admitting that is not a sign of weakness. It is a sign of experience. Here are the scenarios where walking away from the job is the right call.
Recognizing Seized or Corroded Bearings
If the bearing is completely seized into the hub and no amount of penetrating oil or careful pulling moves it, you may need specialized equipment. Automotive shops have hydraulic presses and industrial heat guns that can handle extreme cases safely.
Heavy corrosion from road salt exposure or water ingress can weld the bearing to the hub. Attempting to force these with consumer-grade pullers risks damaging both components. A shop can extract the bearing cleanly or replace the entire hub assembly if needed.
Identifying When You Lack Proper Equipment
Not every job can be done with basic hand tools. If your vehicle uses a sealed hub assembly that requires a press to remove, you need shop equipment. Similarly, if the knuckle design blocks access for a standard puller, you may need a specialized tool like a blind bearing puller for automotive applications.
Knowing your equipment limits saves you from buying tools you will only use once. If you find yourself frequently working on different vehicles, investing in a quality tool set pays for itself quickly.
Knowing Your Limits With Critical Safety Components
The wheel bearing and hub assembly are safety-critical components. They hold your wheel to the vehicle while you are driving at highway speeds. If you are unsure about any step in the process, seeking professional help is the responsible choice.
A properly installed bearing and correctly torqued axle nut are non-negotiable for safe driving. If you have doubts about your ability to complete the job correctly, take it to a qualified mechanic. The cost of professional service is far less than the cost of a wheel coming loose while you drive.
As of 2026, many vehicles use integrated hub assemblies that are designed for complete replacement rather than bearing-only service. Check whether your vehicle falls into this category before attempting a bearing pull. Replacing the entire assembly can be simpler and more reliable than trying to extract and reinstall a single bearing.
FAQs About Wheel Bearing Removal
Can I Use an Impact Wrench to Remove the Axle Nut?
Yes, but with caution. An impact wrench can loosen a seized axle nut quickly, but you risk rounding off the nut or damaging the axle threads. Always use the correct socket size and apply penetrating oil first.
Finish the removal by hand with a breaker bar to ensure clean thread engagement.
How Do I Know If I Have Damaged the Hub During Extraction?
Inspect the hub surface after bearing removal for scoring, deep scratches, or corrosion pits. Run your fingernail across the seating surface. Any catching indicates damage that could prevent proper bearing installation.
Minor surface imperfections can often be cleaned with a fine abrasive pad, but significant damage requires hub replacement.
What Torque Specification Should I Use for Reassembly?
Axle nut torque varies by vehicle manufacturer and model. Most passenger vehicles specify between 150 and 250 lb-ft for the axle nut. Always consult your owner's manual or a factory service manual for the exact specification.
Use a calibrated torque wrench and verify the setting before tightening.
Is It Worth Replacing the Whole Hub Assembly Instead?
For many modern vehicles, replacing the entire hub assembly is simpler and more reliable than pulling a single bearing. Sealed hub assemblies eliminate alignment issues and come pre-greased and sealed. Check whether your vehicle uses a serviceable bearing or an integrated hub unit before deciding which approach to take.
How Long Does the Entire Process Take?
A typical wheel bearing removal and replacement takes one to two hours for someone with moderate mechanical experience. Factors that extend the time include severe corrosion, difficult access to suspension components, and stripping fasteners. Allow extra time for inspection and cleaning of the hub surface before installing the new bearing.
What Should I Do If the Puller Jaws Slip Off the Bearing?
Stop immediately and reposition the puller. Slipping jaws often indicate improper contact point placement or insufficient jaw engagement depth. Reposition the jaws deeper under the bearing lip and ensure the puller body is centered before applying pressure again.
Never continue pulling with misaligned jaws, as this can damage both the bearing and the puller tool.
[…] the approach rather than applying more force. Heat application or penetrating oil followed by a how to remove a wheel bearing with a puller technique change often succeeds where brute force […]