How to Remove a Wheel Bearing & Hub Assembly (Step-by-Step)
A grinding hum from your wheel that changes pitch when you turn? That's likely a failing wheel bearing, and addressing it early can save you from a far more expensive repair. If you've found yourself searching for wheel bearing & hub removal guides, you're probably wondering whether this is a job for the garage or the shop.
The good news is most homeowners with basic tools can tackle it, though you'll need to choose the right approach for your vehicle.
Per vehicle manufacturer specifications, a properly torqued axle nut typically runs between 150 and 200 pound-feet, and getting that number right separates a bearing that lasts from one that fails in months. Below we walk through how to identify the problem, what parts you're actually dealing with, and exactly what to do next.
Quick Answer
Wheel bearing and hub removal involves loosening the axle nut while the vehicle is on the ground, lifting the car, removing the wheel and brake components, then extracting the hub or bearing assembly using a puller tool. You'll need a torque wrench, socket set, and basic hand tools. Reassembly requires torquing the axle nut to manufacturer specification.
Image source: Bing (Web (fair-use with source credit))
The Sound of Failure: How to Spot a Bad Wheel Bearing
What does a bad wheel bearing sound like?
You'll hear a grinding, growling, or humming noise that comes from one wheel and changes with speed. It often gets louder when you turn, a left turn loads the right bearing and a right turn loads the left. That's because weight shifts and puts extra pressure on the opposite side.
The simplest at-home test
Park on level ground, engage the parking brake, and chock the opposite wheels. Jack up the side you're checking and support it on jack stands. Grab the tire at the top and bottom and wiggle it.
Any play or clunk means the bearing or hub assembly needs attention. Spin the wheel by hand and listen for roughness or grinding.
When to act immediately
If the noise is accompanied by vibration in the steering wheel or floorboard, don't delay. A bearing that fails completely can seize or even separate the wheel from the vehicle. That's not a weekend project risk.
How long do bearings typically last?
Aggregate data and manufacturer specs point to a typical lifespan of 85,000 to 100,000 miles. Harsh conditions like winter road salt, off-road driving, or frequent towing can cut that short considerably. Rough roads and potholes also accelerate wear by jolting the bearing races.
Wheel Bearings vs. Hub Assemblies: What's the Difference
Are they the same thing?
No. A traditional wheel bearing is just the bearing itself, a ring of steel balls trapped between two races. It sits inside the hub, which is the drum-shaped part your wheel bolts to.
Replacing a bearing this way usually requires a press tool to push the old one out and seat the new one.
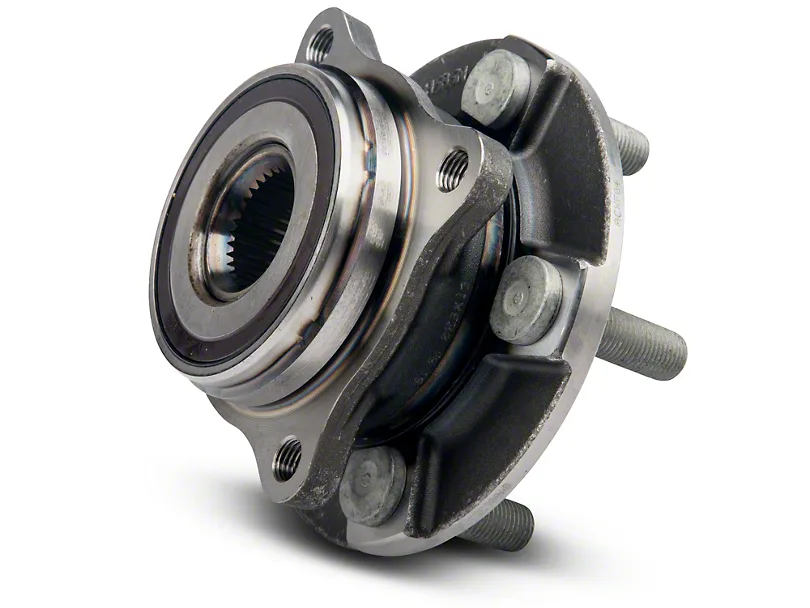
A sealed hub assembly, sometimes called a hub unit, integrates the bearing, hub, and often the ABS tone ring into one pre-greased unit. You unbolt the old one and bolt the new one in place. No pressing required.
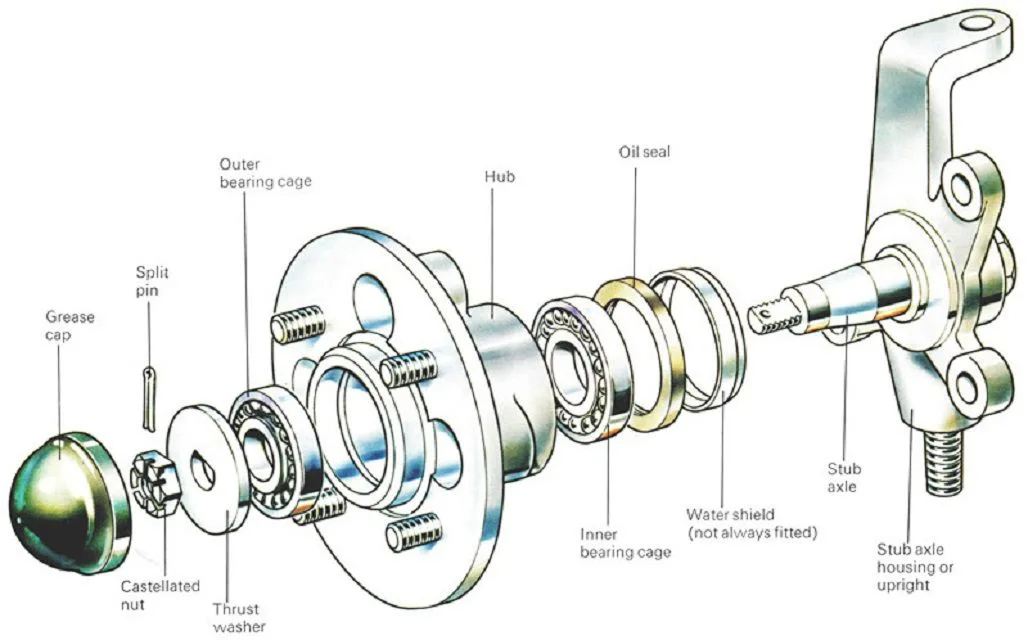
Image source: Web (Bing) / hitchesguide.com (Web image (fair-use with source credit))
Which approach is right for your vehicle?
Most vehicles made after the mid-1990s use sealed hub assemblies. Older cars and some trucks still use serviceable bearings packed with grease. Check your owner's manual or a factory service guide for your specific model year.
Pros and cons at a glance
| Approach | Pros | Cons |
|---|---|---|
| Sealed hub assembly | Bolt-on install, no pressing needed, includes ABS ring | Higher part cost, must replace entire unit |
| Serviceable bearing | Lower part cost, reusable hub if undamaged | Requires press kit, more labor time, skill involved |
The tool trade-off
A traditional bearing swap demands a bearing press or a proper wheel bearing puller, and sometimes a bearing splitter for stubborn units. A sealed hub unit needs nothing more than sockets and a torque wrench. If you already own a quality puller set, the bearing-only route saves money on parts.
If you don't, the hub assembly is the simpler path.
Step-by-Step: Removing a Wheel Bearing and Hub
Safety first
Always work on a flat, solid surface. Use jack stands rated for your vehicle's weight, never rely on a hydraulic jack alone. Wear safety glasses and gloves.
Loose clothing and jewelry can catch on components.
Tools you'll need
- Floor jack and jack stands
- Socket set and ratchet (including an axle nut socket if your model has a large hex nut)
- Torque wrench
- Hub puller or ball joint separator, depending on your vehicle
- Brake tool kit for spreading caliper pistons
- Hammer and drift punch (for cotter pins)
- Bearing grease and seals (if doing a serviceable bearing)
A quality bearing separator can make separating the hub from the knuckle far easier than prying with a screwdriver.
The removal sequence
- Loosen the axle nut while the vehicle is still on the ground. You need resistance to keep it from spinning.
- Lift and support the vehicle, then remove the wheel.
- Remove the brake caliper and hang it from the spring with a bungee, never let it dangle by the hose.
- Disconnect the ABS sensor wire from the bracket.
- Remove the caliper bracket bolts and set the bracket aside.
- Separate the tie rod end or ball joint from the knuckle using a separator tool.
- Pull the hub out of the knuckle. This is where a proper puller tool makes all the difference.
- Extract the old bearing or hub unit and clean the knuckle bore thoroughly.
Prepping for installation
Inspect the knuckle bore for corrosion or damage. A smooth, clean surface is critical for a proper fit. If you're installing a serviceable bearing, apply a thin coat of high-temperature grease to the outer race before pressing it in.
Never hammer directly on the bearing. Use a bearing splitter or proper driver tool instead.
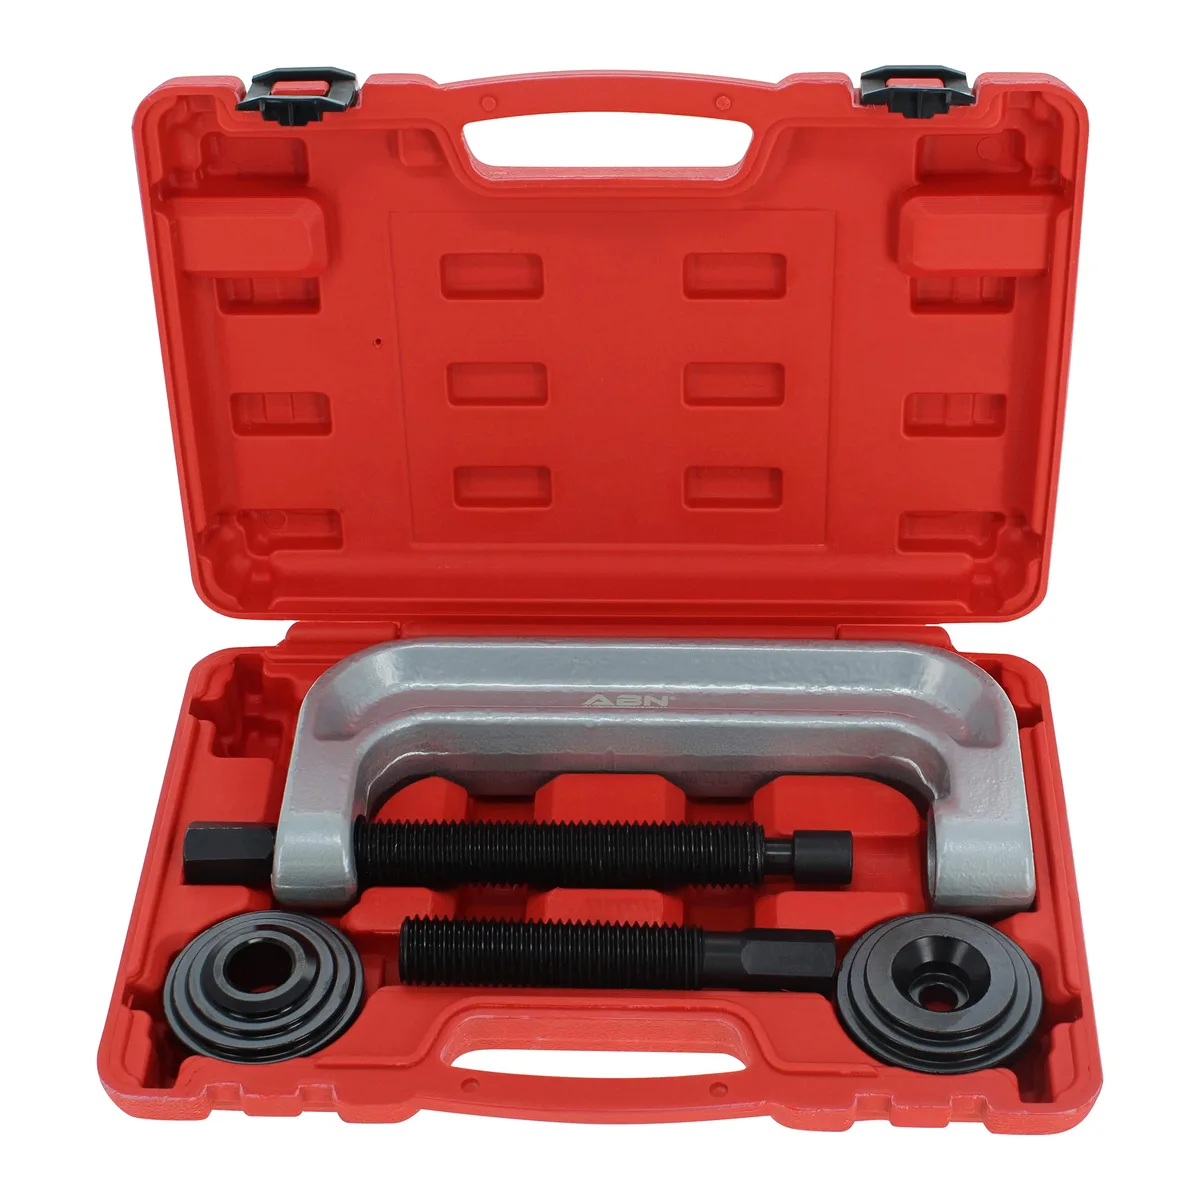
Image source: Web (Bing) / snapklik.com (Web image (fair-use with source credit))
Reassembly highlights
Reverse the removal steps. Torque the axle nut to spec while the vehicle is on the ground or on stands with the suspension loaded. For sealed hub units, torque the four or five mounting bolts to the manufacturer's value.
Always use a fresh cotter pin if your model requires one.
Critical Mistakes That Destroy New Bearings
Damaging the ABS tone ring
The magnetic ring that feeds wheel speed data to your ABS module is often integrated into the hub assembly. Prying against it with a screwdriver or hammer can crack or bend the ring. A damaged ring triggers an ABS warning light and may cause the system to malfunction.
Handle it gently during removal.
Over-torquing the axle nut
This is the most common mistake. Crushing the bearing preload with excessive torque shortens bearing life dramatically. Follow the specification exactly.
If your vehicle calls for a specific nut-torque sequence, use a torque wrench and don't guess.
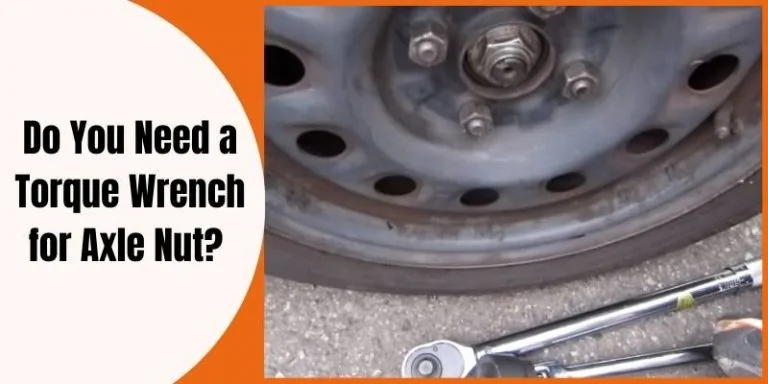
Image source: Bing (Web (fair-use with source credit))
Cross-threading or stripping studs
Wheel studs are expensive and annoying to replace. If a stud feels odd during installation, back it out and clean the threads. Don't force it.
Similarly, ensure the hub seats evenly before tightening, misalignment here causes immediate preload issues.
Reusing old seals or hardware
Old seals are compressed and degraded. A reused seal leaks grease and lets contaminants in. Always install new seals.
Same goes for cotter pins and any single-use fasteners. They're cheap compared to a second teardown.
Skipping the break-in period
New bearings need a gentle break-in. Avoid hard braking and full-speed corners for the first 50 miles. This lets the races and balls seat properly.
Some technicians also recommend re-checking the axle nut torque after this initial drive.
Costs, Tools, and Time: What to Expect
Parts pricing
Sealed hub assemblies typically run $50 to $300 per side, depending on the vehicle. Serviceable bearings alone cost $20 to $80. Aftermarket brands like Timken, SKF, and Moog offer solid options.
OEM parts cost more but match the factory specification exactly. As of 2026, pricing has remained relatively stable across most makes.
Tool investment
If you already own a floor jack, jack stands, and a socket set, you're halfway there. A basic hub puller costs $30 to $80. A torque wrench runs $40 to $150.
A bearing press kit costs $50 to $120 if you plan to do multiple bearing swaps. Renting tools from an auto parts store is a smart middle ground for one-off jobs.
Time commitment
A typical hub assembly replacement takes 1 to 2 hours per side for a DIYer. A serviceable bearing swap takes longer, often 2 to 3 hours, because pressing the old bearing out and seating the new one adds steps. Professional shops complete the job faster but charge $150 to $400 in labor per side.
Is it worth the DIY approach?
If you have the tools and the vehicle uses a sealed hub unit, the savings are significant. You're paying only for parts. For a serviceable bearing job, factor in tool costs and time.
If you already have a press kit from other projects, it's absolutely worth it. Otherwise, compare the total DIY cost against a shop quote before committing.
Frequently Asked Questions
Can I drive with a bad wheel bearing?
You can drive cautiously for a short time, but it's risky. A failing bearing generates heat and metal debris that degrades the unit further. Eventually it can seize or even separate the wheel from the steering knuckle.
If you notice excessive play, vibration, or grinding, replace it immediately rather than risk a breakdown.
How long do wheel bearings last?
Most manufacturers rate bearings for 85,000 to 100,000 miles under normal driving conditions. Harsh environments like salted winter roads, off-road use, or heavy towing reduce lifespan significantly. Some failure reports from aggregate reviews show bearings failing as early as 50,000 miles when exposed to water contamination or impact damage.
Is it worth replacing both sides at once?
Only one side needs replacement if the symptoms are isolated. However, if your vehicle is approaching 100,000 miles and you're already doing the labor, replacing both can be cost-effective. You save on duplicate jack stands time and avoid a second visit to the garage within a year.
Factor in your local parts availability too, since pricing varies by region.
What causes premature bearing failure?
The leading causes are water and road salt intrusion, impact from potholes, and improper preload adjustment during installation. A damaged ABS tone ring or contaminated grease also accelerates wear. Vehicles that tow frequently or drive on gravel roads experience the most premature failures according to manufacturer technical bulletins.
Do I need to replace the hub assembly or just the bearing?
It depends on your vehicle design. Most modern cars use sealed hub assemblies that must be replaced as a unit. Older vehicles with serviceable bearings allow bearing-only replacement if the hub itself is undamaged and the bolt holes are clean.
Check your factory service manual for the specific recommendation on your model year.
How do I know if the noise is coming from the bearing?
The simplest test isolates the wheel. Jack up the vehicle and spin each wheel by hand while listening for roughness. Then grab the tire at the top and bottom and wiggle it firmly.
Any clunking or lateral play points directly to bearing or hub failure. Noise that changes pitch when turning left versus right confirms which side is affected.
[…] Learn more about the complete removal procedure here. Understanding the full process from start to finish gives you a clearer picture of why each step matters. […]