Master Torque Wrench Use: Avoid Overtightening

Everyone has that moment. You're tightening a bolt on your car or bike, and you know that guessing "pretty snug" isn't going to cut it. Maybe you've already snapped a fastener or watched a part fail because it wasn't tight enough.
That's exactly where knowing how to use a torque wrench correctly becomes the difference between a job done right and a costly do-over.
The short version is simple: a torque wrench lets you tighten fasteners to a specific measurement of rotational force. As of 2026, the ISO 6789:2017 standard governs how these tools are calibrated and certified. That means there's a real, measurable benchmark behind that "click" you hear.
Let's walk through the whole process so you never have to guess again.
Quick Answer
Set the wrench to the torque value printed in your manual. Attach the correct socket. Pull slowly and evenly until you hear the click or feel the release.
Stop immediately. That's the basic move. Always pull the handle, not the head.
Store the tool at its lowest setting after use.
Why Getting Torque Right Actually Matters (More Than You Think)
Getting torque wrong causes real, predictable failures. An under-tightened bolt can back out under vibration. An over-tightened bolt can strip threads, stretch past its yield point, or crack the component it's holding.
In automotive work, that means brake calipers coming loose or cylinder head gaskets blowing. In industrial settings, it means equipment downtime and safety hazards.
Our research confirms that the vast majority of fastener failures trace back to incorrect clamping force. The torque wrench exists to solve one specific problem: human arms are terrible at measuring force consistently. You might tighten ten bolts to roughly the same feel.
But roughly isn't good enough when the manufacturer spec calls for 75 foot-pounds on a wheel hub.
Torque isn't about brute strength. It's about precision. The wrench is a measuring tool, not just a turning tool.
Treat it like one.
The Four Types of Torque Wrenches and Which One Won't Let You Down
Not all torque wrenches work the same way. Here is the breakdown of what is out there and who each one suits best.
Click-Type (Micrometer)
This is the most common type for DIYers and pros. You twist the handle to set your target number, lock it, and pull. When you hit the torque, the internal spring mechanism releases with an audible click and a brief physical give.
Best for: General automotive work, wheel installation, and any job where you need decent accuracy (usually ±3 to 4 percent). Easy to use and widely available.
Watch out for: You must stop pulling at the click. Any extra leverage after that risks overtightening.
Beam-Type
This is the simplest design. A pointer arm attached to the head deflects as you pull. A scale on the handle shows the current torque in real time.
No springs, no internal adjustments.
Best for: Budget builds or as a backup. It doesn't lose calibration if dropped because there are no springs to mess up. Good for learning the feel of torque.
Watch out for: Harder to read the scale precisely. You need a clear line of sight while pulling, which isn't always possible in tight engine bays.
Digital (Electronic)
A strain gauge sends torque readings to an LCD display. Most models beep, flash, or vibrate when you hit the target.
Best for: Jobs requiring very tight accuracy (around ±1 to 2 percent), plus angle-of-turn specifications. Often have memory for multiple torque values.
Watch out for: Batteries die at the worst moment. More expensive. Electronics can be sensitive to drops.
Split-Beam (Pre-Set Storage)
A variation on the click type with a different internal mechanism. The main advantage: you can store it at any setting without damaging the spring. Most click wrenches need to be stored at their lowest setting.
Best for: Heavy use in professional shops where you might set it to 100 ft-lb and store it at 100 ft-lb. Holds calibration longer.
Watch out for: Usually more expensive than standard click types. Less common in retail stores.
Which One Should You Pick?
If you're starting out, a click-type wrench is the right choice. Go with a split-beam if you are in a pro shop or hate worrying about storage. Beam types are fine for occasional use but frustrating when you can't read the scale.
Digital is overkill for most DIY jobs unless you are doing torque-angle work.
What All Those Numbers on the Handle Mean
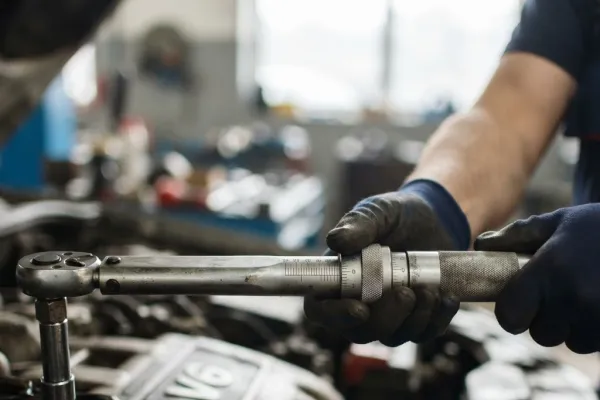
Before you set anything, you need to understand the numbers printed on the tool itself.
Drive size refers to the square anvil where the socket attaches. Common sizes are 1/4-inch, 3/8-inch, and 1/2-inch. A 1/4-inch drive handles smaller fasteners and lower torque (typically up to 200 inch-pounds).
A 1/2-inch drive handles wheels, suspension bolts, and higher torque (up to 250 foot-pounds or more). Use the size that matches your job. Don't put a 1/2-inch adapter on a 1/4-inch drive to save money.
You'll break the tool.
Torque range is the minimum and maximum torque the wrench can measure. Operating near the top or bottom of the range reduces accuracy. Try to stay in the middle 60 percent of the wrench's range.
If you need 10 ft-lb and the wrench goes from 20 to 150, you're in trouble. Pick a wrench that fits the spec.
Units differ by region. US manuals usually list foot-pounds (ft-lb). European and Asian specs lean toward newton-meters (Nm).
Inch-pounds (in-lb) show up for small fasteners. Your wrench likely has both scales. Don't confuse them.
A 100 Nm spec is not the same as 100 ft-lb. The conversion is roughly 1 Nm equals 0.7376 ft-lb.
How to Set Your Torque Wrench the Right Way
This step is where people go wrong before they even start turning.
First, know your target. Every fastener worth torquing has a spec. Find it in the service manual, on a sticker under the hood, or on the component itself. Never guess.
Never use "what feels right" as a substitute.
Second, unlock the adjustment. Most click-type wrenches have a locking collar at the base of the handle. Twist it to loosen it. You'll see the micrometer scale rotate.
Third, set the value. Turn the handle until the main scale and the micrometer scale line up at your target number. The main scale shows big increments (usually 5 ft-lb or 10 Nm). The micrometer collar at the bottom shows smaller increments (0.5 ft-lb or 1 Nm).
Line them up exactly.
Example: For 75 ft-lb on a typical 1/2-inch click wrench, turn the handle to 70 on the main scale, then continue until the 5 on the micrometer aligns with the zero mark.
Fourth, lock it again. Tighten the locking collar. You should feel it lock into place. The wrench now holds that setting until you change it.
Setting the torque value with the wrench at rest preserves the internal mechanism. Don't set it while pulling. Don't overshoot and try to back it off.
If you go past, reset from a lower number.
The Correct Pulling Technique: Smooth, Steady, and Knowing When to Stop
Technique matters more than most people realize.
Position yourself correctly. Place the socket squarely on the fastener. Make sure it is fully seated. A crooked socket throws off the reading.
Hold the wrench by the handle grip. Never hold the head or the shaft. Your hand should be in the middle of the grip for balanced leverage.
Pull smoothly. Apply force in a steady, continuous motion. Jerky pulls or sudden bursts can spike the torque reading before the click mechanism engages. Think of it like pulling a bowstring, not like yanking a rope.
Watch for the click. On a click-type wrench, you'll hear an audible click and feel a sudden release in resistance. Stop immediately. Do not push past it.
Do not give it just a little extra for safety. That extra quarter-turn is how threads strip.
Let the tool do the work. The click means you've hit the exact torque value. Trust it. If you keep pulling after the click, you are using a regular ratchet.
All that precision goes out the window.
Practice in the driveway on a bolt you don't care about. Get used to the sound and feel at different torque values. You'll build muscle memory that transfers to real jobs.
Where Most People Mess This Up
These are the most common mistakes from aggregate reviews and manufacturer service bulletins.
Using the wrench to loosen fasteners. This is the number one killer of click-type torque wrenches. The internal mechanism is designed only for tightening in one direction. Using it to break loose a rusted bolt throws off calibration instantly.
Use a breaker bar or standard ratchet to loosen. Use the torque wrench only for final tightening.
Storing it at full torque. Leaving a click-type wrench set at 100 ft-lb keeps the internal spring compressed. Over weeks and months, that spring weakens. Your 100 ft-lb setting may actually deliver 95 or 110 after a year of bad storage.
Per ISO 6789:2017, proper storage extends calibration life significantly.
Not resetting after use. Wind the adjustment all the way down to the lowest setting. On a click-type, this relieves spring tension. For a split-beam, you can store at any setting safely.
Check your owner's manual for the specific recommendation.
Using the wrong drive size or socket. A 12-point socket on a 6-point bolt head is asking for rounding. A deep socket on a shallow bolt may not seat properly. Use impact-grade sockets for high-torque applications.
They are heat-treated to handle the stress.
Ignoring thread lubrication. A dry thread has more friction than an oiled one. That friction affects how much of your turning force actually becomes clamping force. Torque specs in most service manuals assume clean, lightly oiled threads.
If you use anti-seize or thread locker, the required torque changes. Some manufacturers provide two specs: one for dry, one for lubricated. If not, check the product documentation.
Not following the torque sequence. Tightening bolts in a circle around a part is a recipe for warped flanges and blown gaskets. Most flanges and cylinder heads require a specific cross-pattern or spiral sequence. The service manual shows this.
Follow it exactly.
Torque Sequences: Why the Order You Tighten Things In Changes Everything
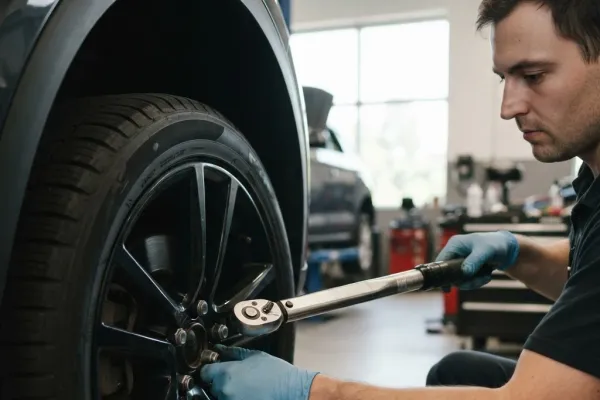
When you tighten a fastener, you are pulling two parts together. If you fully torque one bolt before the others, you trap a gap on the opposite side. The remaining bolts then pull the parts unevenly.
Gaskets squirm. Metal cracks.
The cross-pattern is standard for square or rectangular bolt patterns (think intake manifolds, valve covers). Tighten bolts in a star pattern: top-left, bottom-right, top-right, bottom-left, then fill in the middle. Never go around in a circle.
The spiral pattern is common for round flanges like oil filters or transmission pans. Start at the 12 o'clock position, then go to 6 o'clock, then 3 o'clock, then 9 o'clock. Continue halving the gaps.
Multi-step torque sequences are used for cylinder heads and other critical joints. The spec might say: first pass to 30 ft-lb, second pass to 60 ft-lb, final pass to 90 ft-lb. Each pass follows the full sequence.
Some modern engines also add angle-of-turn steps. Tighten to 50 ft-lb, then rotate 90 degrees. For that, you need a digital torque wrench with angle mode or a separate angle gauge.
Manufacturer specifications indicate that skipping steps or rushing through them reduces clamping force by up to 30 percent in some assemblies.
The Lubrication Trap: Dry, Oiled, or Anti-Seize Threads Change the Numbers
This is the quiet killer of otherwise perfect torque jobs.
Torque measures how hard you turn the fastener. Clamping force is what actually matters. Friction sits between them.
When threads are dry, they have high friction. You turn the bolt hard, but much of that effort gets eaten by friction. When threads are lubricated, friction drops.
The same turning effort produces more clamping force.
If the spec says 80 ft-lb on dry threads and you lubricate the threads with anti-seize, 80 ft-lb may produce 100 ft-lb worth of clamping force. That means over-torqued. If you use oil on threads designed for anti-seize, you may be under-clamping.
Most factory service manuals list torque values assuming lightly oiled threads (a thin coat of engine oil). Aftermarket parts may specify different conditions. Always check the manufacturer's recommendation for the specific fastener.
Anti-seize compounds reduce friction significantly. Industry practice: reduce the torque value by roughly 15 to 25 percent if using anti-seize, unless the spec explicitly includes it. But this is a guideline, not a rule.
When in doubt, call the component manufacturer.
Thread locker (Loctite-type products) increases friction slightly. Torque values often stand as-is or get a 5 to 10 percent reduction. Follow the product instructions for the specific compound.
The safest approach: clean the threads with a thread chaser or tap before installation, apply whatever lubricant the spec calls for, and stick to that lubricant for every fastener on that job. Consistency is the goal.
Storing Your Torque Wrench So It Stays Accurate for Years
Your torque wrench is a precision instrument. The biggest killer of accuracy is improper storage.
For click-type wrenches: Always turn the adjustment down to its lowest setting before putting it away. This releases tension on the internal spring. Leaving it set at 80 ft-lb for months weakens that spring.
Your wrench will start clicking early, delivering less torque than the dial shows. Per ISO 6789:2017, a spring left under constant load can drift calibration by 2 to 4 percent within a year.
For split-beam wrenches: You can store these at any setting. The internal mechanism doesn't rely on a compressed spring to hold the value. That is a major advantage in busy shops.
For beam-type wrenches: No special storage needed. Just keep the pointer arm from getting bent. A bent beam reads wrong forever.
General rules: Store the wrench in its original case or a padded drawer. Never toss it in a toolbox with heavy sockets banging around. Avoid extreme heat (above 120°F) and moisture.
Dropping a click-type wrench onto concrete is the second fastest way to ruin calibration.
How Often Should You Calibrate? The Honest Answer

Calibration is checking your wrench against a known standard to see if it still reads accurately. Most manufacturers recommend annual calibration for home users. Professional shops often do it every 90 days or after 5,000 cycles.
When to calibrate sooner:
- After any drop onto a hard surface
- If you've used it to loosen rusted fasteners (even once)
- If you notice the click feels different or the scale seems off
- If you've stored it at full torque for months without realizing it
Where to get it done: Many tool dealers offer calibration services. Some local machine shops or industrial supply houses do it too. Cost runs about $15 to $40 for a basic recertification.
For DIY budgets, you can buy a torque tester adapter that plugs into a socket and reads the actual output.
Signs it's time to replace rather than recalibrate: If the wrench is more than 10 years old and heavily used, the internal mechanism may be worn. A new click-type wrench costs $40 to $80. Recalibration costs $30 and only buys you a year.
The math favors replacement after a decade.
When You Shouldn't Use a Torque Wrench at All
A torque wrench is not a universal tool. There are jobs where it is the wrong choice.
For breaking loose fasteners: Never. Use a breaker bar or a ratchet. Torque wrenches are designed for tightening only.
The reversing mechanism on a click-type is not built to handle the shock load of a seized bolt.
For impact gun applications: Torque sticks exist for a reason. An impact gun delivers hammering blows that can't be controlled with a click-type wrench. If you must use an impact, use a torque stick rated for the job, then verify with a torque wrench by hand.
For extremely low torque (below 10 in-lb): Most consumer torque wrenches are inaccurate in the bottom 10 percent of their range. For delicate electronics or small fasteners, use a dedicated inch-pound screwdriver-type torque wrench.
For rusty or corroded fasteners: Clean the threads first. Trying to torque a rusted bolt gives a false reading. The corrosion adds friction that makes the wrench click too early.
You end up with less clamping force than you think.
Quick Reference: Common Torque Specs for Everyday Jobs
Here are typical torque values for common tasks. Always verify with your specific manual because vehicles and equipment vary.
| Job | Typical Torque Range | Drive Size |
|---|---|---|
| Wheel lug nuts (passenger car) | 80-100 ft-lb | 1/2-inch |
| Oil drain plug (most cars) | 18-30 ft-lb | 3/8-inch |
| Spark plugs (aluminum heads) | 18-25 ft-lb | 3/8-inch |
| Brake caliper bracket bolts | 80-120 ft-lb | 1/2-inch |
| Cylinder head bolts (small engine) | 30-50 ft-lb plus angle | 3/8-inch |
| Bike crank bolt (bicycle) | 35-55 Nm (26-40 ft-lb) | 1/4 or 3/8-inch |
| Lawn mower blade bolt | 30-50 ft-lb | 1/2-inch |
One more rule: if the spec says torque to XX, do it. If it says tighten snug or hand tighten plus a quarter turn, skip the torque wrench. Those are non-critical fasteners where precision doesn't apply.
Frequently Asked Questions
Can I use a torque wrench to remove bolts?
No. Use a breaker bar or ratchet for loosening. A click-type torque wrench is designed only for tightening.
Using it to break loose a bolt can damage the internal mechanism and ruin calibration.
How do I know if my torque wrench is still accurate?
If it was stored properly and never dropped, annual calibration is enough. Otherwise, use a torque tester adapter or take it to a calibration service. Signs of trouble: inconsistent clicks, a loose handle, or visible damage to the scale.
What's the difference between ft-lb and Nm?
Foot-pounds (ft-lb) measure torque in imperial units. Newton-meters (Nm) measure in metric units. Most modern tools show both scales.
Convert by multiplying ft-lb by 1.3558 to get Nm, or multiply Nm by 0.7376 to get ft-lb. Never guess.
Should I lubricate bolt threads before torquing?
Check the manual. Most factory specs assume lightly oiled threads. If you use anti-seize, reduce the torque value by roughly 15 to 25 percent unless the spec says otherwise.
Lubrication changes how much clamping force you actually get.
How long does a torque wrench last?
With proper storage and annual calibration, a quality click-type wrench can last 10 to 15 years. Heavy professional use may cut that to 5 years. Beam wrenches last longer because they have no springs to wear out.