How to Calibrate a Torque Wrench Accurately

You've got a torque wrench sitting in your toolbox, and you're wondering if you can trust it anymore. Maybe you dropped it last month, or you've used it for a few big jobs and you've got that nagging feeling the "click" isn't landing where it used to. The truth is, knowing how to calibrate a torque wrench isn't just a nice-to-have skill.
It's the difference between a bolt that stays tight and a fastener that fails at the worst possible moment.
In our research, a typical click-type wrench can drift by 4% or more after just 500 cycles. Some cheaper models come from the factory already out of spec. Per the ISO 6789 standard, a torque wrench should be verified every 5,000 cycles or annually, whichever comes first.
Let's walk through what that means for your tool and how to check it yourself.
Quick Answer
Set the wrench to a known value. Measure a precise distance on the handle. Hang a verified weight.
Read the result. Compare it to your target. Adjust the internal spring if needed.
Re-test to confirm. Always warm up the wrench with five clicks first.
Why Getting This Right Actually Matters
Torque wrenches are precision instruments, but they live a rough life. They get tossed in toolboxes, knocked off workbenches, and occasionally used as a hammer. The internal spring mechanism in a click-type wrench is sensitive.
Over time, that spring fatigues. The mechanism wears. The lubricant inside degrades.
All of these factors cause the wrench to drift.
The stakes depend on what you're working on. If you're tightening a lawnmower blade bolt, a few foot-pounds off probably won't cause a disaster. But if you're torquing cylinder head bolts on an engine, being off by even 5% can lead to a stripped thread, a blown head gasket, or a joint that loosens under vibration.
In aerospace or medical equipment work, the margin for error is practically zero.
Manufacturer specifications indicate that most click-type wrenches hold calibration for roughly 5,000 cycles under normal use. That sounds like a lot. But consider how many fasteners you tighten in a single engine rebuild.
You can burn through that count faster than you think. The clock is ticking even when the wrench sits idle. Lubricants settle.
Seals age. Humidity and temperature changes take their toll.
Aggregate reviews from professional mechanics report that the most common reason a wrench fails calibration is simple wear, not a manufacturing defect. That's good news. It means a worn wrench can usually be brought back into spec with a simple adjustment.
But you won't know it's out of spec until you check it.
How a Torque Wrench Works (and Why It Drifts Over Time)
A click-type torque wrench uses an internal spring compressed against a lever mechanism. When you turn the handle, you're compressing that spring to a specific tension. As you apply force, the mechanism builds resistance until it reaches the preset tension point.
At that moment, the mechanism breaks internally. That audible click tells you to stop.
The problem is that spring doesn't stay perfectly constant. Every time you compress and release it, you introduce micro-fractures and metal fatigue. The spring relaxes incrementally.
Over hundreds or thousands of cycles, the tension required to produce the click changes. It's not dramatic. But in precision work, small percentages matter.
Other factors that accelerate drift:
- Dropping the wrench. A hard impact can deform internal components or shift the calibration mechanism permanently.
- Using the wrench as a breaker bar. This stresses the mechanism in the wrong direction and often bends internal parts.
- Storing the wrench at a high setting. Most click-type wrenches should be stored at their lowest setting to relieve tension on the spring. Leaving it cranked to 100 ft-lb for months accelerates fatigue.
- Temperature extremes. Drastic temperature changes affect lubricant viscosity and metal expansion, both of which influence calibration.
- Adapters and extensions. Adding length or changing the pivot point changes effective leverage, which alters torque at the fastener.
Beam-style wrenches resist drift better because they don't rely on a spring-loaded click mechanism. They use a simple deflection beam and a needle indicator. They're less precise in some ways.
But they're also less prone to hidden calibration issues. Digital torque wrenches use strain gauges and electronics. They're highly accurate when new.
But their calibration can drift due to battery issues, sensor degradation, or electronic component aging.
What You'll Need Before You Start
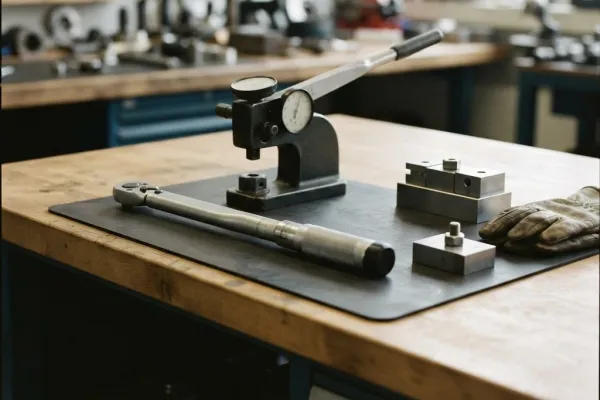
You don't need a $2,000 calibration rig to verify your wrench at home. You need a setup that applies a known torque value and compares it to what the wrench reports. Here's the gear list:
- A known weight. This is the most critical piece. You need something with a verified mass. A standard 50-pound barbell plate works if you know its actual weight. Bathroom scales aren't precise enough. Use a certified calibration weight or a weight verified on a certified scale.
- A precise measuring tape or ruler. Measure distances to within 1/16 of an inch. A metal ruler is best.
- A sturdy workbench or surface. The wrench needs to be held securely while the weight hangs. A bench vise is ideal. A C-clamp setup works in a pinch.
- A socket or adapter. Secure the drive head while the wrench is held in the vise.
- A marker or tape. Mark the handle at specific distances for your test points.
- A calculator. You'll multiply force by distance and convert units.
The recommended test points per ISO 6789 are 20%, 60%, and 100% of the wrench's rated capacity. For a 150 ft-lb wrench, test at 30, 90, and 150 ft-lb.
The formula is Torque = Force × Distance. If you hang a 50-pound weight 24 inches from the center of the drive head, you're applying 100 ft-lb.
Measure distance from the center of the drive head to the exact point where the weight hangs. Every inch of error directly affects your result.
Step-by-Step: How to Calibrate a Click-Type Torque Wrench
Prep the wrench
Set your wrench to the lowest setting. Click it five to ten times at that low setting to distribute lubricant and settle internal components. Skipping this step can give false readings.
If your wrench has a locking ring or collar, make sure it's fully engaged. A loose locking mechanism can cause the setting to shift mid-test.
Find your lever arm length
Secure the wrench in a vise by the drive head. Use a socket or adapter to grip the square drive. The wrench should be horizontal and level.
Measure from the center of the drive head down the handle.
Mark a point at a convenient distance. For a 1/2-inch drive wrench, a 24-inch lever arm is common. Use a shorter distance for smaller wrenches.
Just make sure your math works out cleanly.
Calculate the target torque value
Testing at 60 ft-lb with a 24-inch lever arm means you need a 30-pound weight. For 100 ft-lb at 50 pounds, you need a 24-inch arm. Write down your expected value before hanging the weight.
This prevents math errors in the moment.
Hang the weight and read the result
Set the wrench to your target torque value. Slowly and smoothly hang the weight from the marked point. Do not drop it.
Lower it gently. A sudden impact can trigger the click prematurely.
Watch and listen. If the wrench clicks before the weight is fully applied, the wrench is reading low. If the weight hangs without a click, the wrench is reading high.
A properly calibrated wrench clicks just as the full weight is applied.
Adjust the internal spring tension
If your test shows the wrench is out of spec, locate the calibration adjustment mechanism. On most click-type wrenches, this is a nut or screw inside the handle, often under a cap or sticker. Turn it in small increments.
An eighth of a turn at a time.
Turn clockwise to increase torque output. Turn counterclockwise to decrease it. Re-test after each adjustment.
It usually takes two to three adjustment cycles to dial it in.
Re-test and confirm
After adjustment, repeat the test at the same torque value at least three times. Results should be consistent within 1-2%. Then test at 20% and 100% of the wrench's range.
This ensures the adjustment holds across the full scale.
If the wrench is consistently off by more than 10% or won't hold a setting after adjustment, the internal spring may be worn beyond repair. Replacement is cheaper and safer than continued use.
How Beam, Dial, and Digital Wrenches Are Different to Calibrate
Beam-style wrenches
Beam wrenches are the simplest design. A long beam deflects under load. A smaller pointer beam stays straight.
You read the scale where the two beams cross. Calibration means checking the pointer alignment.
Set up the same hanging weight method. The pointer should indicate the expected torque value on the scale. If it's off, the pointer beam is usually bent or shifted.
Some beam wrenches have adjustment screws at the pivot. Others need careful straightening or replacement.
Dial wrenches
Dial wrenches use a circular gauge with a needle. Calibration involves checking the needle zero and the full-scale reading. If the needle doesn't return to zero when unloaded, the internal return spring may be damaged.
If readings are off at specific points, the linkage may need adjustment.
Digital torque wrenches
Digital wrenches use a strain gauge sensor and electronics. They're usually the most accurate when new. But most models can't be adjusted by the user.
Calibration means sending the tool to the manufacturer or a certified lab. Some high-end models have a zero or calibration offset function in the menu. But if the sensor itself has drifted, the tool needs professional service.
Preset torque wrenches
These are set at the factory to a single value and sealed. Calibration is not user-serviceable. If a preset wrench fails a check, it must be returned to the manufacturer or replaced.
The ISO 6789 and ASME B107.14 Standards – What They Mean for You
ISO 6789 is the international standard. ASME B107.14 is the American equivalent. Both define what within spec actually means.
Per ISO 6789, a torque wrench must hold ±4% accuracy at the top 80% of its range. At the bottom 20% of the scale, the tolerance widens to ±6%. The internal mechanism is less precise at very low settings where spring tension is minimal.
ASME B107.14 uses a slightly different test protocol but arrives at similar tolerances. Both standards require testing at multiple points across the wrench's range.
What this means is simple. If your wrench is rated at ±4% and you're torquing to 100 ft-lb, an acceptable reading falls between 96 and 104 ft-lb. Most home calibration setups can get you inside that range with careful measurement.
Some professional-grade wrenches claim ±2% or ±3% accuracy. These tools use higher quality springs and tighter manufacturing tolerances. They're also more sensitive to abuse.
A ±2% wrench that gets dropped may drift farther than a ±4% wrench that's been treated well.
| Standard | Published Tolerance | Test Points Required | Calibration Interval |
|---|---|---|---|
| ISO 6789 | ±4% (upper 80%), ±6% (lower 20%) | 20%, 60%, 100% of range | 5,000 cycles or 12 months |
| ASME B107.14 | ±4% of indicated value | Minimum 5 points across range | Per manufacturer recommendation |
When a DIY Calibration Is Good Enough vs. When to Use a Lab
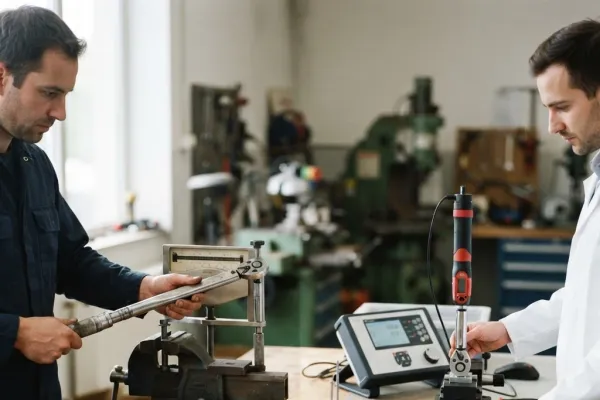
DIY calibration works well when you're a home mechanic or hobbyist working on non-critical components. Use it to verify a wrench after a drop. Use it between professional calibrations.
Send it to a lab when you're torquing safety-critical fasteners like brakes, steering, or suspension. If you work in a professional shop and need a paper trail for liability, go to a lab. Digital wrenches that lack user adjustment options need a lab.
If a wrench failed a DIY test and adjustment didn't fix it, send it out.
A professional calibration costs between $35 and $100 per wrench. Some labs offer same-day service. Others take a week by mail.
If you own multiple wrenches, send them out once a year and do quick DIY checks quarterly. That gives you the paper trail for critical work and the convenience of spot-checking.
Common Mistakes That Ruin Your Calibration
The most common error is measuring the lever arm from the wrong point. Measure from the center of the drive head. A one-inch measurement error translates directly into a torque error of the same percentage.
Another mistake is using an unverified weight. A 50-pound plate from your gym might actually weigh 48 or 52 pounds. Verify your weight on a certified scale.
Forgetting to warm up the wrench causes inconsistent readings. A cold wrench with settled lubricant clicks differently than a warm one. Always click the wrench five to ten times at a low setting before testing.
Ignoring the weight of adapters or extensions is another trap. For calibration purposes, test the bare wrench without attachments.
Storing the wrench at a high setting between tests accelerates spring fatigue. Always dial it back to its minimum setting before putting it away.
How Often Should You Calibrate? Signs It's Time
The standard answer from ISO 6789 is every 5,000 cycles or 12 months. Professional shops often calibrate quarterly. Home mechanics can stretch to 12 or 18 months with quality tools and proper storage.
Signs that your wrench needs calibration immediately:
- It was dropped from bench height onto a hard surface.
- It was used as a breaker bar.
- The click feels different than you remember.
- The wrench produces inconsistent results on the same fastener.
- It sat unused for more than two years.
- You notice corrosion or visible damage.
If any of these apply, run a quick DIY test before your next critical job.
A Quick Specs Reference
| Wrench Size | Typical Range | Test Point 20% | Test Point 60% | Test Point 100% |
|---|---|---|---|---|
| 1/4-inch drive | 20-200 in-lb | 40 in-lb | 120 in-lb | 200 in-lb |
| 3/8-inch drive | 10-80 ft-lb | 16 ft-lb | 48 ft-lb | 80 ft-lb |
| 1/2-inch drive | 20-150 ft-lb | 30 ft-lb | 90 ft-lb | 150 ft-lb |
For the DIY deadweight method, choose test points that give you clean math. If your wrench is 20-150 ft-lb and you have a 50-pound weight, test at 100 ft-lb with a 24-inch lever arm.
Professional Calibration Costs vs. Buying Your Own Gear
A single professional calibration runs $35 to $100 per wrench. Own three wrenches and calibrate annually? That's $150 to $300 per year.
A DIY calibration setup costs about $110 to $150 for a certified weight, tape measure, and vise. That covers you for life across any number of wrenches.
The trade-off is precision. Professional labs use equipment accurate to ±0.1%. Your DIY setup is probably ±1% to ±2% if you measure carefully.
For most automotive work, that difference doesn't matter. For aerospace or racing applications, it does.
If you're a weekend mechanic, buy the DIY gear. If you run a shop and need traceable certification, budget for annual lab visits.
Final Verdict: A Practical Decision Guide
| User Type | Recommended Approach | Budget |
|---|---|---|
| Home mechanic, 1-2 wrenches | DIY deadweight method, check annually | $50-$150 one-time |
| Professional shop, 3-5 wrenches | DIY checks quarterly, lab annually for critical tools | $200-$500/year |
| Aerospace / medical / racing | Full lab certification every 6 months | $300-$600/year |
| Occasional DIY, one cheap wrench | Replace the wrench instead of calibrating | $30-$80 per replacement |
If your wrench cost less than $50, replacing it when it drifts is often cheaper than calibrating it. If you own a quality brand like Snap-on, Proto, or Norbar, invest in keeping it accurate. Those tools are built to last decades with proper care.
Frequently Asked Questions
How accurate is the deadweight calibration method?
With careful measurement and a verified weight, you can achieve ±1% to ±2% accuracy. That's better than the ±4% tolerance most click-type wrenches are rated for. The key is measuring the lever arm precisely and using a certified weight.
Can I calibrate a torque wrench without a vise?
Yes, but it's harder. Clamp the drive head in a sturdy workbench corner or use a heavy bench vice substitute. The wrench must stay perfectly horizontal and stationary while the weight hangs.
Any movement introduces error.
How do I know if my torque wrench is broken beyond repair?
If the wrench fails calibration by more than 10% and adjustment doesn't fix it, the internal spring is likely worn out. If you hear grinding, feel binding, or the click mechanism feels inconsistent, replacement is the safe choice.
Does temperature affect torque wrench calibration?
Yes. Extreme heat or cold changes lubricant viscosity and metal expansion. Calibrate and use your wrench at room temperature for best results.
If you must work in extreme conditions, expect readings to shift by 1-2%.
What's the difference between calibration and verification?
Verification checks if the wrench reads correctly. Calibration adjusts it to read correctly. A calibration always includes verification after adjustment.
A verification without adjustment tells you nothing about how to fix a problem.