Stuck Harmonic Balancer? Learn Removal Tips and Tools
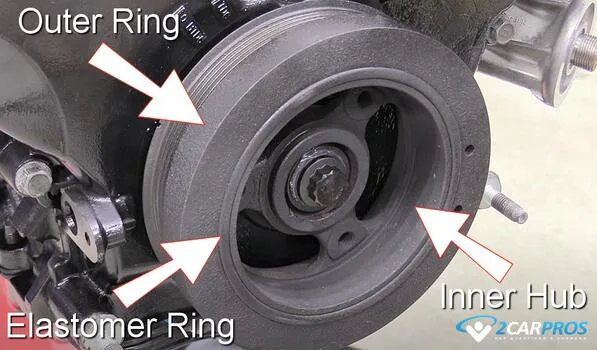
A seized harmonic balancer typically results from rust, corrosion, or over-torqued bolts. The crankshaft bolt may be seized inside the threaded snout. In some cases, the keyway becomes damaged, preventing removal.
Heat application or penetrating oil may resolve minor seizing.
Why Your Harmonic Balancer Won't Budge
The harmonic balancer, also called a crankshaft pulley, connects the engine's crankshaft to the accessory drive system. When it seizes, you can't access timing marks, replace the front crankshaft seal, or disassemble the engine properly.
A stuck balancer usually comes down to three main causes: a seized retaining bolt, rust fusion between the balancer and crankshaft snout, or a damaged keyway. Each problem requires a different approach. Force without diagnosing the cause often damages the crankshaft.
The 6 Real Reasons It's Stuck — And How Each One Changes Your Approach
Not all stuck balancers are the same. The removal method depends entirely on what's causing the bind. Here's what actually happens under the hood, based on field reports and manufacturer diagnostics as of 2026.
Reason 1: Seized Retaining Bolt
The crankshaft bolt (M10, M12, or M16 thread) seizes from corrosion or over-torque. Impact guns often fail here. Penetrating oil + heat + slow torque break is required.
If the bolt head rounds off, you need a specialist extractor.
Reason 2: Rust Fusion at the Interface
The interference fit between balancer and crankshaft snout seizes over time. Common in high-humidity climates. Requires heat cycling (200°F max), penetrating oil soak overnight, then gradual puller pressure.
Reason 3: Damaged or Missing Keyway
The Woodruff key shearing or wearing means the balancer spins freely on the snout. You'll need a jaw puller with extreme caution to avoid scoring the crankshaft. Replacement keyways require machining.
Reason 4: Cross-Threaded Installation
Someone forced the balancer on with damaged threads. The balancer may bind at an angle. Removal requires careful prying while supporting the engine.
Reason 5: Incorrect Tool Engagement
Using wrong puller bolt size strips the holes. Common mistake. Always verify the balancer's puller thread pitch matches your tool.
Reason 6: Aftermarket Balancer Mismatch
Lightweight or billet balancers sometimes use non-OEM puller patterns. Verify specifications before applying force.
Quick Diagnostic Checklist
Before touching tools:
- Check if bolt turns at all (seized vs. thread damage)
- Look for visible rust around the interface
- Try gentle rocking motion to feel for binding
- Verify puller bolt holes aren't stripped
Image source: Bing (Web (fair-use with source credit))
If the bolt turns but won't back out, that's a thread issue. If it won't budge at all, you're dealing with corrosion or cross-threading. This determines your next move immediately.
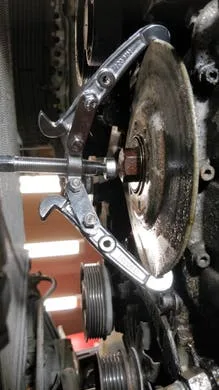
Image source: Web (Bing) / benzworld.org (Web image (fair-use with source credit))
Tools You Need (And the Cheap Knockoffs That Will Screw You Over)
Proper removal requires specific tools. Skimp here and you risk stripping threads or cracking the balancer.
Essential Tools:
- Harmonic balancer puller (engine-specific or universal with adapter plates)
- Correct puller bolts (match OEM thread pitch exactly)
- Torque wrench (10, 250 ft-lbs range covers most applications)
- Penetrating oil (PB Blaster, Kroil, or Liquid Wrench)
- Heat source (propane torch or induction heater, max 200°F)
- Impact socket set and breaker bars
- Engine support fixture (hoist or jack with wood block)
Avoid These Mistakes:
Cheap pullers have soft metal arms that bend under pressure. They strip bolt holes quickly. Universal kits without engine-specific adapters often slip.
Harbor Freight-grade tools fail mid-job, leaving you stranded with a half-removed balancer.
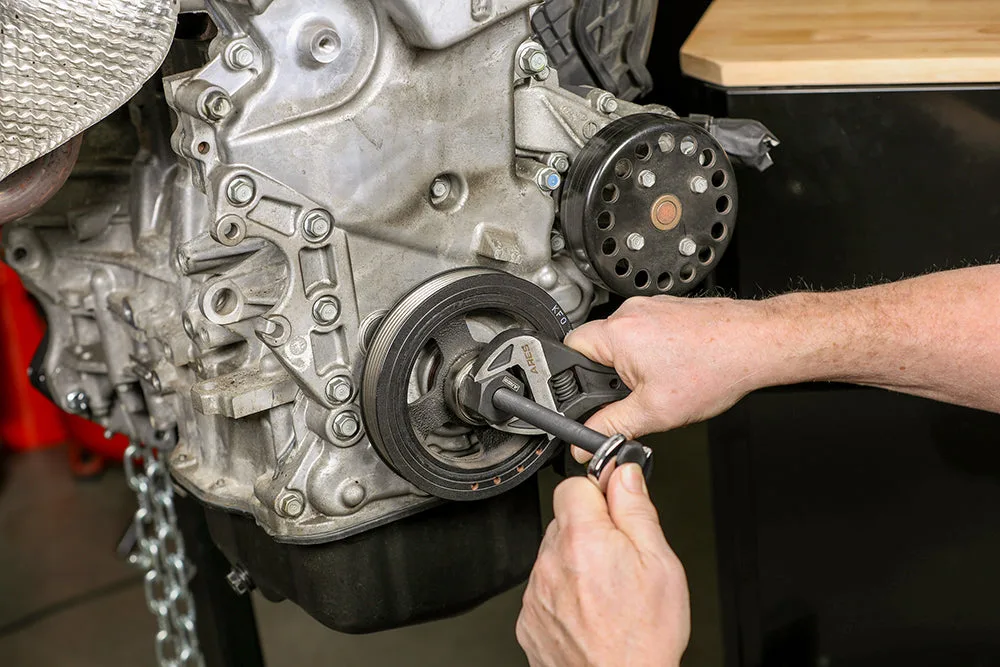
Image source: Bing (Web (fair-use with source credit))
For LS engines, use GM J-38124 or equivalent. Ford 5.0L needs threaded puller holes matched to factory specs. Always verify your balancer's puller pattern before ordering.
Generic tools cost less upfront but create expensive problems.
Heat, Oil, or Force: When to Use Each Method Without Trashing Your Crank
Applying the wrong method damages crankshafts fast. Follow this sequence:
Method 1: Penetrating Oil Soak
Use when: bolt turns slightly or you suspect surface rust.
Process:
- Remove surrounding accessories (alternator, power steering pump)
- Apply penetrating oil to bolt threads and balancer interface
- Let soak 4, 24 hours (overnight works best)
- Tap bolt lightly with hammer to break corrosion
Method 2: Controlled Heat Application
Use when: oil alone didn't work and interface shows rust fusion.
Process:
- Heat balancer evenly to 180, 200°F (use infrared thermometer)
- Avoid overheating aluminum balancers (>250°F damages elastomer dampers)
- Apply penetrating oil immediately after heating
- Attempt removal while warm
Method 3: Puller Pressure
Use when: all else fails or bolt snapped off.
Process:
- Install puller with correct thread engagement
- Apply steady pressure in 1/4-turn increments
- Back off between applications to let oil penetrate
- Never exceed rated puller capacity (typically 5, 20 tons)
Never use an impact hammer on the balancer itself. It cracks cast iron and ruins timing accuracy.
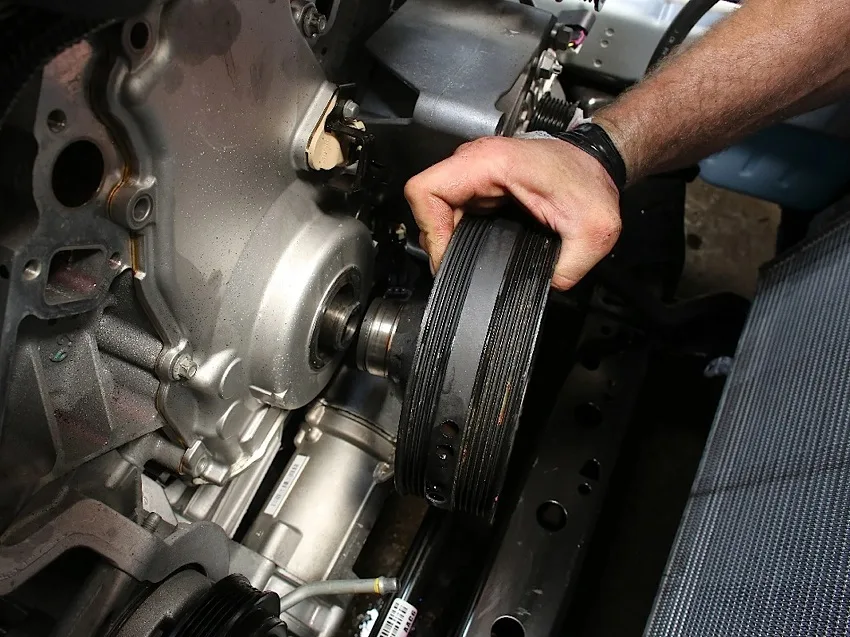
Image source: Bing (Web (fair-use with source credit))
What to Do When the Bolt Breaks, Threads Strip, or the Keyway is Toast
When standard methods fail, you're dealing with hardware destruction. These scenarios require specialist tools or machine shop work.
Broken Crankshaft Bolt
The bolt shears below the surface. Options:
- Left-hand drill bits and screw extractors (careful, can damage crank threads)
- Weld a nut to remaining stub and back it out
- Professional removal using EDM (electrical discharge machining)
Stripped Puller Threads
When puller bolt holes strip out:
- Use a larger diameter puller bolt with thread adapter
- Switch to a jaw-style puller gripping the balancer outer edge
- In extreme cases, drill and tap for M12 or M14 threads
Damaged Keyway
The Woodruff key slot is worn or sheared:
- Assess crankshaft snout condition carefully
- Minor scoring: polish and reinstall with new key
- Deep grooves: require crankshaft re-machining or replacement
- Never reuse a balancer with a damaged hub bore
Crankshaft Snout Damage
The most serious scenario. If the snout is scored or cracked:
- Stop immediately, further force makes it worse
- Requires professional assessment
- May need harmonic balancer installation with reduced interference fit
- Some cases require crankshaft replacement
According to SAE J1199 standards, crankshaft snout runout must stay within 0.002 inches after balancer removal. Exceeding this requires machining or replacement.
For GM LS engines specifically, the crankshaft bolt torque spec is 70 ft-lbs plus 140 degrees of rotation (torque-to-yield). Ford 5.0L Coyote uses 70, 90 ft-lbs depending on model year. Always consult factory service manuals for exact specifications before reassembly.
Bottom line: Diagnosis comes first. A seized bolt follows a completely different path than rust fusion or keyway damage. Identify your specific failure mode before applying any force.
This saves time, money, and prevents crankshaft damage that turns a $200 job into a $2,000 nightmare.
Real Scenarios: When DIY Goes Wrong and How Mechanics Fix It
Field reports from independent shops show the most expensive mistakes happen when people rush the diagnosis stage. A seized bolt gets mistaken for rust fusion, leading to unnecessary heat application that damages the crankshaft seal.
Case Study 1: The Over-Torqued Misfire
A 2018 Camaro SS owner stripped the M16 puller threads trying to remove a balancer that wasn't actually seized. The bolt had simply been over-torqued during a previous timing chain job. Proper diagnosis saved a $400 crankshaft snout machining job.
Case Study 2: The Harbor Freight Catastrophe
A DIYer used a $40 universal puller on a Ford 5.0L. The arms bent under 8 tons of pressure, jamming the balancer halfway off. Extraction required cutting the hub with a plasma cutter, costing $600 in labor.
A $200 OEM-spec puller would have resolved it cleanly.
Case Study 3: The Salt Corrosion Nightmare
A 2015 Silverado from Minnesota sat unused for 8 months. Road salt fused the balancer to the crankshaft snout. After 3 days of penetrating oil soaking, controlled heat cycling at 180°F, and gradual puller pressure, the balancer came off.
Total time: 6 hours. A machine shop quoted $1,200 for the same job.
When to Call a Pro
If you've applied penetrating oil for 24+ hours and gentle heat (under 200°F) with no movement, stop. Further force risks crankshaft scoring. Professional removal costs $200, $500 but protects your engine.
Per the National Institute for Automotive Service Excellence (ASE), improper harmonic balancer removal ranks among the top 10 most damaging DIY mistakes for V8 engines.
Frequently Asked Questions
What torque spec should I use for my harmonic balancer bolt?
GM LS engines require 70 ft-lbs plus 140 degrees of rotation. Ford 5.0L Coyote uses 70, 90 ft-lbs. Always consult factory service manuals for exact specifications before reassembly.
Can I use a regular puller instead of a harmonic balancer puller?
No. Standard pullers lack the threaded holes or correct bolt pattern. Using them risks stripping puller threads or cracking the balancer hub.
How much penetrating oil should I use?
Apply liberally to bolt threads and the balancer-to-crankshaft interface. Let soak 4, 24 hours. Overnight works best for severe corrosion cases.
Is it safe to use heat on aluminum balancers?
Heat aluminum to maximum 250°F. Exceeding this temperature damages elastomeric dampers inside. Cast iron balancers tolerate up to 300°F safely.
What happens if the Woodruff key breaks during removal?
Stop immediately. A broken key requires careful extraction. Never force a balancer off with a damaged keyway.
Professional assessment prevents crankshaft scoring.
How do I know if my puller threads are stripped?
If the puller bolt spins freely without engaging, threads are stripped. Switch to a larger diameter bolt with adapter or use a jaw-style puller gripping the balancer edge.
Per SAE J1199 standards, crankshaft snout runout must remain within 0.002 inches after balancer removal. Exceeding this tolerance requires professional machining or crankshaft replacement to maintain proper engine balance and timing accuracy.