



Your tools should work every time you pull the trigger. This Power Tool Maintenance Guide gives you a clear, condition-based workflow that prevents failures before they happen. You will spot issues sooner, fix what matters, and stop wasting time on guesswork.
The goal is simple, better cuts, longer runtime, and fewer surprises.
In our research, the biggest wins come from basic checks done regularly and in the right order. Manufacturer specifications indicate lithium-ion packs prefer 30 to 60 percent storage state-of-charge. OSHA requires GFCI on construction sites for cord-connected tools.
Per IEC and UL 62841, tools are designed around specific duty cycles and protection features. Let’s start with the problem you are solving.
Quick Answer
Power Tool Maintenance Guide means condition-based checks and actions. Start with symptoms and tool type. Unplug or remove battery, then inspect and clean.
Verify power, ventilation, and wear parts. Calibrate, test, and log service.

Image source: Wikimedia Commons / USAID Pakistan
The real problem: tool failures, downtime, and safety
Downtime costs real money and momentum. A saw bogs mid cut, an SDS-Plus hammer overheats, or a grinder trips a GFCI, and the job stalls. The bigger risk is injury from kickback, a burst wheel, or a shock from a damaged cord.
Most of this traces back to dust, heat, moisture, dull media, and ignored warnings.
Here is what typically bites first:
- Cordless fatigue: short runtime from cold packs, dirty terminals, or overworked cells.
- Corded dropouts: frayed cords, undersized extension leads, or sticky switches.
- Pneumatic starvation: low CFM or wet air that gums internals and rusts vanes.
- Accuracy drift: fences out of parallel, worn pads, runout at the arbor or collet.
- Dust choke: blocked vents and filters, abrasive gypsum or silica scouring bearings.
Hidden costs add up quickly. A cheap grinder wheel dressed too late can vibrate and crack, which risks injury and ruins bearings. A dull blade burns stock, then you push harder, heat climbs, and the motor cooks.
A wet airline lets water blast into nailers, which corrodes passages and sticks valves. Each is preventable with the right sequence of checks.
The safety angle is just as real. A missing guard or a bypassed safety switch is a gambling move. Wire insulation that looks “just a little worn” can arc to a steel bench.
Crystalline silica from concrete cuts tears up lungs, even on short tasks. The plan below fixes performance and reduces those hazards in one pass.
Key insight: a condition-based maintenance flow that actually works
You do not need a perfect shop or a service van full of spares. You need a short, repeatable flow that branches based on the tool and symptom. That is condition-based maintenance.
If you standardize the order, your checks go faster and you catch more.
Use this five-part loop, as of 2026:
Make safe: disconnect, depressurize, secure the tool.
Clean and expose: remove dust, clear vents, take off media or guards as needed.
Check power and air: extension cord gauge, GFCI/RCD, battery SoC and temperature, compressor CFM and dryness.
Inspect wear parts: blades, bits, pads, belts, brushes, bearings, wheels.
Calibrate and test: squareness, runout, clutch, no load, then light load.
Why it works:
- Cleaning first reveals faults and protects bearings from grit during inspection.
- Power and air checks prevent chasing phantom mechanical issues caused by low voltage or low CFM.
- Wear parts drive most performance complaints. Replace or sharpen early, not late.
- Calibration locks in quality and reduces strain, which saves motors and packs.
Safety first: lockout, GFCI/RCD, silica control, and PPE that actually protects
Lock the tool out before you touch anything. Unplug corded tools, remove the battery from cordless, and shut off and bleed pneumatic lines. For shops with shared power, follow your site’s lockout or tagout procedure so nobody re-energizes a circuit while you are working.
Electrical protection is non-negotiable. Use GFCI on corded tools in wet or jobsite conditions. In the UK, use a 30 mA RCD.
Damaged cords, nicked insulation, or missing strain relief are red flags. Replace, do not tape. For extension cords, upsize gauge for distance and load, for example 12 AWG for high draw saws on longer runs.
Control dust before it controls you. Concrete, tile backer, and masonry produce respirable crystalline silica, which is a severe lung hazard. Use shrouds and a vac with HEPA filtration and tight connections.
For tasks on silica, follow OSHA silica guidance. Wood dust also needs capture and filtration, especially MDF and exotic species.
Pick PPE that fits the task:
- Eye protection that meets ANSI Z87.1 or EN166.
- Hearing protection matched to the tool’s dBA. Pick an NRR that gives safe exposure time.
- Respiratory protection rated for the hazard. N95 or better for nuisance dust, P100 for fine particulates, or a respirator selected per your employer’s program.
- Cut-resistant gloves for handling blades and wheels. Never wear loose gloves near rotating spindles.
Use guards and safety systems as designed. Keep riving knives, lower saw guards, and tool brakes in place and functional. Do not defeat paddle switches or clutch features just to “get through a cut.” Safety systems save fingers, eyes, and motors.
Set your variables: tool type, motor type, and environment
Different tools fail in different ways. Treat a cordless impact driver, a corded miter saw, and a pneumatic nailer as three separate systems. Match the checks to what actually runs the tool, the motor type, and the environment you are working in.
Define the key variables clearly:
- Power system: corded, cordless, or pneumatic. That decides voltage drop, battery care, or air quality checks.
- Motor type: brushed uses carbon brushes and a commutator. Brushless uses an electronic controller and sensors. Care differs.
- Interface and media: chucks, collets, SDS, arbors, pads, belts, blades, and wheels. Media condition is the number one quality driver.
- Environment: cold, hot, wet, or dusty. Each changes how power, air, and filtration behave.
Use this quick map to tune your actions:
| Variable | What changes | What to check first |
|---|---|---|
| Cordless, lithium-ion | Voltage under load and pack temperature | Battery SoC, terminals, charger ventilation |
| Corded, 120V or 230V | Voltage drop across extension and GFCI trips | AWG vs length, cord jacket, plug integrity, GFCI test |
| Pneumatic | CFM at pressure and moisture in the line | Tank drain, filter bowl, regulator, hose leaks |
| Brushed motor | Brush length and commutator condition | Brush wear line, arcing, pitting, endplay |
| Brushless motor | Electronics and sensors | Trigger, speed control, thermal lockout, error codes |
| Dusty site | Cooling and abrasive ingress | Vents, filter media, shrouds, anti-static hoses |
| Cold weather | Battery chemistry and lubricants | Warm packs indoors, correct oil viscosity |
| Wet or coastal | Corrosion and insulation breakdown | Rust inhibitor, IP rating, RCD use, dry storage |
A few fast definitions for clarity:
- State-of-charge, or SoC, is the percentage of stored energy in a battery. Store packs at 30 to 60 percent to slow aging.
- Runout is the amount a rotating shaft or tool wobbles. Lower runout means cleaner cuts and longer bearing life. For many handheld tools, aim for 0.005 inch or less.
- CFM is cubic feet per minute, the airflow a compressor or vacuum delivers. Match rated tool CFM at the pressure you plan to use.
When you set these variables first, every later decision gets easier. You will stop replacing parts to fix a power problem or chasing a bearing noise caused by a glazed wheel.
Start here: symptom-based decision tree
Use the branches below to go straight from symptom to action. Disconnect power first. Remove the battery or unplug, and depressurize air lines.
Then proceed.
Won’t start or trips breaker/GFCI/RCD
If a tool will not start or trips protection, start with power integrity. Do not open the tool before you rule out supply issues.
Steps for corded tools:
- Test the outlet with a known good tool. If it works, move on.
- Press the GFCI test and reset on the cord or adapter. If it trips again under load, suspect a ground fault or moisture.
- Check the extension cord gauge. Long light-duty cords drop voltage. For 10 to 15 amp saws, use 12 AWG when the run is long.
- Inspect the tool cord and plug. Look for crushed jackets, exposed copper, or loose strain relief. Replace, do not repair with tape.
- Verify the switch and trigger. If the tool runs when wiggled, the switch may be failing.
Steps for cordless tools:
- Reseat the battery. Clean pack and tool terminals with a dry brush or contact cleaner. Avoid oily residue.
- Try a second pack known to be good. If it runs, test the first pack on an LED work light. Slow fade there points to the pack.
- Let cold or hot packs rest at room temperature. Many BMS units lock out charging and discharge at temperature extremes.
- If the tool briefly blips then dies, electronics may be protecting against a short or locked rotor.
Steps for pneumatic tools:
- Check compressor pressure and CFM against the tool rating. A small compressor may fill to pressure but cannot hold flow.
- Drain the tank. Water in the line can stall valves.
- Check quick couplers for full opening. Some mismatched fittings choke flow.
- Add a few drops of pneumatic tool oil into the inlet, unless the tool is specified oil-free.
If the tool still trips protection or stays dead:
- For corded, a persistent GFCI trip can indicate an internal short or leakage to ground. Send to a service center if you are not qualified.
- For cordless, if multiple good packs fail to power the tool, the electronics or motor may be open or shorted internally. Service recommended.
- For pneumatic, if full pressure and lubrication do not help, inspect the trigger valve and O-rings per the parts diagram.
Reference for context on electrical protection, see OSHA guidance on portable tools and GFCI use.
Short runtime or slow charging (cordless)
Short runtime points to the battery, the charger, or a high-draw accessory. Start simple and avoid stressing the pack.
Quick checks:
- Measure SoC on the pack if available. Packs stored full for months age faster.
- Charge at room temperature. Many chargers limit current when cold or hot.
- Confirm the charger’s amperage. A 2 A charger will take twice as long as a 4 A unit.
- Clean pack and charger contacts. Poor contact creates heat and timeouts.
If the pack still drains fast:
- Swap to a fresh, known-good blade, bit, or wheel. Dull media spikes current draw.
- Check the tool for drag. Spin the arbor by hand with the battery removed. Grit or misalignment wastes energy.
- Review your clutch or speed setting. Overdriving screws at max speed burns runtime.
Storage and health:
- Store lithium-ion at 30 to 60 percent SoC for weeks or months. Manufacturer guidance aligns with this range to slow capacity loss.
- Keep packs between 50 and 77 degrees Fahrenheit when stored. Extreme heat ages cells.
- If a pack swells, isolate it in a fire-resistant space and follow your region’s battery recycling program. Do not attempt repair.
If charging is abnormally slow across chargers and outlets, suspect the pack’s internal resistance. Retire high-cycle packs from heavy tools and reuse them on lights or radios where demand is low.
Overheating, burning smell, or visible sparking
Heat is a warning that friction, dust, or electrical stress is building. Fix the cause, not just the symptom.
Immediate steps:
- Stop and let the tool cool completely. Heat compounds damage.
- Clean vents and remove caked dust. Compressed air helps, but avoid blasting directly into bearings. Angle the nozzle across vents.
- Replace dull media. Burning wood or discolored metal points to a dull blade or glazed wheel.
For brushed motors:
- Inspect brush length and springs. If at or past the wear line, replace as a set.
- Look at the commutator. Light streaks are normal. Heavy pitting or burned bars indicate arcing. Dress only if the tool is designed for serviceability.
For brushless motors:
- If the tool repeatedly thermal limits at modest load, the controller may sense blocked airflow or excessive current. Check for drag, alignment, and media.
- Sticky triggers or faulty speed controls can lock high current. Replace the switch assembly if intermittent.
Environmental factors:
- High ambient temperature reduces cooling headroom. Give longer rest intervals.
- Packed dust acts like insulation. Keep vents and fans clear with a gentle vacuum and a soft brush.
- Wrong lubricant thickens in cold weather. Use the viscosity specified for gearboxes and pneumatics.
If overheating persists with sharp media and clear vents, service the bearings and gearcase. Worn bearings produce heat and audible growl. Replace before a seized bearing cooks the armature.
Poor cut/drill quality, burning, wobble, or deflection
Bad cut quality usually starts at the interface. Fix the workholding, then the media, then the machine.
Start with alignment and holding:
- Clamp the work and support offcuts. Vibration shows up as chatter and tear-out.
- Check fence and base squareness on saws. Use a reliable square. If the bevel or miter detent is off, recalibrate according to the manual.
- Confirm the right blade for the material. Tooth count and hook angle matter. A fine crosscut blade will stall on rip cuts.
Inspect interfaces:
- Clean collets and arbors. Resin and dust can prevent full seating and concentric grip.
- Replace worn collets. If bits are slipping or showing burn marks near the shank, the collet may be bell-mouthed.
- For drills, check chuck jaw wear. Keyless chucks can glaze and slip when dirty.
Media checks:
- Sharpen or replace dull blades and bits early. Burning marks, shiny edges, or torn fibers indicate dullness.
- Dress grinder wheels. A glazed wheel skates and overheats metal. Use a diamond dresser for fast, flat results.
- Swap sanding discs or belts when the grit loads. Fresh abrasives cut cooler and flatter.
Runout and vibration:
- If cuts wander or holes egg, measure runout. For handhelds, aim for 0.005 inch or below at the arbor or collet nose.
- If runout is high, clean mating tapers and retest. Replace bent arbors or collets.
The payoff is immediate. With alignment set, sharp media, and clean interfaces, you will get straighter cuts, cooler chips, and less strain on motors and batteries.
Unusual noise or vibration
Noise is an early failure warning. Vibration shortens bearing life and ruins finish. Stop and track the source.
Quick triage:
- Remove the blade, bit, wheel, or pad, then spin the tool by hand. If the sound disappears, the media is the culprit.
- Check fasteners on guards, bases, and handles. A loose base plate or shoe chatters under load.
- Inspect the pad on a random orbital sander. A hardened pad transmits more vibration.
Bearings and gears:
- Rumbling or growling under no load suggests bearing wear. Replace before they seize.
- Clicking under cutting load can be gear teeth or a cracked blade. Replace immediately.
- For impact drivers and wrenches, short metallic rattles at idle are normal, constant rattle under no load is not.
Wheels and discs:
- For grinding wheels, always ring test before mounting. Follow ANSI B7.1 practices. A dead thud indicates a crack. Discard safely.
- Balance matters. If a wheel vibrates at speed, dress it to true and balance.
If vibration persists with new media and tight fasteners, test runout and inspect shafts. A minor bend amplifies at speed. Service or replace the spindle to protect the motor.
Cordless branch: batteries, chargers, and electronics (SoC storage, BMS, terminals, pack health)
Start with the pack, because the pack drives everything. Check state-of-charge, pack temperature, and terminal condition before opening up the tool. Most lithium-ion packs protect themselves with a battery management system that locks out charge or discharge if they are too hot, too cold, or outside safe voltage.
Do these checks in order:
- Verify the pack seats fully. Reseat until you hear a clean click.
- Clean battery and tool terminals with a dry nylon brush, then a no-residue contact cleaner. Let them dry.
- Charge at room temperature. Typical charger windows are 41 to 104 degrees Fahrenheit.
- Make sure the charger can breathe. Fans and vents need space on all sides.
Runtime and charging issues map cleanly if you keep it simple.
| Symptom | Most likely cause | What to do |
|---|---|---|
| Short runtime | Dull media or high drag | Replace media, check alignment and pad condition |
| Slow charging | Cold or hot pack, low amp charger | Warm to room temp, use the rated charger |
| Charger stops mid-cycle | Pack temp or bad contact | Clean terminals, move charger to cool air |
| Tool blips then dies | BMS protection tripping | Check for locked rotor, clear jams, try a second pack |
| Intermittent power | Dirty tool contacts | Clean and retension spring contacts if serviceable |
Temperature drives behavior. A cold 18V pack can sag hard under load, which looks like a weak motor. Warm packs slightly indoors before heavy work.
Hot packs degrade faster, so do not fast-charge in a sealed job box. Give airflow.
If you suspect a weak pack, compare voltage sag under the same load. Drive identical screws into the same material with two packs. If one cuts out earlier and recovers quickly, its internal resistance is likely high.
Retire it from saws and hammers and move it to lights or radios.
Keep storage smart:
- For weeks to months, store at 30 to 60 percent SoC. This slows cell aging.
- Park packs in a dry, temperate space. Avoid direct sun in vehicles.
- Do not store packs on a charger that trickle feeds. Most modern chargers stop gracefully, but shelf storage is still kinder.
Watch for safety cues:
- Swelling or hissing is bad. Isolate the pack in a fire-resistant container and follow your local battery recycling program.
- Burn marks on terminals point to high resistance. Clean and reassess. Replace if pitting is deep.
Electronics and triggers fail too. If speed control surges or the brake stops working, replace the switch module. On brushless tools, error codes on LEDs often map to thermal, overcurrent, or sensor faults.
Use the manufacturer’s chart for translation.
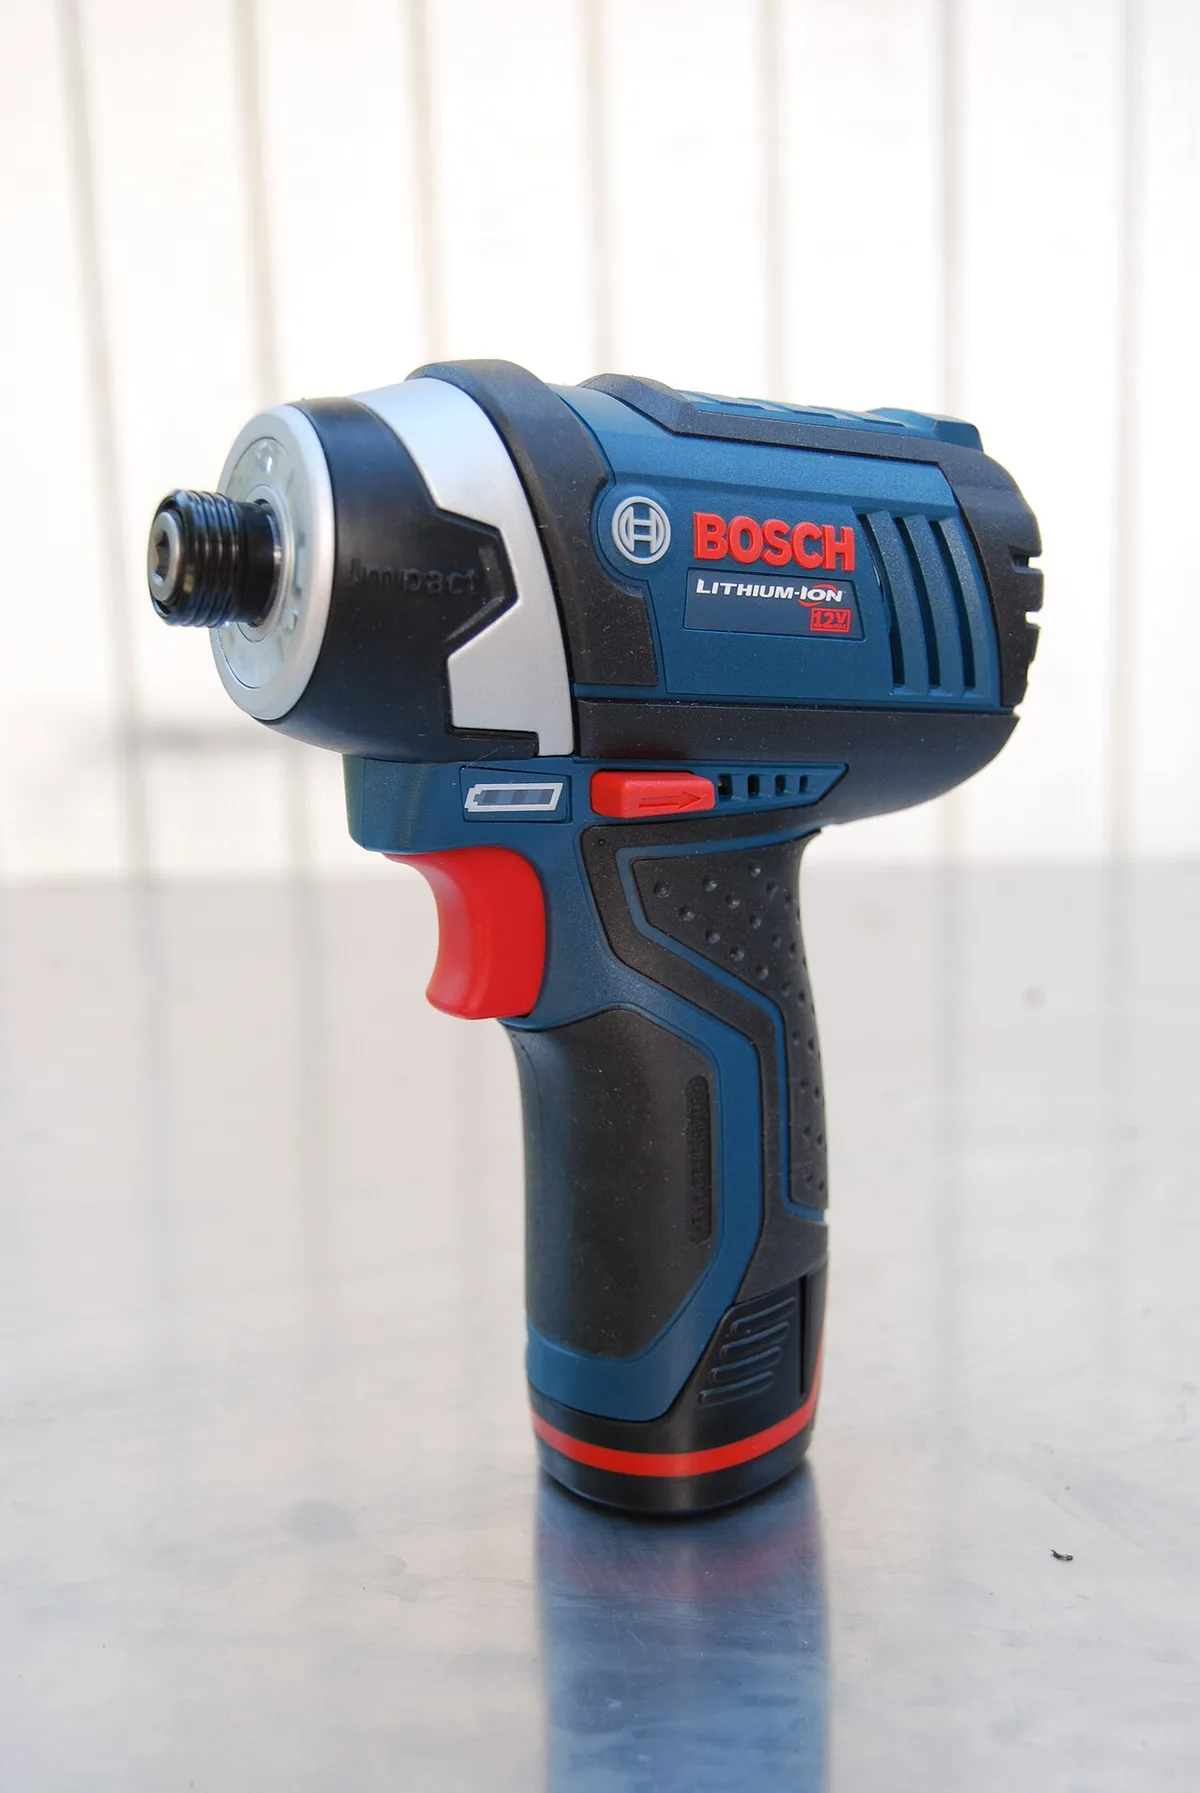
Image source: Wikimedia Commons / Charles & Hudson (CC BY-SA)
Corded branch: power cords, plugs, switches, and brushed/brushless motor checks (brushes, commutator, IP rating)
Corded tools live or die by healthy wiring and enough voltage at the tool. Start with the supply, then inspect the switch, then look at the motor type and wear parts. Do not chase motor ghosts before you eliminate a voltage drop.
Work the electrical path front to back:
- Confirm the outlet is live and protected. Use GFCI on jobsites and in wet areas.
- Size the extension cord correctly. A 12 AWG cord for long runs on a 15 amp saw prevents drop.
- Inspect the cord jacket, plug blades, and strain relief. Replace damaged parts. Tape is not a repair.
- Check the tool switch. If cycling the trigger makes it cut in and out, the switch likely has worn contacts.
Split diagnosis by motor type.
Is it brushed or brushless?
Answer this first, then test accordingly. Brushed universal motors have carbon brushes that ride a copper commutator. Brushless motors use an electronic controller to switch phases and do not have brushes.
For brushed motors:
- Inspect brush length. Many have a wear line. Replace as a set if near or past that line.
- Examine the commutator. Uniform copper bars with light graze marks are fine. Burned, raised, or heavily pitted bars indicate arcing.
- Check armature endplay. Excess play suggests worn bearings or thrust washers.
For brushless motors:
- If you have intermittent power with no mechanical noise, suspect the controller or hall sensors.
- Thermal or current protection can cut power under heavy load. Clear dust, reduce drag, and retest.
Noise and smell tell you a lot. A hot electric smell with visible sparking in a brushed motor points to worn brushes or a grooved commutator. A rhythmic growl points to bearings.
Replace bearings early to protect windings.
Protection features matter:
- Electronic brakes stop blades and wheels faster. If the brake weakens, check brushes or the controller, depending on the motor type.
- Soft start reduces inrush. When it fails, start-up jerks get harsher.
- Double insulation is common on handhelds. Look for the square-in-a-square symbol. That does not excuse damaged cords or missing grounds on other tools.
Ingress ratings count in wet work. If your tool has an IP rating, respect it. Spray from a pressure washer can defeat housings and drives moisture into switches.
Dry tools fully before re-energizing. If a tool trips a GFCI after a soak, isolate and send for service.
Continuity and resistance checks help if you are qualified. With the tool unplugged, meter across hot and neutral at the plug, power switch on, and rotate the spindle slowly. Consistent readings without shorts to ground suggest the windings are intact.
If you are not trained for this, leave it to a service center.
Pneumatic branch: compressor, CFM/PSI, FRL, moisture management, and hose/coupler leaks
Air tools run great if they get dry air at the right flow. They stumble when the compressor cannot keep up, when hoses choke flow, or when water and oil mix at the worst time. Start at the compressor, then follow the air through the system to the tool.
Compressor capacity must match demand. Compare the tool’s CFM at its working pressure to your compressor’s SCFM rating at 90 PSI. If one framing nailer is fine but two choke the line, you need more tank and pump or you need to stagger firing.
Keep air dry and clean:
- Drain the tank daily. Open the petcock until water stops and air spits clean.
- Use a filter-regulator-lubricator near the tool. Set the regulator just above the tool’s minimum requirement.
- Fit a coalescing filter if you need very dry air for paint or sensitive valves.
Hose and coupler sizing changes everything. Small hose IDs add pressure drop at flow. Use larger ID on long runs to keep pressure at the tool.
| Hose ID | Typical use case | Notes |
|---|---|---|
| 1/4 inch | Short runs, single nailer | Light, flexible, higher drop on long runs |
| 3/8 inch | Multi-nailer, grinders, die grinders | Better flow for high CFM tools |
| 1/2 inch | Long runs, shop manifolds | Lower drop, heavier, less flexible |
Oil the tool as specified:
- Standard rotary vane or impact tools often want a couple of drops of ISO 32 pneumatic oil at the inlet each day.
- Many finish nailers are oil-free by design. Check the manual before adding oil, since oil can contaminate seals or finishes.
Chase leaks and restrictions:
- Listen for hiss at couplers. Replace female couplers that stick or fail to open fully.
- Check quick connect types. Automotive and industrial styles do not always mate perfectly.
- Spray soapy water on fittings to reveal pinhole leaks. Tighten or replace.
Regulator drift and wet bowls cause intermittent power. If the nailer hits hard then weak, your regulator may be dropping as flow rises. Service or replace the regulator.
Empty filter bowls when the level reaches the mark. Keep spare sight glasses and O-rings on hand.
Cold weather brings water and ice. Air cools in hoses, water drops out, and valves stick. Use an aftercooler and a dryer if your climate swings, or route lines where they will not chill.
At minimum, keep hoses off frozen concrete.
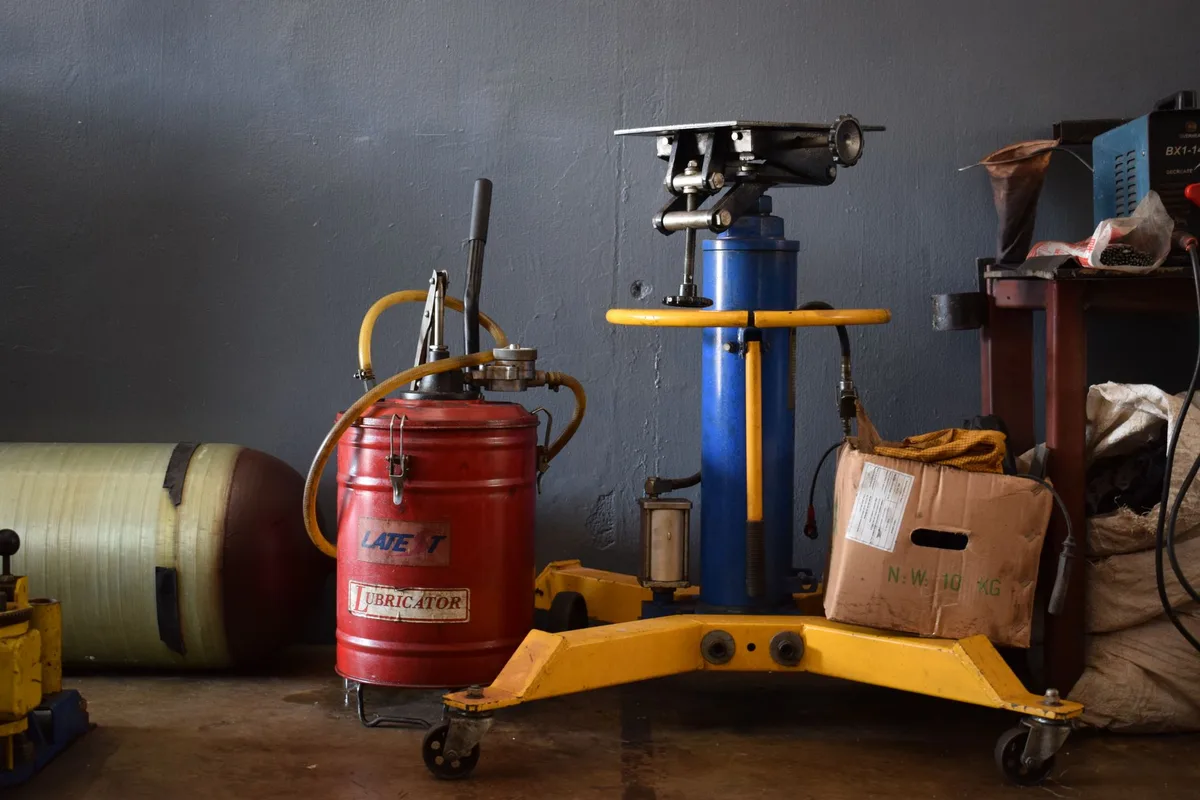
Image source: Pexels / Ayub Abdul Rahman (Pexels License)
Cutting and abrasives care: blades, bits, wheels, and sanding media (TPI, kerf, grit, wheel type)
Cut quality and tool heat start at the business end. A sharp, appropriate blade or bit reduces load, keeps motors cooler, and makes you faster. Dull or wrong media force you to push harder, which creates heat and noise, then bearings and windings pay the price.
Choose media for the material and task:
- Wood rip cuts want fewer teeth and a higher hook angle. Crosscuts want more teeth and a calmer hook.
- Metal cutting with a circ saw requires proper ferrous or non-ferrous rated blades. Do not use wood blades on metal.
- Masonry drilling calls for carbide SDS bits sized to the anchor spec. Keep shank and chuck clean to avoid slip.
Keep media clean and true:
- Clean resin from saw blades with a resin remover. A clean plate cuts cooler and stays sharp longer.
- Dress grinding wheels routinely. A glazed wheel runs hot and vibrates. A diamond dresser restores bite and roundness.
- Replace sanding discs and belts when loaded. Fresh grit cuts fast and flat.
Compatibility and mounting matter:
- Match arbor diameters and use correct flanges. Do not bush a wheel outside spec.
- Check max RPM. Never exceed the wheel or disc rating. Grinder wheel bursts are catastrophic.
- For oscillating tools, match the interface. Starlock holds tighter than OIS and transmits torque more efficiently.
Inspect for safety:
- Perform a ring test on vitrified wheels before mounting. A clear ring indicates integrity.
- Check saw blades for missing carbide tips or cracks near the arbor. Replace when damaged.
- On routers, inspect collets for burrs and bell-mouth wear. Replace collets as routine maintenance.
Storage keeps edges alive. Hang blades vertically to keep plates flat. Keep wheels dry, away from oils and solvents.
Store sanding media flat and clean, since dust and grit embedded on the surface scratches finishes.
Calibration and accuracy: miter/bevel detents, fence parallelism, chuck/collet/arbor cleanup, and runout checks
Accuracy reduces strain and rework. When fences are square, bevel angles track, and runout is low, you feed straighter and cooler. That keeps motors, gearboxes, and batteries happier.
Work from reference surfaces to the cutting edge.
How do you square a miter saw and lock it in?
Unlock, clean, adjust, then tighten. That is the rhythm. Dust and resin throw angles before any adjustment takes hold.
Steps for a typical miter saw:
Clean the fence faces and table. Resin build-up tilts workpieces.
With the saw unplugged, raise the blade guard and install a flat, known-good blade.
Set the miter detent to zero. Use a reliable square against the blade plate, not the teeth. Adjust the fence halves until square.
Lock the fence fasteners to the manufacturer’s torque guidance.
Set bevel to zero. Use a digital angle gauge or square to confirm. Adjust the bevel stop screw or cam.
Make a test cut on scrap. Flip one piece and check for gaps against the other. Tune if needed.
Keep detents crisp. If the miter detent plate is worn or rounded, the saw will drift. Replace the plate or detent pin assembly.
A floppy detent costs you time on every cut.
How do you set fence parallelism on a portable saw?
Measure, adjust, test. If the fence is not parallel to the blade, cuts burn and bind.
Portable table saw basics:
- Measure from a fixed tooth to the fence front and rear. Use a steel rule or calipers. Aim for equal readings.
- Adjust the fence rail or cam as designed. Many fences have set screws to change squareness and toe.
- Verify the riving knife is aligned with the blade plate. Misalignment causes pinch and kickback.
What about chucks, collets, and arbors?
Clean, inspect, then measure runout. Small alignment issues create big wobbles at the cutting edge.
Keep interfaces pristine:
- For drill chucks, open fully and blow out debris. Clean jaws with a brush and contact cleaner. Lightly oil the mechanism, not the jaws.
- For router collets, remove the collet from the nut. Clean the taper and bore. Replace if you see scoring or bell-mouth wear.
- For grinders, clean the spindle threads and flanges. Replace flanges that are worn or rounded.
Runout testing, quick and reliable:
- Mount a dial indicator against the arbor, collet nose, or bit shank near the collet. Rotate by hand and record total indicator reading.
- For many handheld tools, target 0.005 inch or less. Routers and laminate trimmers benefit from even tighter readings if possible.
- If runout is high, clean tapers again. If it persists, the arbor may be bent. Replace the arbor or service the spindle.
Clutch and torque accuracy on drivers:
- Set a test board with consistent pilot holes. Drive identical screws at a set clutch number.
- If heads strip at low numbers, the clutch may be worn. Replace or recalibrate per the manual.
Lock settings with the right chemistry. Use medium threadlocker on fasteners that vibrate, like fence lock screws. Use anti-seize on arbors that see heat, like grinders or metal cut-off saws.
Keep oil off friction clamps and belts.

Image source: Pexels / Sandin Redzo (Pexels License)
Lubrication that won’t attract dust: gearbox grease, spindle/arbor oil, pneumatic oil, dry lube, and threadlocker use
Use the right lube, applied sparingly. Over-lubrication traps dust and cooks into grit. Match the lubricant to the mechanism and the climate, then wipe any excess.
Where to use what:
- Gearboxes: NLGI 1 or 2 lithium or moly grease, per the manual. Do not mix greases.
- Spindles, arbors, slides: one drop of ISO 32 or 46 oil. Wipe off the squeeze-out.
- Rails and saw bevel slides: dry PTFE or silicone dry lube in dusty shops.
Pneumatic and fastener chemistry:
- Oil air tools with a couple drops of pneumatic oil, unless the tool is oil-free. Too much oil fouls finishes and seals.
- Medium threadlocker on vibration-prone fasteners, like fence locks and detent screws. Let it cure before heavy use.
- Anti-seize on hot arbors and studs, like grinders or metal cut saws. Keep it off friction surfaces.
Dust extraction and filtration: shrouds, HEPA/M-class filters, cyclones, airflow targets, and anti-static hoses
Capture dust at the source. A tight shroud, an anti-static hose, and a vac with the right filter keep air clear and tools cool. For silica or fine MDF, use HEPA 99.97 percent at 0.3 micrometers or a certified M-class unit.
Useful airflow targets:
- Shrouded cutting or grinding: pair the tool with a vac that can deliver strong CFM while maintaining filter integrity.
- ROS sanders: constant suction to hold the pad flat and extract fines.
- Drilling concrete: on-tool collection matched to bit diameter and depth.
Keep filters working:
- Use a cyclone pre-separator to drop chips before the filter. This preserves CFM.
- Empty bags and bins before they are packed. Packed collectors leak and choke airflow.
- Inspect hoses and cuffs for leaks. Anti-static hoses reduce clogging and shocks.
Maintenance intervals and recordkeeping: daily/weekly/seasonal checklists, fleet logs, warranty notes
A light cadence prevents big repairs. Do short daily checks, focused weekly tasks, then deeper seasonal work. Record everything so warranties and patterns are easy to see.
Suggested rhythm:
- Daily: unplug or remove battery, clean vents, inspect cords and guards, check wheels and blades, drain compressor tanks.
- Weekly: verify fence squareness, check clutch accuracy, oil pneumatics if specified, test GFCI or RCD.
- Seasonal: replace brushes if near wear line, change pads and belts, deep clean dust extractors, replace vac filters.
Track the basics:
- Keep a spreadsheet or CMMS with tool ID, serial, hours estimate, service notes, and parts used.
- Store copies of receipts and service center invoices for warranty claims.
- Tag tools with due dates for the next check so nothing slips.
Specs and benchmarks to sanity-check your work: extension cord AWG vs length, runout ≤0.005", RPM/OPM, storage temps, CFM/PSI, HEPA 99.97% @ 0.3 µm
Hard numbers keep you honest. Use these quick benchmarks as your sanity check during and after service. Adjust by model as manufacturer specs require.
Targets to hit:
- Extension cords: 12 AWG for long runs on 15 amp saws to limit voltage drop.
- Runout: 0.005 inch or less at the arbor or collet nose on handhelds.
- Battery care: charge at 41 to 104 degrees Fahrenheit, store near 50 to 77.
- Air: match compressor SCFM to tool CFM at 90 PSI with headroom.
- Dust: HEPA 99.97 percent at 0.3 micrometers for silica tasks, with sealed connections.
Final decision guide: fix now, service center, or replace (including parts availability and safety thresholds)
Decide by risk, part cost, and downtime. Fix now if it is a consumable or a simple external part. Send for service when electrical safety or internal integrity is in question.
Replace when parts are scarce or total cost exceeds half the tool’s value.
Quick calls:
- Fix now: blades, bits, pads, belts, brushes, cords, wheels, hoses, guards, chucks, collets.
- Service center: repeated GFCI trips, hot windings, controller faults, bearing replacements, severe runout with a straight arbor.
- Replace: cracked grinder wheels, swollen batteries, obsolete parts, cracked housings around load-bearing screws.
If you run a fleet, keep one spare for critical tools. Swap fast, then repair or retire based on the above thresholds. That keeps jobs moving and costs predictable.
Frequently Asked Questions
How often should I replace carbon brushes on a brushed motor?
Replace brushes when they reach the wear line or when arcing increases. Many tools hit that point between 50 and 200 hours of use, depending on load and dust. Inspect during seasonal maintenance.
Always replace brushes as a matched set and clean the commutator while you are in there.
What extension cord should I use for a 15 amp saw at 100 feet?
Use a 12 AWG cord to keep voltage drop in check at that length. Avoid coiling the cord while under load, since heat builds up. Keep plug blades tight and clean.
If the saw still dogs, move the power source closer or use shorter runs.
How should I store lithium-ion batteries for a few months?
Store at 30 to 60 percent state-of-charge in a cool, dry space. Keep packs between 50 and 77 degrees Fahrenheit. Do not leave them on chargers that trickle feed.
Clean terminals before storage and avoid direct sunlight in vehicles.
How can I tell if runout is from the bit or from the tool?
Measure runout at the collet or arbor first, then at the bit shank. If the arbor is true but the bit wobbles, the bit is bent or the collet is worn. Clean the taper, reseat, and recheck.
Replace a suspect bit or collet before chasing spindle repairs.
