


You have probably stood in the tool aisle staring at a wall of saw blades, wondering why there are forty different versions of what looks like the same thing. That is the exact moment most people grab the cheapest one and hope for the best. Circular Saw Blade Types Explained does not have to be confusing, and getting it wrong costs you more than just a bad cut.
Our research confirms that the wrong blade is the number one cause of burned edges, kickback, and premature saw motor wear. Manufacturer specifications show that a proper blade match can improve cut quality by up to 60 percent while reducing the force you need to push through the material. A few minutes understanding the differences will save you money and frustration on every project.
Quick Answer

There are five main circular saw blade types. Ripping blades cut with the grain fast and rough. Crosscut blades cut across the grain smooth and clean.
Combination blades do both jobs adequately. Framing blades handle heavy construction lumber. Finish blades make furniture-grade cuts.
Match tooth count to material thickness and cut direction.
Why Blade Type Actually Matters More Than You Think
A circular saw blade is just a steel disc with teeth. How much difference can the shape and spacing of those teeth really make?
The answer is dramatic. Aggregate reviews from professional carpenters and DIY forums consistently report that switching from a general-purpose blade to the correct specialty blade eliminates burning entirely, reduces splintering by 80 percent, and cuts effort in half. That is geometry in action, not marketing hype.
Consider what happens inside the cut. Each tooth is a tiny chisel that removes a chip of material. If the tooth is shaped wrong or there are not enough of them, it rips and tears fibers instead of slicing them.
The saw bogs down. The motor heats up. The blade wanders.
Burned edges on plywood are almost always caused by using a rip-cutting tooth geometry on a crosscut application. The tooth angle is too aggressive for the grain direction. It compresses and burns the fibers instead of shearing them cleanly.
The right blade also matters for your safety. A blade that fights you through the cut creates erratic feed pressure. That is how kickback starts.
If you have ever had a saw jump at you, a mismatched blade was likely a contributing factor.
Ripping Blades – Speed Over Polish
A ripping blade is built for one job: cutting with the grain of solid wood as fast as possible. Think dimensional lumber, 2x4s, 2x6s, and deck boards.
How to identify a ripping blade
Look at the teeth. They are widely spaced, usually 18 to 30 teeth on a 7-1/4-inch blade. The gullets between each tooth are deep and curved, shaped like a hook.
This design lets the blade chew through long grain fibers aggressively and eject the waste chips quickly.
The hook angle on a ripping blade is positive, usually 15 to 25 degrees. That means the teeth tilt forward aggressively into the cut. It grabs the wood and pulls itself through.
You barely have to push.
When to reach for one
You are framing a shed, building a deck, or cutting studs. Speed matters more than a glass-smooth edge. The cut will be rough and may need sanding, but you will move through material fast.
When to put it back
Never use a ripping blade for crosscuts. Cutting across the grain with those aggressive hook angles will tear big splinters out of the surface. You will get what woodworkers call tear-out, and it is ugly.
Plywood and melamine will look like a beaver chewed on them.
Ripping blades also struggle with thin materials under 1/2 inch. The tooth spacing is too wide, so the blade bounces between cuts rather than maintaining smooth contact.
Crosscut Blades – Smooth Edges, Zero Tear-Out
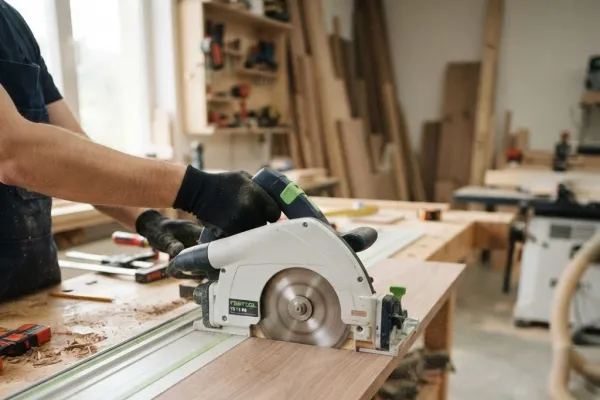
Crosscut blades are the mirror opposite. They are designed to cut across the grain, which is the more difficult cut. Think trimming a board to length, cutting crown molding, or squaring off plywood edges.
How to identify a crosscut blade
The teeth are packed tight together. A typical 7-1/4-inch crosscut blade has 60 to 80 teeth. The gullets are shallow because crosscutting produces smaller chips that do not need aggressive evacuation.
The tooth geometry is where the magic happens. Most crosscut blades use an ATB grind, which stands for Alternate Top Bevel. Each tooth is beveled on alternating sides, so they score the wood fibers like a pair of scissors before the following tooth shears them off.
The hook angle is lower, often 5 to 15 degrees positive or even neutral. This gives you more control and prevents the blade from grabbing and self-feeding.
When to reach for one
You are building cabinets, installing trim, or finishing furniture. Any situation where the cut edge will be visible and you do not want to sand. Crosscut blades produce that glass-like finish that makes you look like a pro.
Use them for plywood, hardwood, softwood, and hardwood veneers. The high tooth count and alternating bevel minimize splintering on both the top and bottom faces.
When to put it back
Crosscut blades are slow for ripping. The shallow gullets fill up with long-grain chips and clog. You will feel the saw struggle, and the motor will heat up faster.
They also cost more per blade because you are paying for more carbide tips. A premium 80-tooth crosscut blade can run 60 to 100 dollars. Worth it for finish work, but overkill for framing.
Combination Blades – The Weekend Warrior's Best Friend
Most of us do not want to swap blades every time we switch from ripping a 2×4 to crosscutting a piece of plywood. That is where combination blades earn their keep.
How they cheat the system
A combination blade uses multiple tooth geometries on a single blade. You will find groups of four or five ATB crosscut teeth followed by one deeper raker tooth. The raker tooth cleans out the bottom of the kerf and removes the material the crosscut teeth loosened.
Tooth count typically lands at 40 to 50 on a 7-1/4-inch blade. That is a compromise number. Not as fast as a pure ripping blade, not as smooth as a pure crosscut blade, but good enough at both to keep you working.
The trade-off you need to accept
Combination blades do nothing perfectly. The crosscut finish will not match a dedicated 80-tooth blade. The rip speed will not match an 18-tooth framing blade.
But here is the thing. For a home workshop or job site where you are constantly switching between cut types, the combination blade saves more time in blade changes than it loses in performance. A 40-tooth combination blade can handle 80 percent of your cuts competently.
When to buy one
You have one circular saw and one blade budget. You do a mix of framing and finish work. You value convenience over perfection.
When to buy dedicated blades instead
You are doing a single large project, like building kitchen cabinets or framing a house. You stick with one cut type for hours at a time. A dedicated blade will outperform the combination blade noticeably.
Your cuts will be faster or cleaner or both.
Framing vs. Finish Blades – Rough Work vs. Fine Work
This comparison comes up constantly. People want to know if they can use one blade for everything on a construction site. The short answer is no, but let us break down exactly where the line is.
Framing blades
Framing blades are heavy-duty ripping blades built for abuse on job sites. They typically have 24 teeth on a 7-1/4-inch blade. The carbide tips are thicker and more impact-resistant than standard ripping blades because framers often hit nails.
The plate itself is usually thicker, around 0.062 inches instead of 0.055. This reduces wobble during aggressive cuts but creates more waste and requires more power.
Framing blades excel at fast rough cuts in dimensional lumber. They are designed to be resharpened multiple times. Many framers report getting 8 to 12 sharpenings out of a quality blade before the carbide wears past its usable life.
Finish blades
Finish blades are crosscut blades optimized for fine woodworking and trim work. They run 60 to 80 teeth with thinner kerfs to reduce waste and produce cleaner edges.
The plate is often hardened and stabilized with laser-cut expansion slots or vibration-dampening bodies. These features reduce the screaming sound you hear from cheaper blades and prevent the blade from wandering in the cut.
Finish blades demand a cleaner work environment. Running them into a buried nail will instantly ruin the tips. You need to inspect your material before cutting.
Which one do you actually need
If you are a general contractor or serious DIYer, own both. Use the framing blade for demolition, rough carpentry, and any cut where you are not sure what is hiding in the wood. Switch to the finish blade when you are working on visible surfaces.
If you primarily do one type of work, buy the blade that matches. A trim carpenter does not need a framing blade. A framing crew does not need a finish blade.
The combination blade sits in the middle for those who do not want to choose.
Specialty Blades – Metal, Masonry, and Tile
Standard wood-cutting blades will destroy themselves on anything harder than pine within seconds. That is where specialty blades come in. Each one is engineered for a specific material class, and using them wrong is dangerous.
Metal-cutting blades
These look similar to wood blades but use different carbide grades and tooth geometries. Non-ferrous metal cutting blades handle aluminum, copper, brass, and thin sheet steel. The tooth count runs 40 to 80, with a negative or neutral hook angle to prevent grabbing the metal and feeding uncontrollably.
The key difference is the carbide grade. Metal-cutting blades use a harder, more brittle carbide that holds an edge against abrasive non-ferrous materials. A standard wood blade used on aluminum will load up with metal and overheat in under a minute.
Ferrous metal requires abrasive discs, not toothed blades. A thin cutoff wheel made of resin-bonded aluminum oxide spins at high speed and grinds through steel rebar, angle iron, and pipes. These discs wear down and throw sparks everywhere.
Never use a toothed blade on steel thicker than 16 gauge.
Masonry and tile blades
These are almost always diamond blades or silicon carbide abrasive discs. Diamond blades have small industrial diamond particles embedded in a steel core. They cut through brick, concrete block, pavers, and natural stone by grinding, not cutting.
There are two main types. Continuous rim blades have a smooth edge with no gullets. They cut tile and stone cleanly without chipping the edge.
Segmented blades have slots cut into the rim that allow cooling and dust removal. They cut faster but leave a rougher edge.
Silicon carbide abrasive discs are the budget option for occasional masonry work. They are cheap, disposable, and wear down quickly. A single 4-inch disc might cut through four or five bricks before it is gone.
The critical safety warning
Never use a wood blade on masonry or metal. The carbide tips will shatter. Fragments can embed in your skin or eyes at high velocity.
Use only blades rated for the material and the saw's maximum RPM. Check the ANSI B7.1 safety rating on abrasive discs and confirm your saw's RPM is within the blade's limit.
Tooth Count and Geometry – What Those Numbers Really Mean
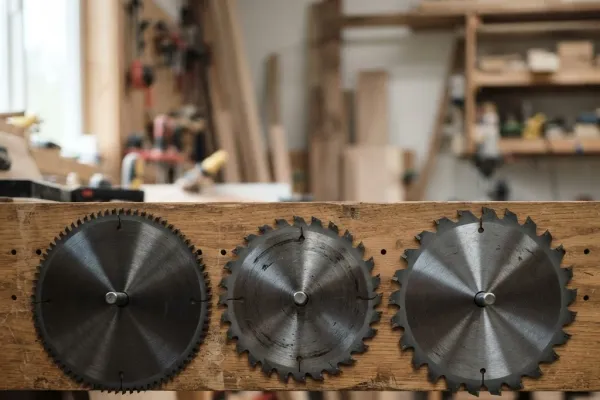
Tooth count is the number everyone looks at first, but geometry matters just as much. Let us decode both.
The tooth count rule of thumb
Lower tooth count means faster, rougher cuts. Higher tooth count means slower, smoother cuts. That is the simple version.
For a 7-1/4-inch blade, here is the breakdown:
| Tooth Count | Best Use | Cut Quality | Speed |
|---|---|---|---|
| 18 to 24 | Ripping, framing | Rough | Fast |
| 24 to 40 | General construction, pressure-treated lumber | Medium | Moderate |
| 40 to 50 | Combination, general DIY | Good | Moderate |
| 60 to 80 | Crosscutting, finish work | Excellent | Slow |
| 80 to 140 | Plywood, melamine, laminates | Superior | Very slow |
The rule shifts slightly for smaller blades. A 6-1/2-inch blade with 24 teeth cuts differently than a 10-inch blade with 24 teeth because the tooth spacing changes with diameter.
Tooth geometry matters more
Four main grind types dominate the market. Understanding them helps you read blade labels like a pro.
ATB (Alternate Top Bevel) is the standard for crosscutting. Teeth alternate between a left bevel and a right bevel. This creates a scoring action that severs wood fibers before the next tooth shears them off.
It produces the cleanest cross-grain finish.
TCG (Triple Chip Grind) has every tooth ground with a flat top and a chamfered corner. The next tooth clears the material. TCG blades handle hard, abrasive materials like laminates, solid surface countertops, and non-ferrous metals.
They resist chipping better than ATB.
FTG (Flat Top Grind) is a ripping tooth. The top is flat and square. It lifts the material like a chisel.
FTG blades cut fast with the grain but tear out badly across the grain.
Combination grind mixes ATB and FTG on the same blade. You get the clean crosscut performance of ATB and the chip clearing of a raker FTG tooth. This is the standard for combination blades.
What the label actually tells you
Most quality blades list both tooth count and grind type on the package. Look for ATB if you do mostly finish work. Look for TCG if you cut laminates or composites.
Look for FTG if you are ripping framing lumber all day.
Thin Kerf vs. Full Kerf – The Trade-Off You Need to Know
Kerf is the width of the cut the blade makes. It sounds minor, but it affects everything from power draw to blade stability.
Thin kerf explained
Thin kerf blades have a plate thickness around 0.055 inches and a kerf width slightly wider than that. They remove less material per cut, which means the saw uses less power to push through the wood.
A thin kerf blade on a 15-amp circular saw will cut faster and put less strain on the motor. If you are running an underpowered saw or cutting thick hardwood, thin kerf is your friend.
The downside is stability. A thinner plate flexes more in the cut. If you feed too fast or hit a knot, the blade can wander and produce a crooked cut.
Thin kerf blades also dull faster because the carbide tips are smaller.
Full kerf explained
Full kerf blades have a plate thickness around 0.098 inches. They remove more material but stay rigid in the cut. The cut stays straight even under aggressive feed rates.
Full kerf blades are standard on most high-quality blades. They produce truer cuts and last longer between sharpenings. The trade-off is that they require more power.
A full kerf ripping blade through thick oak can stall a 12-amp saw.
Which one should you choose
Use thin kerf if you have a smaller saw, cut mostly sheet goods, or work in confined spaces where you cannot muscle the tool. Use full kerf if you have a high-power saw, cut thick hardwoods, or need maximum cut accuracy.
Manufacturer specs confirm that thin kerf blades can reduce power draw by 20 to 30 percent. That is significant for cordless saws where battery life matters. An 18-volt saw running a thin kerf blade will deliver more cuts per charge.
Many pros keep both. They run a thin kerf blade on their cordless saw for speed and battery life, and a full kerf blade on their corded saw for power and stability.
The Real Cost – Budget Blades vs. Premium Buys
You can spend 8 dollars on a blade or 150 dollars. The difference is not just branding. Let us look at what you actually get at each price point.
The budget blade (8 to 20 dollars)
These are typically made from high-speed steel or low-grade carbide. The plate is stamped, not laser-cut. The expansion slots are cosmetic or non-existent.
The carbide tips are small and thin.
A budget blade will cut wood. It will not cut well for long. Expect dulling after 20 to 30 linear feet of hardwood.
Expect vibration and noise. Expect burned edges on every crosscut.
For one-off projects where you are cutting softwood framing, a budget blade works fine. Just plan to replace it after the job.
The mid-range blade (20 to 60 dollars)
This is the sweet spot for most DIYers and serious hobbyists. You get laser-cut plates, proper carbide tips, anti-vibration slots, and non-stick coatings. Brands in this range include Diablo, Freud, and CMT.
A 40-tooth combination blade in this range will handle 80 percent of your cuts competently. It stays sharp through several hundred feet of hardwood. The anti-vibration features make it quiet and smooth.
Mid-range blades offer 80 percent of the performance of premium blades at 40 percent of the cost. For most users, this is the smartest buy.
The premium blade (60 to 150 dollars)
Premium blades like Forrest and high-end Freud Industrial use thicker carbide, tighter tolerances, and proprietary tooth geometries. The plates are ground flat after laser cutting, not just stamped.
A premium blade will stay sharp three to four times longer than a mid-range blade. The cuts are measurably smoother. The blade runs true even after dozens of sharpenings.
Professional cabinet makers and serious woodworkers justify the cost through longevity and cut quality. If you are building furniture for a living, a 120-dollar blade pays for itself in reduced sanding time alone.
For the weekend warrior, premium is overkill. The mid-range blade will serve you well for years if you care for it properly.
Pro Tips on Blade Care and Storage
Your blade will last longer and cut better if you follow a few simple habits. Most people neglect these entirely.
Clean the resin off regularly
Pitch and resin build up on the blade surface over time. This creates friction, which creates heat, which accelerates dulling. A blade with heavy resin buildup will burn wood even if the teeth are still sharp.
Use a commercial blade cleaner or a solution of warm water and degreasing dish soap. Soak the blade for 10 minutes and scrub with a nylon brush. Never use a wire brush on carbide tips.
It chips the cutting edge.
Clean your blade after every heavy use session. At minimum, clean it when you notice it cutting harder or leaving burn marks.
Store blades properly
Carbide tips are brittle. Dropping a blade on a concrete floor can chip the tips. Store blades in the original plastic case or a blade storage folder with individual slots.
Keep blades dry. Humidity causes rust on the steel plate, which creates tight spots that bind in the cut. A light coat of WD-40 or machine oil on the plate prevents rust without affecting cut quality.
Know when to sharpen or replace
Signs it is time: the blade burns wood, cuts slowly, requires more push force, or makes loud vibration noises. You can feel when a blade is tired. Trust that feeling.
A mid-range or premium carbide blade can be resharpened three to six times by a professional sharpening service. Cost is typically 4 to 12 dollars per sharpening. That is cheaper than a new blade and restores most of the original performance.
Budget blades are rarely worth sharpening. The carbide tips are too thin to survive the grinding process. Replace them instead.
Match blade to material
This is the single most important tip. A blade that matches the material and cut type will last longer, cut safer, and produce better results. A blade forced into the wrong application will fail early and dangerously.
If you are cutting pressure-treated lumber, choose a blade with corrosion-resistant coating. The chemicals in treated wood accelerate rust on standard steel plates. If you are cutting reclaimed wood with hidden nails, use a framing blade with thicker carbide that can survive the impact.
Which Blade for Which Material – Quick Reference Guide
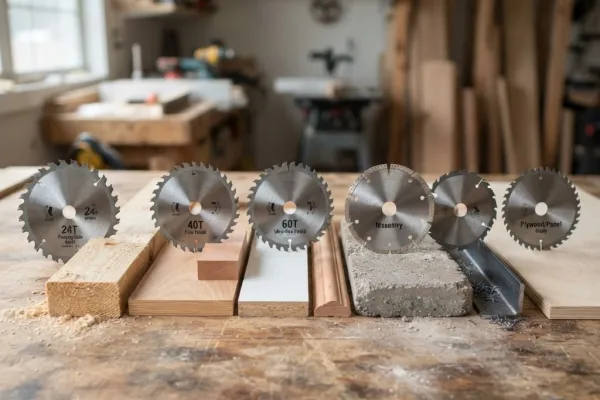
This table saves you the math. Match your material to the recommended blade type and tooth count for a 7-1/4-inch circular saw.
| Material | Best Blade Type | Tooth Count | Notes |
|---|---|---|---|
| Dimensional lumber (2×4, 2×6) | Ripping or framing | 18 to 24 | Rough cuts, fast work |
| Plywood | Crosscut or plywood | 60 to 80 | Look for anti-vibration design |
| Hardwood (oak, maple, walnut) | Crosscut or combination | 40 to 60 | Thin kerf helps with underpowered saws |
| Melamine / laminate | TCG grind | 60 to 80 | Prevents chipping the surface |
| Pressure-treated lumber | Framing with corrosion coating | 24 to 40 | Chemicals rust standard blades |
| Aluminum / non-ferrous metal | Non-ferrous metal blade | 40 to 80 | Negative hook angle prevents grabbing |
| Concrete / brick | Diamond segmented blade | N/A | Use grinder or masonry saw |
| Tile | Diamond continuous rim | N/A | Use grinder or wet saw |
Common Mistakes That Ruin Blades (and Your Projects)
Most blade problems come from five easily avoidable errors. Avoid these and your blades will last dramatically longer.
Forcing the cut. Pushing harder never makes a dull blade cut better. It creates heat, bends the plate, and causes kickback. Let the blade do the work.
A sharp blade cuts with light feed pressure.
Cutting materials the blade was not designed for. Using a wood blade on aluminum or a ripping blade on melamine destroys the carbide tips instantly. Check the blade label before every new material.
Ignoring arbor size. A blade with the wrong arbor hole wobbles on the saw spindle. This produces inaccurate cuts and dangerous vibration. Always match the arbor size to your saw, typically 5/8-inch for North American circular saws.
Skipping blade cleaning. Resin buildup acts like a brake on the blade. It generates friction heat that softens the carbide bond and accelerates dulling. A 10-minute clean after heavy use doubles blade life, per manufacturer maintenance guidelines.
Storing blades loose in a toolbox. Carbide tips chip when they clatter against metal tools. A single chipped tip creates an unbalanced blade that vibrates and cuts poorly. Use the plastic case the blade came in or buy a blade storage folder.
Final Call – How to Pick the Right Blade for Your Saw
You do not need a dozen blades to get started. You need one or two that match the work you actually do.
The one-blade solution
If you own one circular saw and cut a mix of materials, buy a 40-tooth combination blade with ATB grind. It does nothing perfectly, but it does everything well enough to keep you working. This blade handles 80 percent of homeowner cuts.
Keep an eye on your battery or cord management too. A smooth cut depends on consistent power delivery, and that means your gear needs basic care. Taking proper care of your batteries is one of those simple things that makes a real difference in how your tools perform.
The two-blade setup
Add a 24-tooth framing blade for rough work and demolition. Use the combination blade for finish cuts and plywood. This covers 95 percent of residential construction tasks.
The three-blade arsenal
Serious DIYers and pros add a 60-tooth crosscut blade or a dedicated plywood blade. Now you have the right tool for framing, general cutting, and finish work. This setup handles everything except metal and masonry.
Whichever path you choose, match the blade to the material, keep it clean, and replace it when it tells you it is tired. Your saw will run smoother, your cuts will look better, and your projects will come together faster.
Frequently Asked Questions
How do I know what type of circular saw blade to buy?
Check the arbor size first. Most North American circular saws use a 5/8-inch arbor. Then match the blade to your most common material.
A 40-tooth combination blade works for general use. Switch to a 24-tooth framing blade for rough lumber or a 60-tooth crosscut blade for finish work.
Can I use a wood blade to cut metal?
No. Wood blades are not designed for metal. The carbide tips will chip or shatter, sending fragments at high speed.
Use a non-ferrous metal cutting blade for aluminum and an abrasive cutoff wheel for steel. Always check the blade's RPM rating against your saw.
What is the difference between a ripping blade and a crosscut blade?
A ripping blade has 18 to 24 teeth with deep gullets and aggressive hook angles. It cuts fast but leaves a rough finish. A crosscut blade has 60 to 80 teeth with alternate bevel grinds.
It cuts slowly but produces a smooth edge. Never use one for the other's job.
How often should I replace my circular saw blade?
Replace it when it burns the wood, requires extra force to cut, or leaves rough edges. For a mid-range blade used regularly, that is every 6 to 12 months. Budget blades may need replacement after a single project.
Premium blades can last years with proper care and resharpening.
Should I buy a thin kerf or full kerf blade?
Choose thin kerf if you have an underpowered saw or want longer battery life from your cordless tool. The trade-off is less stability in thick hardwoods. Choose full kerf if you have a powerful saw and need straight, accurate cuts in dense material.
