
An organized small workshop boosts productivity, improves safety, extends tool life, and frees up workable surface for better project outcomes. Even a compact garage bench can run like a professional shop when every tool and consumable has a permanent place. This guide gives a step-by-step framework, product ideas, safety rules, and routines so your small workshop stays functional and tidy.
How do you organize a small workshop efficiently?
An efficient small workshop starts with assessing space, decluttering, grouping tools by function, then designing a workflow that places frequently used items closest to the workbench and power. Assign storage zones, favor vertical and mobile storage, install clear labeling, and commit to a simple maintenance routine so organization lasts.
Step-by-step framework
- Assess the available footprint and ceiling height.
- Remove everything and declutter (keep / donate / sell / dispose).
- Group items by task: cutting, finishing, electrical, fasteners.
- Design a linear or U-shaped workflow around your bench.
- Choose storage: pegboard, French cleat, cabinets, rolling tool cart.
- Install lighting, outlets, and dust control.
- Label, outline, and shadow-board key tools.
- Run a 5, 10 minute end-of-day tidy routine.
Practical example: I set up my compact garage as a U-shaped bench around a central mobile work surface. Frequently used hand tools live on pegboard within arm’s reach; power tools sit on an under-bench shelf with battery chargers above. Less-used items go on high shelves or in clear bins.
Why workshop layout matters
A good workshop layout reduces walking, speeds tasks, minimizes tool changes, and prevents hazards by separating wet, chemical, and cutting zones, ultimately improving safety and efficiency when space is tight. Thoughtful layout saves time and keeps the shop cleaner with less effort.
Why it matters
- Productivity: fewer steps between tool, material, and bench.
- Reduced fatigue: better ergonomics and shorter reaches.
- Safety: clear tool paths and designated cutting and finishing areas.
- Space utilization: placing tall storage against walls frees central floor space.
- Easier cleaning: grouping dusty operations near a dust collector simplifies maintenance.
Workflow diagram description
- Entry → Material staging → Cutting/cutting tools → Primary workbench → Finishing/paint area → Storage.
- For a single-bench shop, arrange tools so the most-used items sit within a 180° reach zone. Mark zones on the floor or with tape during planning to visualize traffic flow.
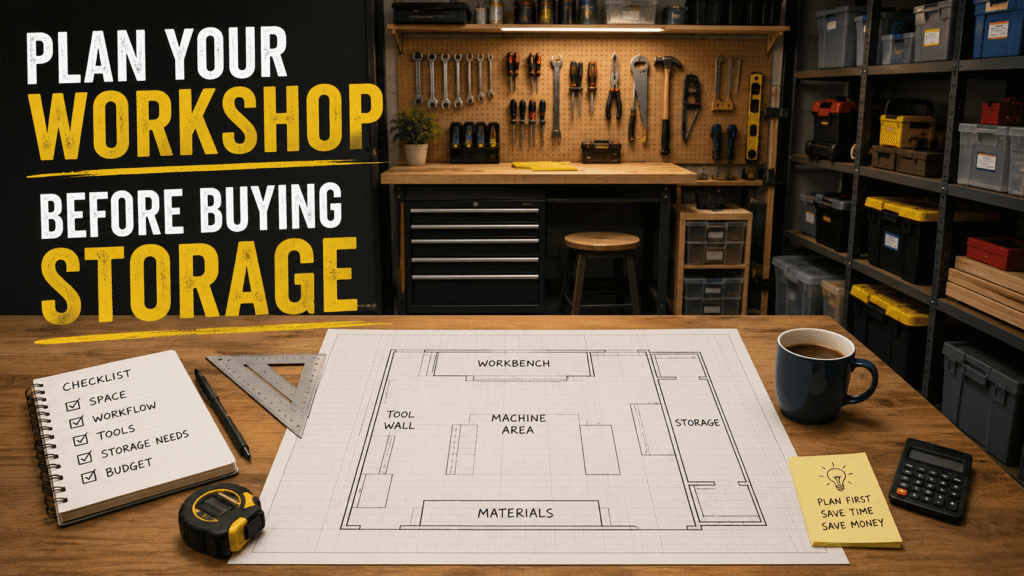
Plan your workshop before buying storage
Measure walls, ceiling height, door swing, and outlet placement, then plan storage to fit those constraints so storage purchases actually solve problems rather than create new ones. Plan everything and buy only what fits your specific footprint, workflow, and electrical needs.
Planning checklist
- Measure floor footprint (length × width).
- Measure wall space and obstruction heights (windows, doors).
- Note ceiling height for overhead racks.
- Count and map electrical outlets and light positions.
- Identify ventilation points for dust and fumes.
- Record typical project types and frequently used tools.
- Sketch a to-scale plan on paper or use a free floorplanner.
Quick planning tips
- Leave 36, 42 inches of aisle space when possible for maneuvering.
- Reserve at least one dedicated circuit for heavy tools if possible.
- Consider folding or flip-up workbenches to recover floor space when idle.
Declutter before organizing
Sort everything into keep, donate, sell, replace, or dispose piles; only organize the keep pile so storage reflects actual needs and not sentimental clutter. Making decisive choices reduces storage demand and surfaces unneeded duplicates.
Decision table
| Condition | Action |
|---|---|
| Tool works and used regularly | Keep |
| Tool works but rarely used in projects you do | Donate or sell |
| Duplicate tool or specialty you don’t use | Sell |
| Broken beyond economical repair | Recycle or dispose |
| Consumables expired or contaminated | Dispose safely |
| Batteries leaking | Dispose per local battery recycling rules |
Decluttering tips
- Use a 12, 18 month rule: if you haven’t used it in 12 months, consider letting it go.
- Photograph specialty items before selling to speed listing.
- Keep a small “maybe” box for one month, if unused, out it goes.
Create dedicated storage zones
Designate zones for hand tools, power tools, fasteners, measuring tools, safety equipment, woodworking, painting, and electrical work so similar tasks and items live together, improving accessibility and reducing clutter. Formalize zones with labels or colored floor tape.
Example zoning layout for a small garage workshop
- Zone A (near bench): Hand tools, common clamps, measuring tools.
- Zone B (under/adjacent bench): Daily-use power tools and batteries.
- Zone C (wall storage): Fasteners, consumables, small hardware bins.
- Zone D (high shelves): Seasonal or large items like sheet goods and spare lumber.
- Zone E (corner): Finishing and paint with small ventilated cabinet.
Practical zoning tips
- Keep flammables in a small metal cabinet away from heat sources.
- Place PPE, first aid, and fire extinguisher near the entrance for quick access.
- Use modular bins within a zone so individual categories are obvious.
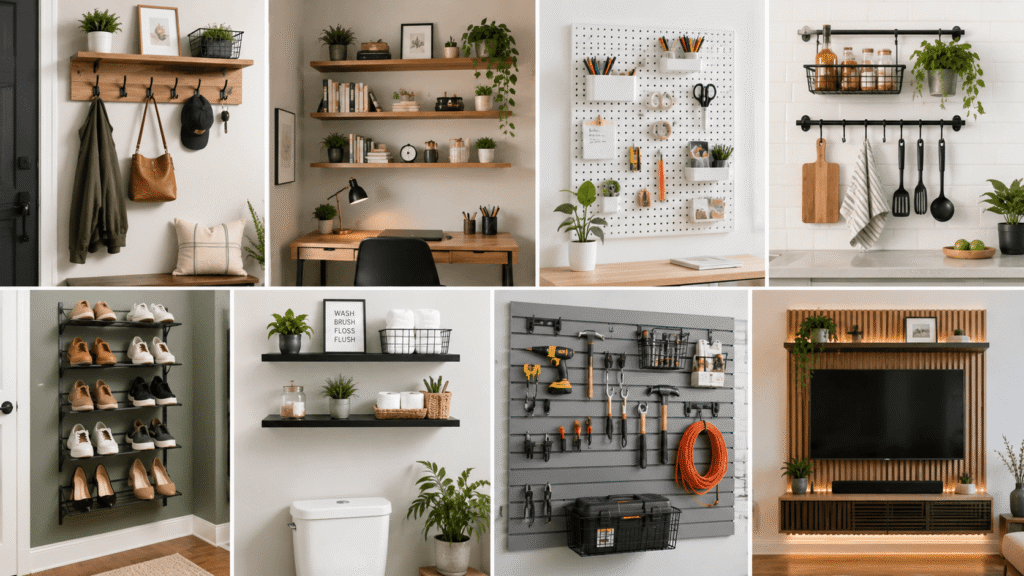
Best wall storage ideas
Use pegboard, French cleats, magnetic strips, wall racks, floating shelves, and hanging baskets to convert wasted wall space into accessible storage that keeps the floor clear and tools visible. Each system has trade-offs in strength, flexibility, and finish.
Advantages and disadvantages
- Pegboard: Highly visible, inexpensive, flexible; weaker for heavy tools unless backed and reinforced.
- French cleat: Extremely strong, reconfigurable, great for heavy power tools; requires wood or metal cleat work.
- Magnetic strips: Quick access for steel hand tools; limited to ferrous items only.
- Wall racks & hooks: Simple and robust for clamps, hoses, and extension cords; less tidy if mismatched.
- Floating shelves: Good for bins and cases; takes wall space and limits vertical hanging space.
- Hanging baskets: Ideal for small consumables and gloves; can look cluttered if not organized.
Installation basics
- Always screw pegboards to studs or use a ¾” plywood backing to distribute load.
- Use a mix: pegboard for hand tools, French cleat for saws and heavy items, magnetic for drill bits and drivers.
Use vertical storage to maximize space
Stackable shelving, tall cabinets, ceiling racks, and fold-down surfaces expand capacity upward so floor area remains usable; vertical thinking multiplies small shop capacity without increasing footprint. Prioritize access and safe mounting.
Examples and strategies
- Tall shelving (metal or plywood): store bins and rarely used gear at top.
- Ceiling racks: store lumber, seasonal items, or lightweight materials; check ceiling joist capacity.
- Hanging organizers: suspend clamps, hoses, and extension cords to free bench space.
- Fold-down work surfaces: wall-mounted drop-leaf benches provide a work area when needed and clear wall when not.
- Stackable clear bins: visible inventory; label each bin.
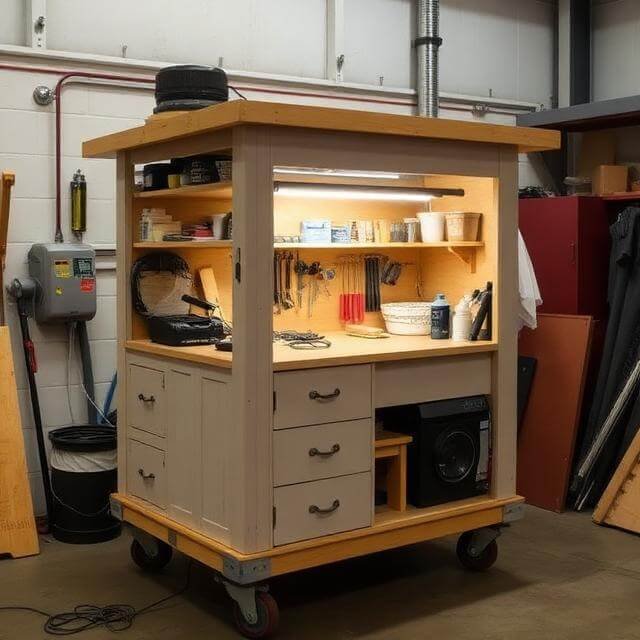
Mobile storage
- Use a rolling tool chest as a movable workstation and storage hub.
- Keep heavy items low for stability and lighter bins high.
Organize your workbench
Place daily-use tools, clamps, and measuring devices near the bench. Use drawers, under-bench storage, and a dedicated charging station to keep the top clear and functional. Routing cables and dedicating areas for clamp storage and vises prevents tool pile-ups.
Workbench organization checklist
- Top: clear, with only the small set of daily-use items, square, tape, pencil, small set of drivers.
- Pegboard or shadow-board behind the bench for immediate reach tools.
- Drawers: drawer organizers and foam cutouts for precision tools and bits.
- Under-bench: rolling cabinet or shelf for bulkier power tools and a shop vacuum.
- Clamp storage: vertical rack on an end wall or under-bench holder.
- Charging station: dedicated shelf with labeled chargers and battery slots.
- Cable routing: use cable clips and a power strip with surge protection affixed underside of bench.
Ergonomics
- Workbench height: 34, 38 inches for general tasks; adjust lower for heavy planing or higher for precision assembly.
- Anti-fatigue mat in front of the bench reduces standing strain.
Smart storage for power tools

Create a charging hub with marked battery slots, store corded tools where cords can be routed neatly, protect blades and bits in dedicated cases, and keep saw accessories shielded. Battery and charger organization reduces downtime and prevents damage.
Power tool storage tactics
- Charging area: label chargers and keep cords tidy; avoid stacking batteries.
- Battery organization: dedicated shelf with labels for tool type and charge state (Full / Empty / Charging).
- Drill and driver storage: hang on hooks with bit holders nearby.
- Saw storage: blade guards or wall-mounted saw holders; store blades in labeled cases or magnetic blade strips.
- Cord management: use cord wraps, hooks, or retractable reels; avoid tangles.
- Mobile power cart: keeps heavy tools on wheels to move to the job site inside the garage.
Safety with batteries
- Store lithium batteries in a cool, dry place away from direct sun or heat sources.
- Keep a small metal box for damaged or swollen batteries and recycle at a proper facility.
Best ways to organize small hardware
Organize screws, nails, bolts, washers, and anchors in clear, labeled containers sorted by size and type so you can find the right fastener in seconds. Use drawer organizers, stackable bins, and multi-compartment boxes with visible lids.
Storage recommendations
- Small parts organizers: multi-drawer plastic cabinets with shallow drawers for screws and small fasteners.
- Stackable clear bins: for anchors and larger hardware, label each bin with size/type.
- Drawer organizers: foam or dividers inside deep drawers to separate sizes and types.
- Magnetic trays: temporary holding for small metal parts while working.
- Spice-rack style jars: repurpose small jars with labeled lids and a rack for visibility.
Labeling and inventory
- Mark container front with item type and common sizes (e.g., 1/4″, 20 x 1” hex bolt).
- Keep a simple index sheet or a photo grid of drawers on the inside of a cabinet door for quick lookup.
Improve workflow using the 5S method
Implement 5S, Sort, Set in Order, Shine, Standardize, Sustain, to systematize organization so it becomes routine rather than a one-off cleanup. 5S reduces search time and enforces safety and consistency in a small workshop.
Practical 5S examples
- Sort: remove unnecessary tools and consumables from the bench.
- Set in Order: shadow-board the most-used tools and keep labels consistent.
- Shine: daily wipe-down and vacuum the bench and floor.
- Standardize: create checklists for tool return, charging, and consumable restocking.
- Sustain: schedule weekly audits and assign simple, repeatable end-of-day tasks.
Implementation steps
- Run a one-day sorting sweep and mark items with red tags for decisions.
- Create labeled storage locations using tape and printed labels.
- Make a simple laminated “bench map” showing tool locations.
- Do a quick five-minute tidy at the end of each workday; track missed items to refine layout.
Workshop safety organization tips
Store PPE, fire extinguishers, first aid kits, and flammable liquids in dedicated, clearly labeled spots. Manage dust, cables, and trip hazards to reduce accident risk, and ensure exits remain clear. Organization and safety go hand in hand.
Safety checklist
- Fire extinguisher at the entrance and near high-risk zones.
- First aid kit easily visible and stocked.
- PPE station with labeled hooks for goggles, gloves, and ear protection.
- Dust collection: connect a shop vacuum or extractor to stationary tools.
- Chemical storage: use a vented metal cabinet for solvents and paints.
- Cable management: reel or hang extension cords off the floor.
- Keep exits clear and lighting functional.
Regulatory reference
- For basic guidelines and workplace safety standards consult OSHA for workshop-relevant recommendations and training resources.
Workshop lighting and visibility
Install layered lighting, bright ambient LEDs plus adjustable task lights at the bench and saws, to reduce shadows and eye strain and to reveal fine details when measuring or finishing. Proper lighting improves accuracy and reduces mistakes.
Lighting recommendations
- Ambient: overhead LED fixtures with 4000, 5000K color temperature for daylight-like visibility.
- Task: adjustable gooseneck or swing-arm lamps at the main bench and secondary stations.
- Shadow reduction: place task lights from multiple angles or use diffused panels.
- Portable: rechargeable LED work lights for inside cabinets or dark corners.
- Switches and placement: put switches near entry and main bench to avoid walking into a dark shop.
Labeling systems that actually work
Combine printed labels, color coding, drawer silhouettes, and QR codes for inventory to make items instantly findable and reorderable. Labels should be durable, consistent, and placed on both container and shelf edges.
Effective labeling options
- Printed thermal labels for shelf/bin fronts, clear, durable, and uniform.
- Color coding: assign colors to zones (e.g., blue for electrical, red for finishing).
- QR inventory: place a QR code on larger bins that links to a simple spreadsheet with contents and quantities.
- Drawer labels and tool outlines (shadow boards) to show missing tools instantly.
- Label placement: front-facing for bins and inside lids for cases.
Common workshop organization mistakes
Buying storage without measuring, keeping broken tools, mixing hardware types, ignoring vertical space, and failing to label make organization fragile and short-lived. Fix these common errors with planning and basic standards.
Common mistakes and quick fixes
- Mistake: buying a big tool chest that blocks access. Fix: measure first and choose slimmer or mobile options.
- Mistake: keeping broken or duplicate tools. Fix: adopt a strict sell/donate/repair policy.
- Mistake: no labeling. Fix: implement a simple printed label system this weekend.
- Mistake: poor lighting. Fix: add LED strips above the bench.
- Mistake: ignoring cable management. Fix: add hooks and reels and tuck cords overhead.
Maintenance routine for staying organized
A practical routine with daily, weekly, monthly, and quarterly tasks prevents slippage and keeps the shop ready for projects. Make the routine short and repeatable so it sticks.
Daily checklist (5, 10 minutes)
- Return tools to their assigned spot.
- Wipe the bench and clear debris.
- Put batteries on charger if low.
- Sweep or vacuum immediate work area.
Weekly checklist (20, 40 minutes)
- Empty and clean dust collector or shop vac filter.
- Check fastener inventory and refill small bins.
- Inspect belts, blades, and critical PPE.
- Confirm lighting and outlet function.
Monthly checklist (1, 2 hours)
- Deep clean benches and tool surfaces.
- Re-evaluate layout for recurring workflow problems.
- Test fire extinguisher pressure and first aid kit contents.
- Sharpen blades and service tools as needed.
Quarterly checklist (2, 4 hours)
- Audit tool inventory and sell unused items.
- Repaint or re-silicone surfaces as required.
- Test and update shelving anchors and mounting hardware.
- Update inventory spreadsheet and QR codes.
Comparison Table
| Storage Solution | Cost | Capacity | Best For | Space Efficiency | Difficulty |
|---|---|---|---|---|---|
| Pegboard | Low | Small–Medium | Hand tools, quick access | High (wall) | Easy |
| Tool Chest (stationary) | High | Medium–Large | Organized tool sets | Medium | Medium |
| Shelving (open) | Low–Medium | Large | Bins, lumber | Medium–High | Easy |
| Cabinets (lockable) | Medium–High | Medium | Chemicals, PPE | Medium | Medium |
| French Cleats | Low–Medium | Medium–Large | Reconfigurable heavy storage | Very High | Medium |
| Magnetic Holders | Low | Small | Steel tools | Very High (wall) | Easy |
| Rolling Cart | Medium | Small–Medium | Mobile work/assembly | Very High | Easy–Medium |
Expert Tips
These 15 practical tips save space, time, and money in a small workshop.
- Start with a one-day purge and don’t buy storage until you measure.
- Build a simple French cleat wall, cheap plywood and a straight router bit makes a flexible system.
- Reserve the bench for assembly and keep cutting and finishing off to the side.
- Use clear stackable bins with labels for consumables so contents are visible.
- Mount a power strip under your bench with individual switched outlets for chargers.
- Create a small “project box” on a shelf to hold all parts for an ongoing job.
- Store lumber vertically with a wall rack to reduce footprint.
- Keep a small magnetic tray in your apron for screws while working.
- Use a rolling cabinet as both storage and a portable work surface.
- Make shadow boards for fast visual checks after a job.
- Attach a small shop vacuum hose port to table saw area for instant dust pickup.
- Label batteries with tool type and purchase date to manage lifespan.
- Re-purpose kitchen spice racks or mason jars for small parts, they’re cheap and clear.
- Keep heavier items low and anchored to avoid tipping risks.
- Run a monthly “what’s missing?” check, if you can’t replace it in a day, consider selling the associated item.
Quick Checklist
✔ Declutter
✔ Group tools by task
✔ Label storage clearly
✔ Install pegboard or French cleats
✔ Add tall shelving and overhead racks
✔ Organize small hardware in clear bins
✔ Improve lighting with LEDs
✔ Store batteries safely and add a charging station
✔ Create a workflow layout and mark zones
✔ Clean and tidy daily
Key Takeaways
- Plan before purchasing storage: measure first.
- Use vertical and mobile storage to multiply usable space.
- Group tools by function and keep daily-use items close to the bench.
- Label and outline storage so missing items are obvious instantly.
- Adopt 5S routines so organization survives projects and time.
- Prioritize safety: dust management, cable control, and proper storage of chemicals and batteries.
FAQ (Optimized for Google People Also Ask)
What is the best layout for a small workshop?
A U-shaped or single-bench layout that minimizes walking and keeps frequently used tools within a 180° reach is ideal. Position the workbench centrally with storage along walls, allocate a cutting zone near dust collection, and leave clear access to exits and electrical outlets.
How do professionals organize their workshops?
Professionals design zones, mount frequently used tools on pegboard or French cleats, use labeled bins for hardware, maintain charging stations for batteries, and run regular 5S-style audits so tools return to defined places and downtime is minimized.
How much space do I need for a workshop?
You can run a functional workshop in a single-car garage corner (about 80, 120 sq ft) if vertical storage and mobile carts are used. For comfortable two-person work or large equipment, consider 200+ sq ft. Base needs on project types and tool sizes.
Should tools be stored vertically?
Yes. Vertical storage saves floor space, keeps items visible, and reduces clutter. Use wall racks, pegboard, French cleats, and ceiling storage for lumber and seasonal items while keeping heavy objects low for safety.
What is the 5S method?
5S stands for Sort, Set in Order, Shine, Standardize, and Sustain. It’s a systematic approach to organizing a workspace so tools and materials are easy to find, areas stay clean, and processes are repeatable, increasing efficiency and safety.
What should be kept near a workbench?
Keep daily-use hand tools, measuring tools, pencils, clamps, a square, a small selection of drivers, and a dust brush nearby. Also keep chargers for batteries and a waste bin within arm’s reach for quick cleanups.
How do I organize screws and bolts?
Sort by type and size into shallow clear drawers or stackable bins; label front-facing and keep a size index. Use small jars with labeled lids or multi-drawer organizers. Keep commonly used sizes in a prime-access zone.
What is the cheapest way to organize a workshop?
Measure and reuse what you have: repurpose cabinets, mason jars, pegboard, and scrap plywood for French cleats. Buy only essential storage after planning and use secondhand tool chests or shelving to cut costs.
Are pegboards better than shelves?
Pegboards are better for small hand tools and visibility; shelves are better for bins, tool cases, and bulk materials. Combining both provides the best of each: pegboard for quick access, shelves for storage capacity.
How often should a workshop be reorganized?
Perform small daily tidy routines, a weekly check, a monthly inventory and maintenance session, and a quarterly layout audit. Reorganize more fully only when workflow changes or new tools require different storage.
For safety rules and workplace standards consult OSHA. For manufacturer guidance on tool-specific care and storage see DeWalt.
Final note
A small workshop can outperform a larger one if it’s planned, zoned, and maintained. Start with measuring and decluttering, then implement vertical and flexible storage, add safe charging and dust control, and bake a short, repeatable maintenance routine into each week. Do that and you’ll spend more time building and less time searching.